crwdns2915892:0crwdne2915892:0
Is your headphone jack not working or possibly damaged? Well you’re in luck, this guide will show you the step-by-step instructions on how to replace your headphone jack.
crwdns2942213:0crwdne2942213:0
-
-
Remove the white sticker covering the screws (if applicable).
-
Use the PH1 screwdriver to remove the four 2 mm screws from the the backside of the device.
-
-
-
Insert the plastic opening tool along the seam of the back case.
-
Gently slide the plastic opening tool along the entire seam popping the clips free.
-
-
-
Carefully lift the back case and remove the smartcard ribbon from the motherboard.
-
-
-
Remove the ten 3mm screws with a PH00 screwdriver from the shield.
-
-
-
Remove the grey docking station port cover.
-
-
-
Gently slide the plastic opening tool along the entire seam popping the clips free.
-
-
-
-
Lift the shield away from the device and remove the fingerprint scanner's ribbon from the motherboard.
-
-
-
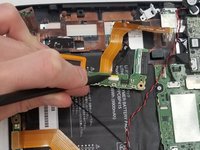
Pull up the cord that connects the battery to the motherboard
-
-
-
Remove seven 1mm screws using a PH00 screwdriver.
-
-
-
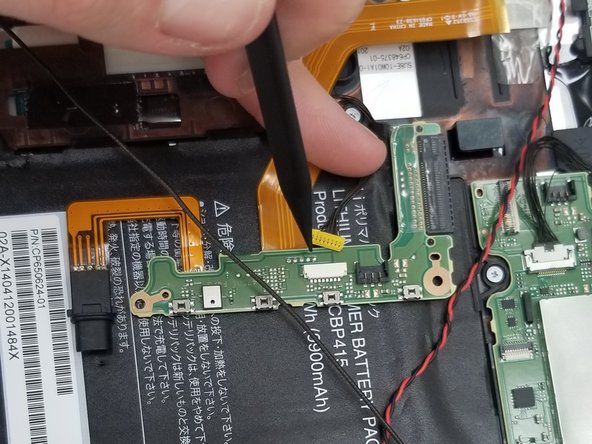
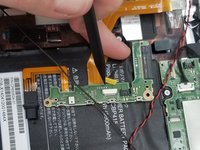
Disconnect upper peripheral ribbons from motherboard.
-
Disconnect left peripheral ribbon from motherboard.
-
-
-
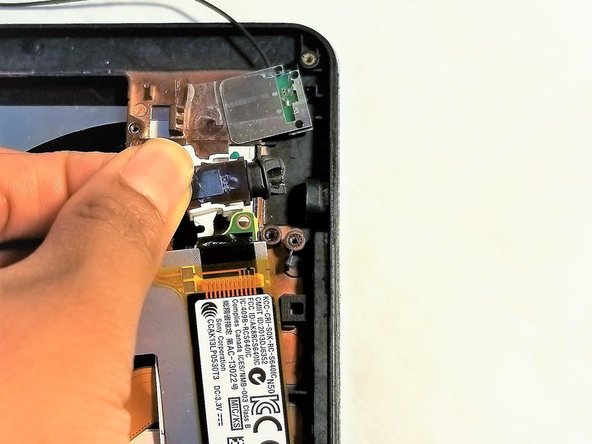
Gently lift the battery from the casing.
-
-
-
Remove the two 0.2 mm screws with a PH00 Screwdriver.
-
-
-
Remove the two 0.2 mm screws with a PH00 screwdriver
-
-
-
Now use an ESD-safe spudger to gently pry up the silver piece and flip it over. Be sure not to remove this piece completely!
-
-
-
Use an ESD-safe spudger to gently push the yellow piece out from the white cradle.
-
-
-
When removing the headphone jack, simply use your fingers to pull out the white and black piece altogether.
-


To reassemble your device, follow these instructions in reverse order.
To reassemble your device, follow these instructions in reverse order.
crwdns2935221:0crwdne2935221:0
crwdns2935227:0crwdne2935227:0
crwdns2915084:0crwdne2915084:0

IUPUI, Team S1-G1, Henning Spring 2019 crwdns2935289:0IUPUI, Team S1-G1, Henning Spring 2019crwdne2935289:0
IUPUI-HENNING-S19S1G1
crwdns2931471:03crwdne2931471:0
crwdns2935297:03crwdne2935297:0