crwdns2931315:0crwdnd2931315:0crwdne2931315:0
crwdns2942213:0crwdne2942213:0
-
crwdns2935201:0crwdne2935201:0 crwdns2935203:0crwdne2935203:0
-
First, push in the lens and remove the two AA batteries.
-
-
crwdns2935201:0crwdne2935201:0 crwdns2935203:0crwdne2935203:0
-
Open the rear compartment and remove the film cartridge.
-
-
crwdns2935201:0crwdne2935201:0 crwdns2935203:0crwdne2935203:0
-
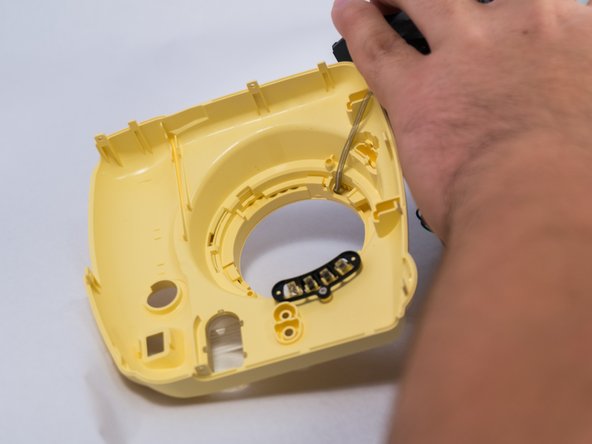
Remove screws from bottom of camera with a small #00 Phillips Screwdriver. Then remove screws around the camera. Additionally, there are two screws in the battery compartment which also need to be removed.
-
-
-
crwdns2935201:0crwdne2935201:0 crwdns2935203:0crwdne2935203:0
-
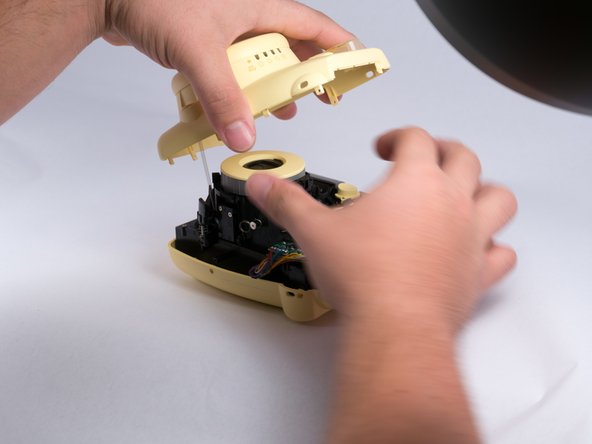
Once all screws are removed, gently pry open the front casing with your hands or plastic opening tools carefully. Do note that there will be a spring that attaches the front casing and the main circuit board, so refrain from allowing excess tension on the spring.
-
-
crwdns2935201:0crwdne2935201:0 crwdns2935203:0crwdne2935203:0
-
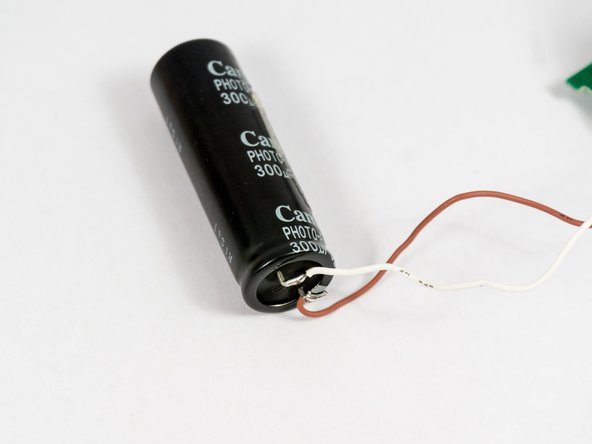
Locate the photo-flash capacitor, then find all the connecting wires to the motherboard and battery compartment. Take notes to which exact wires they are to limit mistakes.
-
-
crwdns2935201:0crwdne2935201:0 crwdns2935203:0crwdne2935203:0
-
Carefully pry out the capacitor with a spudger or plastic opening tools.
-
-
crwdns2935201:0crwdne2935201:0 crwdns2935203:0crwdne2935203:0
-
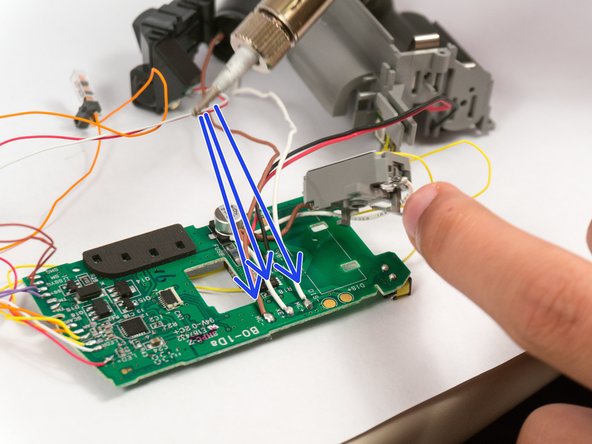
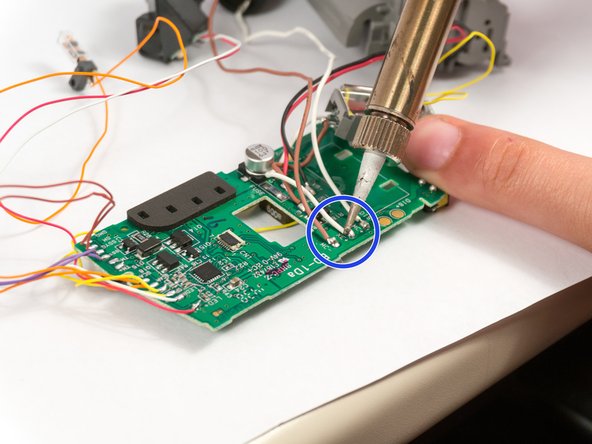
With a solder kit, heat the connecting solder points to open the connection, thus removing the connecting wires. There are many ways to do this, depending on the available tools on hand.
-


crwdns2935221:0crwdne2935221:0
crwdns2935229:04crwdne2935229:0

crwdns2915084:0crwdne2915084:0

USF Tampa, Team 4-1, Meier Fall 2015 crwdns2935289:0USF Tampa, Team 4-1, Meier Fall 2015crwdne2935289:0
USFT-MEIER-F15S4G1
crwdns2931471:04crwdne2931471:0
crwdns2935297:024crwdne2935297:0
crwdns2944067:02crwdne2944067:0
Hi There! I need a new capacitor for my daughter's Fuji Instax Mini 9. Do you supply? I am in South Africa.
Hi, any recommendations on where can find a shop in Kl Malaysia to fix my instax mini 8? Thanks in advance !