crwdns2915892:0crwdne2915892:0
Is the flash not flipping up on your Fujifilm Finepix S1800 camera? It might be time to replace the top cover plate. This guide will show you how to replace the top cover.
crwdns2942213:0crwdne2942213:0
-
-
Unscrew the four 4mm screws on the left-hand side of the camera with the JIS #1 screwdriver.
-
-
-
Unscrew the four 4mm screws on the right-hand side of the camera with the JIS #1 screwdriver.
-
-
-
Unscrew the three 4mm screws on the bottom of the camera with the JIS #1 screwdriver.
-
-
-
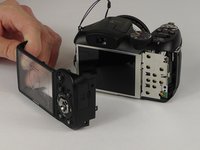
Take the plastic opening tool and place it in the space between the top of the screen and the top of the camera.
-
The cover will pop out.
-
-
-
-
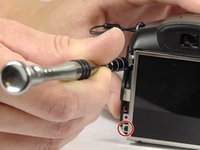
Remove the three 2 mm screws from the back cover plate with the Phillips #000 screwdriver.
-
Gently lift the back cover away from the device.
-
-
-
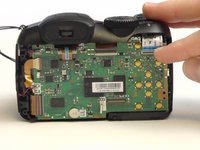
Move the lever to disconnect the ribbon cable from the circuit board.
-
-
-
Lift the flash.
-
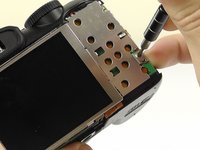
Remove the two 4 mm screws from the top of the camera with the JIS #1 screwdriver.
-
-
-
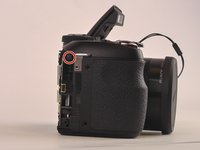
Remove the 4 mm screws from the left and right sides of the camera with the JIS #1 screwdriver.
-
-
-
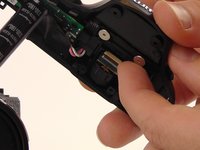
Switch the lever to disconnect the micro strip that connects the top plate.
The second photo is after the top cover is removed. I’m repairing a s1600. The lens is stuck. But this guide and inside looks almost 100% the same as my s1600. Only thing is: i can’t remove the top cover. Removed all the same screws but the only difference is the lcd has no screws. Anyway the only screws I haven’t removed are the once inside the battery case (the 2 extra in the flash, not done here are also removed) Anyway the topcover looks stuck. And i’m going to try a plastic prying tool. The battery screws are very short. Maybe they are the problem but they look like they only hold the spring bumpers for battery. It must be difficult to put these bumpers back. But I must say I did 1. And the bumper is not falling out. So try those 3 screws first and then pry open the top.
-


To reassemble your device, follow these instructions in reverse order.
To reassemble your device, follow these instructions in reverse order.
crwdns2935221:0crwdne2935221:0
crwdns2935227:0crwdne2935227:0
crwdns2915084:0crwdne2915084:0

USF Tampa, Team 8-6, Eyestone Spring 2017 crwdns2935289:0USF Tampa, Team 8-6, Eyestone Spring 2017crwdne2935289:0
USFT-EYESTONE-S17S8G6
crwdns2931471:04crwdne2931471:0
crwdns2935297:010crwdne2935297:0
crwdns2947410:01crwdne2947410:0
I had a problem with my Fuji Fine pix S 2950 (similar case) On / Off switch, this guide was invaluable to help me get into the top case moulding.
The fault was a crack around a solder pad were the SMT switch is mounted on the PCB , a simple solder job but an absolute bugger to get to.
Thank you for this simple and straight forward guide.