crwdns2915892:0crwdne2915892:0
A guide on how to take out the many screws located on the inside, metal cover and how to install an LCD.
crwdns2942213:0crwdne2942213:0
-
-
Remove the screws from the bottom of the camera using the tri-wing screwdriver.
-
Three 5.4 mm tri-head screws.
-
-
-
Remove screws from charger side of camera using the Phillips 00 screwdriver.
-
Two 3.3 mm Phillips #00 screws.
-
-
-
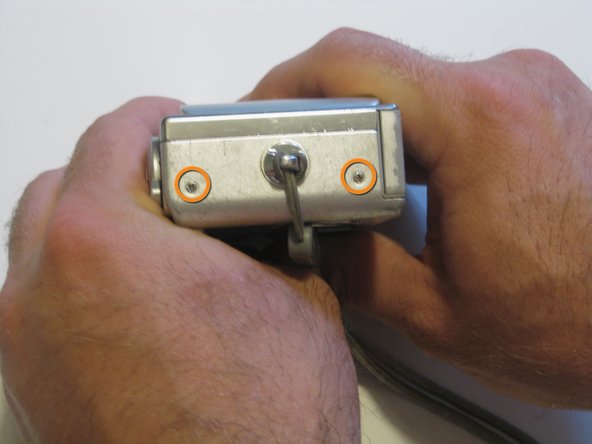
Remove screws from wrist-strap side of camera using the Phillips 00 screwdriver.
-
Two 3.3 mm Phillips #00 screws.
-
-
-
-
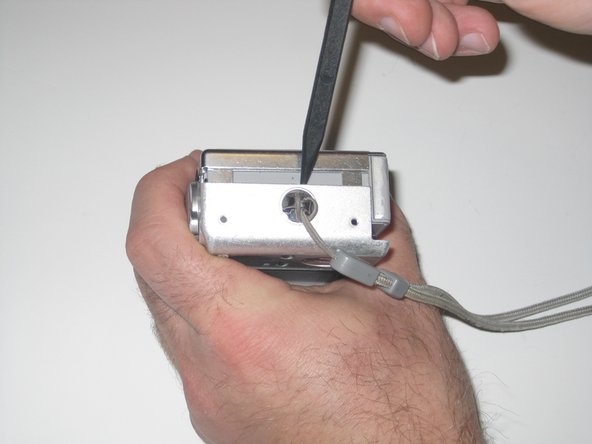
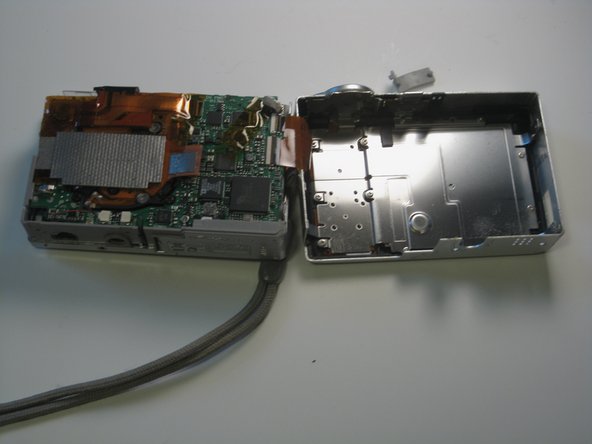
Separate the front and back casing using the spudger.
-
Gently pull apart the two casings.
-
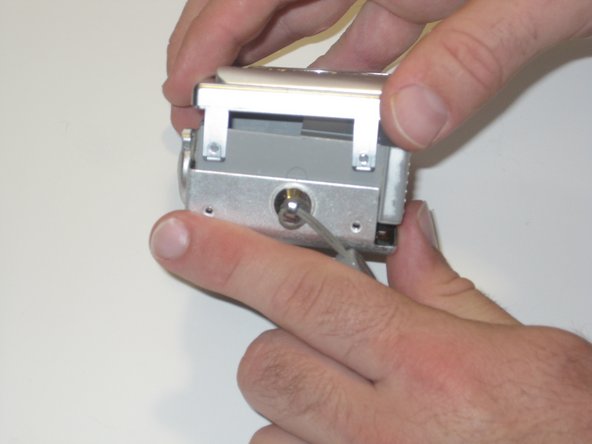
Pull the back casing away from the camera.
-
-
-
Remove screws from the casing covering the LCD using the Phillips 00 screwdriver.
-
Remove the fifteen 2.9 mm Phillips #00 screws.
-
-
-
Gently remove the LCD display data cable by gripping the end that is connected to the motherboard and pulling out.
-


To reassemble your device, follow these instructions in reverse order.
To reassemble your device, follow these instructions in reverse order.
crwdns2935221:0crwdne2935221:0
crwdns2935227:0crwdne2935227:0
crwdns2915084:0crwdne2915084:0

Clemson, Team 13-4, Benson Spring 2013 crwdns2935289:0Clemson, Team 13-4, Benson Spring 2013crwdne2935289:0
CLEM-BENSON-S13S13G4
crwdns2931471:02crwdne2931471:0
crwdns2935297:016crwdne2935297:0
crwdns2944067:03crwdne2944067:0
Great Guide! Worked great to replace my screen!
Awesome guide! BEST WORK I'VE EVER SEEN ON A REPAIR GUIDE
Shutter button replacement was great too!
Daniel -