crwdns2915892:0crwdne2915892:0
Use this guide to replace the lense in the Fujifilm Finepix S4200. This guide requires the use of a Phillips 000 screwdriver and soldering iron. Previous soldering experience is recommended.
crwdns2942213:0crwdne2942213:0
-
-
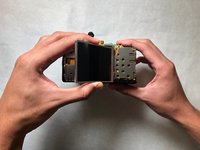
Turn off the camera by pushing the ON/OFF switch as shown.
-
-
-
Using a Phillips #000 screwdriver, remove all of the 4mm screws from the left, right, and bottom of the camera.
-
-
-
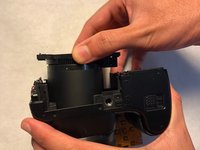
Remove casing part pictured by gently pulling up until casing is fully detached.
-
-
-
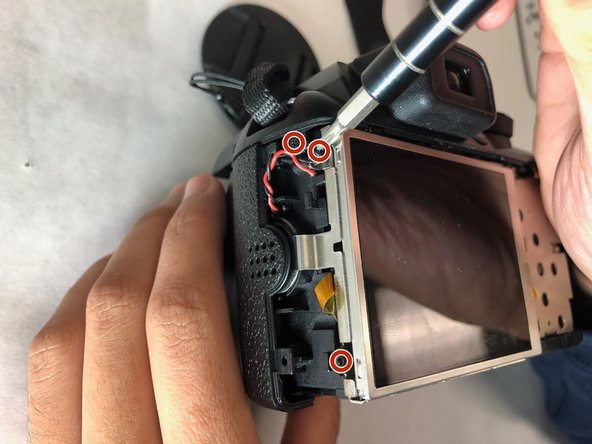
Remove the 4 mm screws on the metal plate. Then remove the 4 mm screws on left side of the camera, and remove the two 4mm screws on right side.
-
-
-
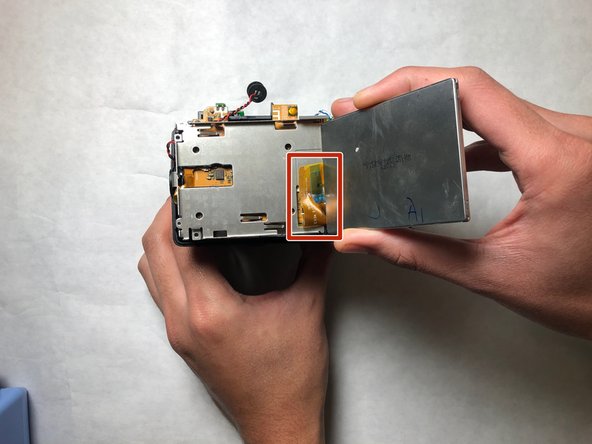
Remove orange ribbon cable by gently pulling on the cable until it is detached from the clamping device on the motherboard.
-
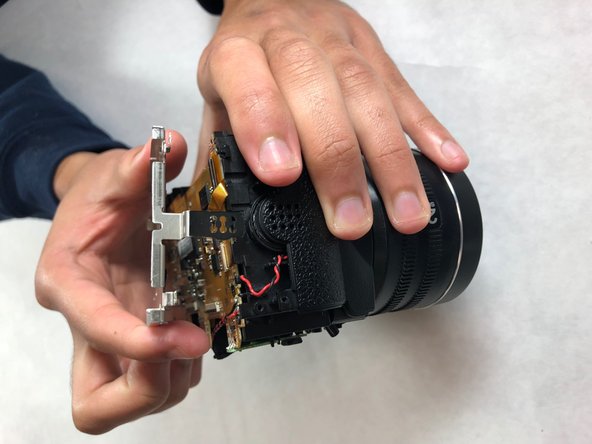
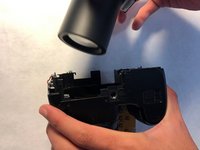
Remove the top casing by pulling upwards.
-
-
-
-
Remove remaining 4mm screw. Detach metal plate by lifting plate upwards.
-
-
-
Remove remaining orange tabs on motherboard by gently pulling on all tab until they are free.
-
-
-
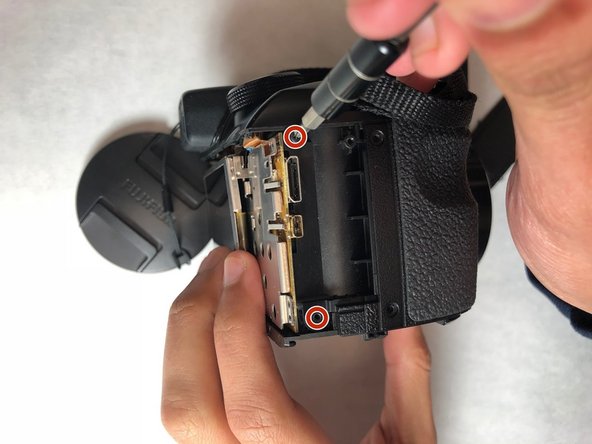
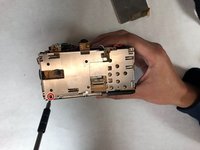
Using the Phillips #000 screwdriver, remove the 4mm screws in the corners of the motherboard.
-
-
-
Use a soldering iron to desolder the five connections shown.
-
-
-
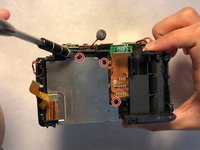
Remove the motherboard. It should be free of all connections at this point and can be lifted with ease.
-
-
-
Using a Phillips #000 screwdriver, remove the 4mm screws around the metal plate.
-
Using a Phillips #000 screwdriver, remove the 10mm screws.
-
-
-
Slowly lift up the metal plate and remove it from the camera.
-
-
-
Using a Phillips #000 screwdriver, remove the 10mm screw.
-
-
-
Change the broken inner lens with a new inner lens.
-
Reassemble the camera.
-


To reassemble your device, follow these instructions in reverse order.
To reassemble your device, follow these instructions in reverse order.
crwdns2915084:0crwdne2915084:0

IUPUI, Team S1-G5, Harley Fall 2018 crwdns2935289:0IUPUI, Team S1-G5, Harley Fall 2018crwdne2935289:0
IUPUI-HARLEY-F18S1G5
crwdns2931471:03crwdne2931471:0
crwdns2935297:04crwdne2935297:0