crwdns2933423:0crwdne2933423:0

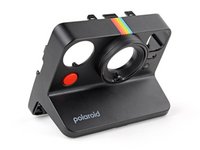
Front Shell Removal

crwdns2862623:0crwdne2862623:0
crwdns2942641:0crwdne2942641:0

crwdns2942213:0crwdne2942213:0

  1. Front Shell Removal, Safety precautions: crwdns2935265:01crwdnd2935265:01crwdnd2935265:02crwdne2935265:0 Front Shell Removal, Safety precautions: crwdns2935265:01crwdnd2935265:02crwdnd2935265:02crwdne2935265:0
    • If you have any film left, take some photos! Then remove the cartridge. Disassembly will expose any leftover film.

    • Before you begin:

    • Unplug and fully power down your camera.

    • Put on the lens cap to avoid scratching your lens during disassembly.

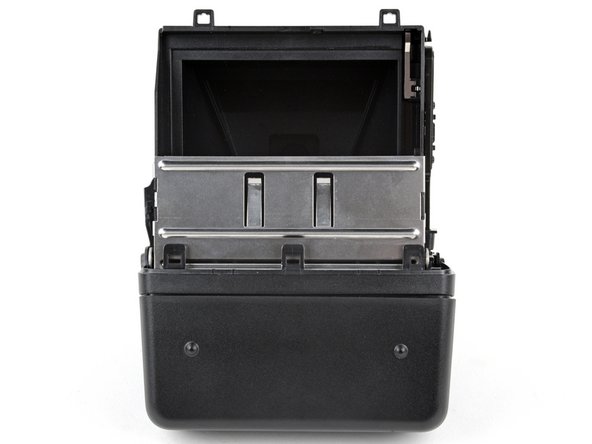
  2. Front Shell Removal, Open the film door: crwdns2935265:02crwdnd2935265:01crwdnd2935265:03crwdne2935265:0 Front Shell Removal, Open the film door: crwdns2935265:02crwdnd2935265:02crwdnd2935265:03crwdne2935265:0 Front Shell Removal, Open the film door: crwdns2935265:02crwdnd2935265:03crwdnd2935265:03crwdne2935265:0
    • Throughout this guide, directional words (front, back, left, right) are from the perspective of using the camera—or when the lens faces away from you.

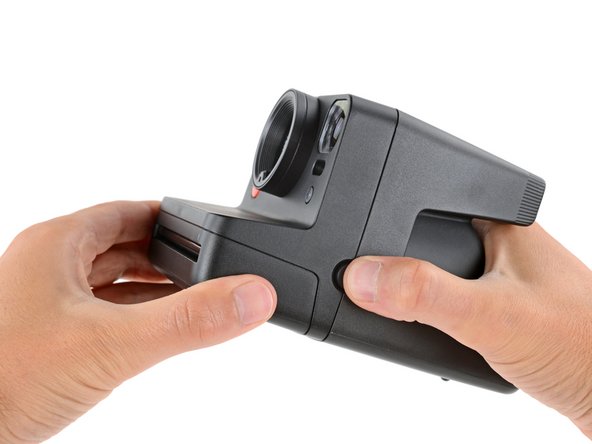
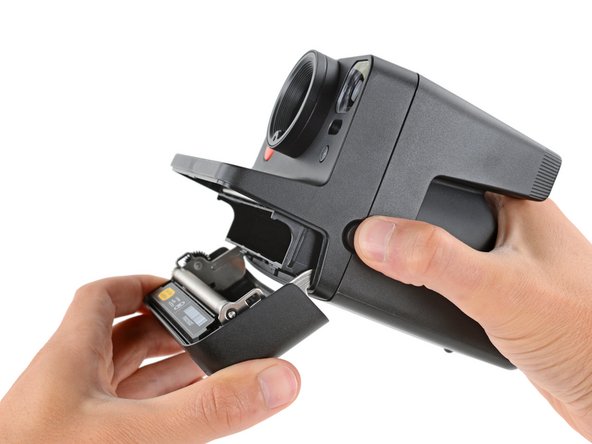
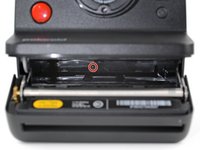
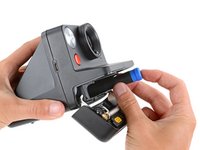
    • Hold down the latch on the left side of the camera and open the film door.

  3. Front Shell Removal, Remove the rear shell screw: crwdns2935265:03crwdnd2935265:01crwdnd2935265:03crwdne2935265:0 Front Shell Removal, Remove the rear shell screw: crwdns2935265:03crwdnd2935265:02crwdnd2935265:03crwdne2935265:0 Front Shell Removal, Remove the rear shell screw: crwdns2935265:03crwdnd2935265:03crwdnd2935265:03crwdne2935265:0
    crwdns2935267:0crwdne2935267:0
    Magnetic Project Mat
    $19.95
    • Throughout this repair, keep track of each screw and make sure it goes back exactly where it came from.

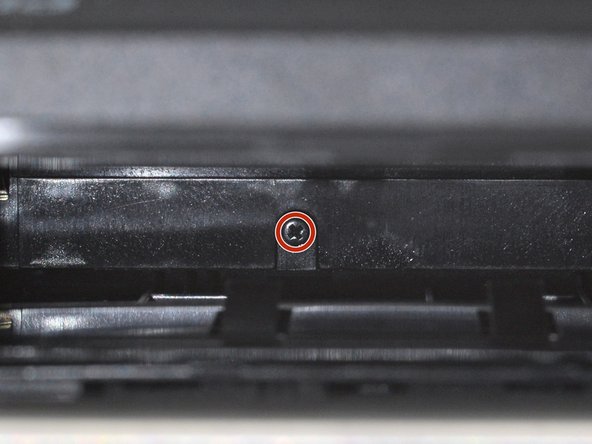
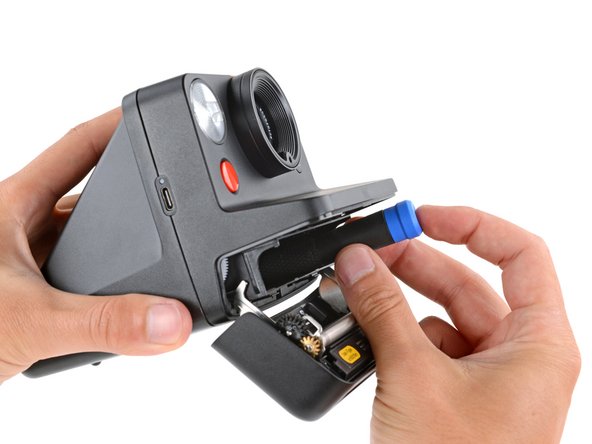
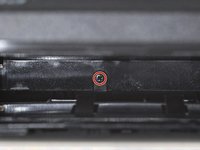
    • Use a Phillips screwdriver to remove the 5.9 mm‑long screw securing the rear shell.

    • The screw is hidden inside the camera on the back edge—you may need to use a flashlight to see it, as well as a skinny, long‑shank screwdriver to reach it.

    • Be careful when removing your screwdriver, as the screw can easily fall inside the camera. If it does, hold the camera above your work surface and gently shake it so the screw falls out.

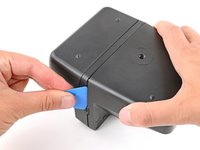
  4. Front Shell Removal, Release the rear shell clips: crwdns2935265:04crwdnd2935265:01crwdnd2935265:03crwdne2935265:0 Front Shell Removal, Release the rear shell clips: crwdns2935265:04crwdnd2935265:02crwdnd2935265:03crwdne2935265:0 Front Shell Removal, Release the rear shell clips: crwdns2935265:04crwdnd2935265:03crwdnd2935265:03crwdne2935265:0
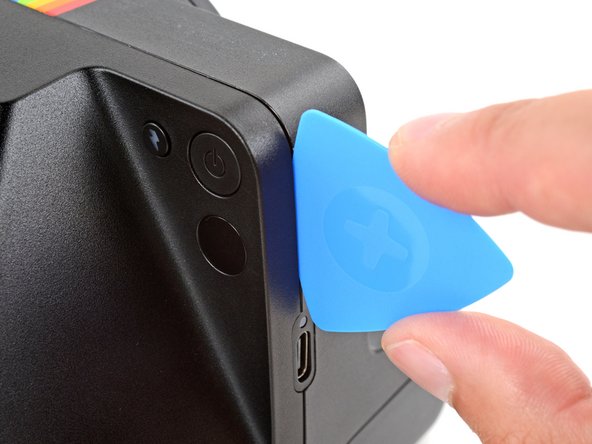
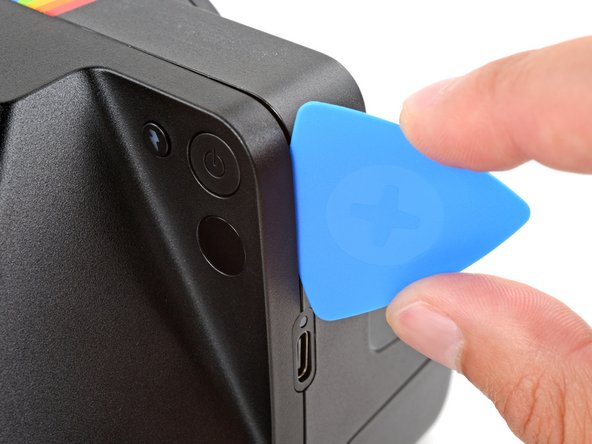
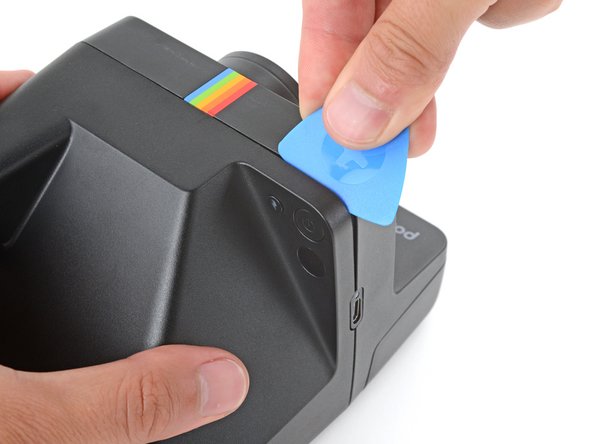
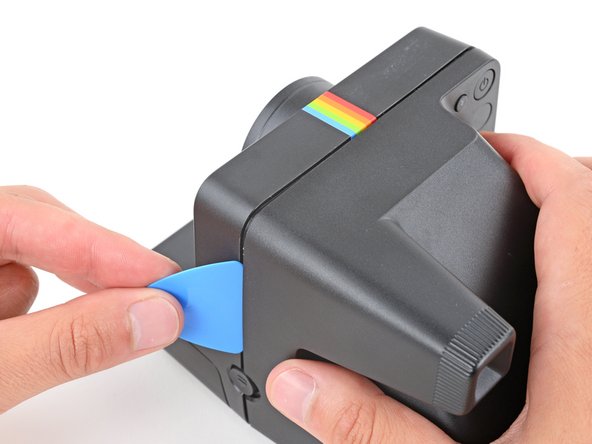
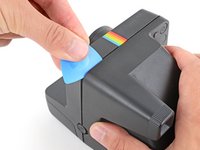
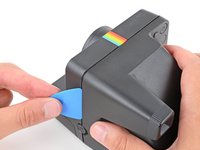
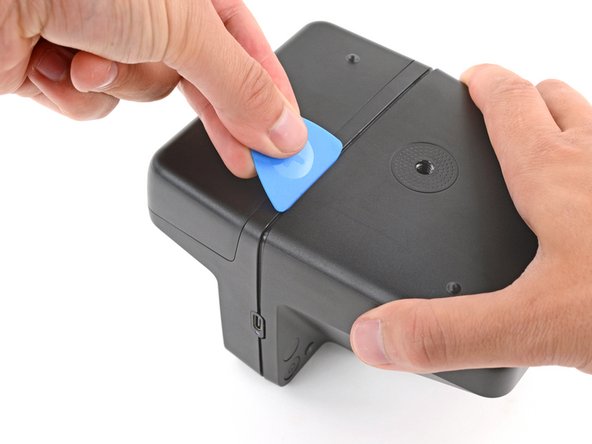
    • Insert the flat edge of an opening pick in the seam between the front and rear shells, just above the USB‑C port on the right edge.

    • Use your pick to pry the rear shell away from the front shell.

    • Keep the inserted edge of the pick pointed toward the rear shell when separating it. This helps release the tight plastic clips holding them together.

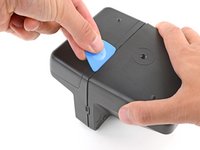
  5. Front Shell Removal: crwdns2935265:05crwdnd2935265:01crwdnd2935265:03crwdne2935265:0 Front Shell Removal: crwdns2935265:05crwdnd2935265:02crwdnd2935265:03crwdne2935265:0 Front Shell Removal: crwdns2935265:05crwdnd2935265:03crwdnd2935265:03crwdne2935265:0
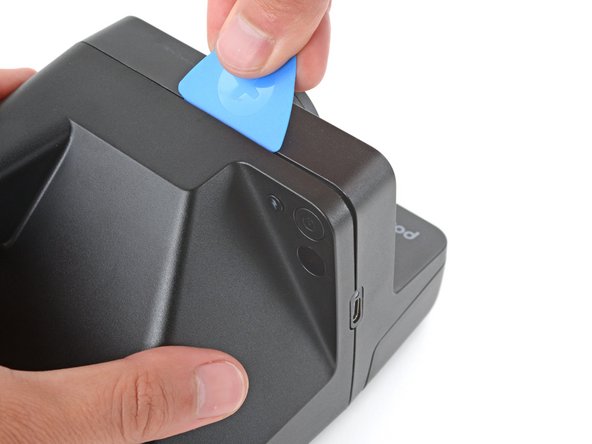
    • You should feel and hear distinct "clicks" as the clips release. If you don't, try again—it may take multiple attempts.

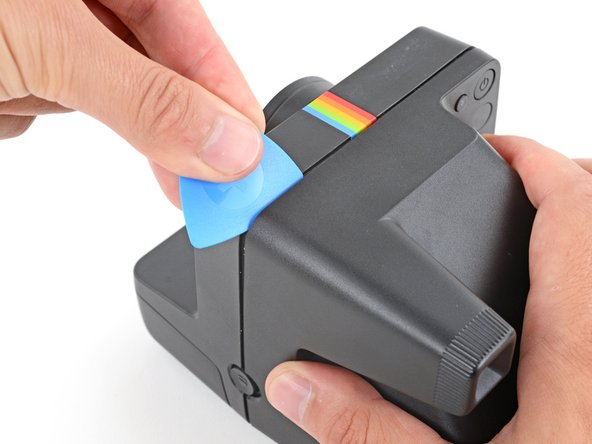
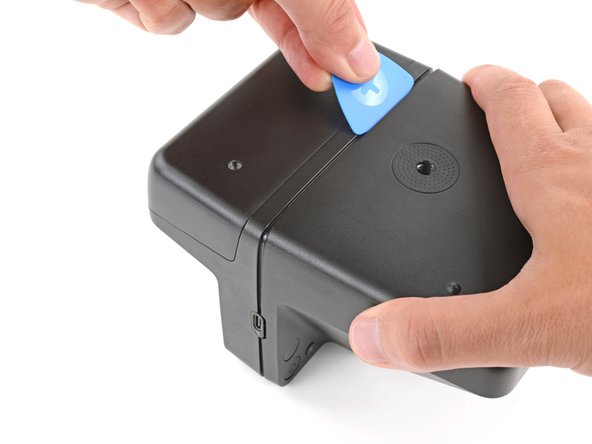
    • Slide your pick around the top right corner and along the top edge to release the clips.

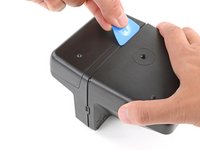
  6. Front Shell Removal: crwdns2935265:06crwdnd2935265:01crwdnd2935265:03crwdne2935265:0 Front Shell Removal: crwdns2935265:06crwdnd2935265:02crwdnd2935265:03crwdne2935265:0 Front Shell Removal: crwdns2935265:06crwdnd2935265:03crwdnd2935265:03crwdne2935265:0
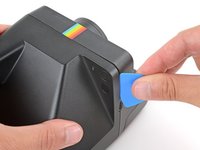
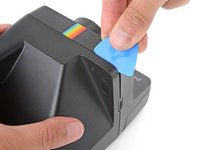
    • Continue sliding your pick along the top edge, around the top left corner, and down the left edge to release the clips. Stop when you get to the film door latch.

  7. Front Shell Removal: crwdns2935265:07crwdnd2935265:01crwdnd2935265:01crwdne2935265:0
    • Gently flip the camera over, making sure none of the clips re‑engage.

  8. Front Shell Removal: crwdns2935265:08crwdnd2935265:01crwdnd2935265:03crwdne2935265:0 Front Shell Removal: crwdns2935265:08crwdnd2935265:02crwdnd2935265:03crwdne2935265:0 Front Shell Removal: crwdns2935265:08crwdnd2935265:03crwdnd2935265:03crwdne2935265:0
    • Remember to keep the inserted edge of the pick pointed towards the rear shell.

    • Insert your opening pick in the seam near the USB‑C port and slide it around the corner and along the bottom edge to release the remaining clips.

  9. Front Shell Removal, Camera mirror warning: crwdns2935265:09crwdnd2935265:01crwdnd2935265:02crwdne2935265:0 Front Shell Removal, Camera mirror warning: crwdns2935265:09crwdnd2935265:02crwdnd2935265:02crwdne2935265:0
    • Removing the rear shell in the next step exposes the camera mirror. Be careful not to smudge it or get any debris on it. If you accidentally do, use a lint‑free cloth to gently wipe the mirror clean.

  10. Front Shell Removal, Remove the rear shell: crwdns2935265:010crwdnd2935265:01crwdnd2935265:02crwdne2935265:0 Front Shell Removal, Remove the rear shell: crwdns2935265:010crwdnd2935265:02crwdnd2935265:02crwdne2935265:0
    • Gently pull the rear shell off the main body of the camera.

    • The shell should slide off easily. If it doesn't, check to see if any clips re‑engaged and use your opening pick to release them.

    • During reassembly:

    • Press the shell firmly onto the main body so all the clips engage.

    • You should feel and hear distinct "clicks" as the clips engage.

    • Check around the shell seam and make sure there are no gaps. If there are, firmly press the shells together to engage the clip near the gap.

  11. Front Shell Removal, Capacitor warning: crwdns2935265:011crwdnd2935265:01crwdnd2935265:02crwdne2935265:0 Front Shell Removal, Capacitor warning: crwdns2935265:011crwdnd2935265:02crwdnd2935265:02crwdne2935265:0
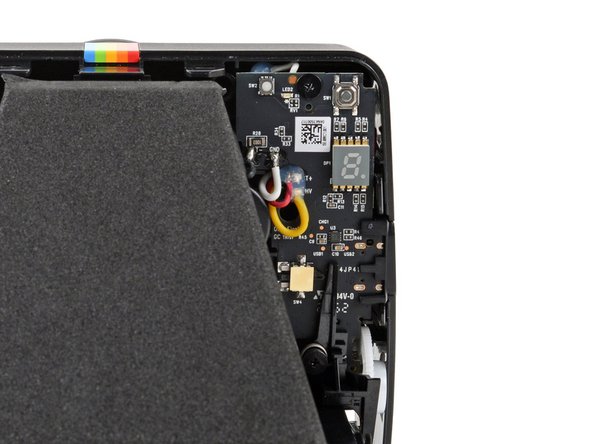
    • The capacitor in your camera holds an electrical charge and can deliver a potentially dangerous electric shock if you touch the boards incorrectly.

    • To minimize risk, avoid touching the boards, wires, and other exposed components with your fingers or metal tools. Consider wearing rubber gloves if working near the board.

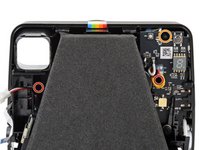
  12. Front Shell Removal, Reposition the battery tape: crwdns2935265:012crwdnd2935265:01crwdnd2935265:03crwdne2935265:0 Front Shell Removal, Reposition the battery tape: crwdns2935265:012crwdnd2935265:02crwdnd2935265:03crwdne2935265:0 Front Shell Removal, Reposition the battery tape: crwdns2935265:012crwdnd2935265:03crwdnd2935265:03crwdne2935265:0
    • Use your fingers to remove the piece of tape securing the battery and its cables (just below the viewfinder).

    • Put the piece of tape aside—you'll use it during reassembly.

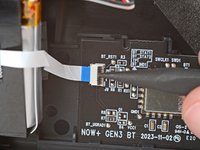
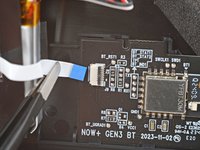
  13. Front Shell Removal, Disconnect the sub‑board cable: crwdns2935265:013crwdnd2935265:01crwdnd2935265:03crwdne2935265:0 Front Shell Removal, Disconnect the sub‑board cable: crwdns2935265:013crwdnd2935265:02crwdnd2935265:03crwdne2935265:0 Front Shell Removal, Disconnect the sub‑board cable: crwdns2935265:013crwdnd2935265:03crwdnd2935265:03crwdne2935265:0
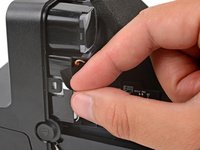
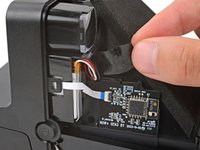
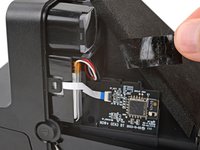
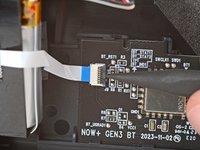
    • Disconnecting the sub‑board cable makes battery removal easier and prevents accidentally damaging the cable or its delicate connector.

    • Use a spudger to flip up the hinged locking flap on the sub board ZIF connector.

    • Use a pair of tweezers or your fingers to gently pull the cable straight out of its socket.

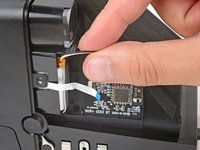
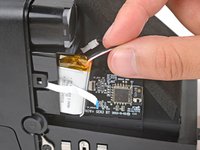
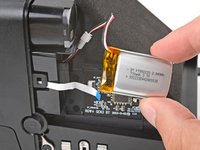
  14. Front Shell Removal, Reposition the battery: crwdns2935265:014crwdnd2935265:01crwdnd2935265:03crwdne2935265:0 Front Shell Removal, Reposition the battery: crwdns2935265:014crwdnd2935265:02crwdnd2935265:03crwdne2935265:0 Front Shell Removal, Reposition the battery: crwdns2935265:014crwdnd2935265:03crwdnd2935265:03crwdne2935265:0
    • Gently slide the battery out of its plastic housing.

    • Don't try to fully remove the battery yet, as it's still connected by a delicate cable.

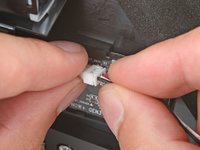
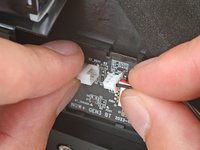
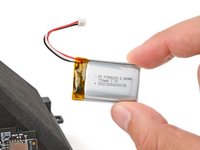
  15. Front Shell Removal, Remove the battery: crwdns2935265:015crwdnd2935265:01crwdnd2935265:03crwdne2935265:0 Front Shell Removal, Remove the battery: crwdns2935265:015crwdnd2935265:02crwdnd2935265:03crwdne2935265:0 Front Shell Removal, Remove the battery: crwdns2935265:015crwdnd2935265:03crwdnd2935265:03crwdne2935265:0
    • Firmly grip the larger end of the plastic battery connector with one hand and the battery's cable in the other—grip the battery cable as close to the connector as possible.

    • Pull the battery cable straight away from the connector to disconnect it.

    • Be very careful not to strain the cables.

    • Remove the battery.

  16. Front Shell Removal, Flip your camera over: crwdns2935265:016crwdnd2935265:01crwdnd2935265:01crwdne2935265:0
    • Flip your camera over so the bottom is facing up.

  17. Front Shell Removal, Remove the film door screws: crwdns2935265:017crwdnd2935265:01crwdnd2935265:02crwdne2935265:0 Front Shell Removal, Remove the film door screws: crwdns2935265:017crwdnd2935265:02crwdnd2935265:02crwdne2935265:0
    • Use a Phillips screwdriver to remove the two 3 mm‑long film door hinge screws (one on either side of the camera).

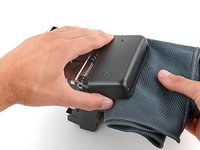
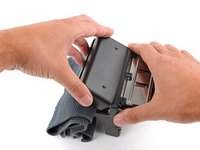
  18. Front Shell Removal, Insert a clean cloth: crwdns2935265:018crwdnd2935265:01crwdnd2935265:03crwdne2935265:0 Front Shell Removal, Insert a clean cloth: crwdns2935265:018crwdnd2935265:02crwdnd2935265:03crwdne2935265:0 Front Shell Removal, Insert a clean cloth: crwdns2935265:018crwdnd2935265:03crwdnd2935265:03crwdne2935265:0
    • Open the film door and place a clean cloth in the compartment.

    • This prevents the door from re‑securing while detaching the hinges.

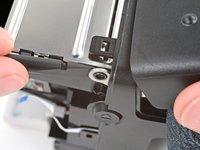
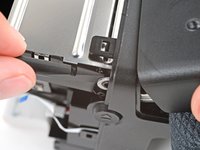
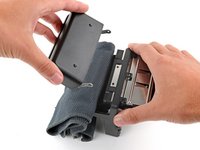
  19. Front Shell Removal, Detach the film door: crwdns2935265:019crwdnd2935265:01crwdnd2935265:03crwdne2935265:0 Front Shell Removal, Detach the film door: crwdns2935265:019crwdnd2935265:02crwdnd2935265:03crwdne2935265:0 Front Shell Removal, Detach the film door: crwdns2935265:019crwdnd2935265:03crwdnd2935265:03crwdne2935265:0
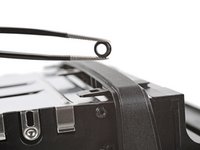
    • The small, plastic grommets inside the film door hinges can easily fall off during this step. Don't lose them—you'll need them for reassembly.

    • Use the flat end of a spudger to push one of the film door hinges away from the camera and off its post.

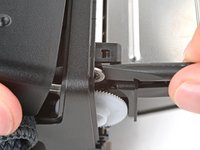
    • Repeat the process to detach the other hinge.

    • Hold the film door steady so the already detached hinge doesn't slide back into place.

  20. Front Shell Removal: crwdns2935265:020crwdnd2935265:01crwdnd2935265:03crwdne2935265:0 Front Shell Removal: crwdns2935265:020crwdnd2935265:02crwdnd2935265:03crwdne2935265:0 Front Shell Removal: crwdns2935265:020crwdnd2935265:03crwdnd2935265:03crwdne2935265:0
    • Check to see if either of the small, plastic hinge grommets stayed on their posts.

    • If they did, remove them and set them aside.

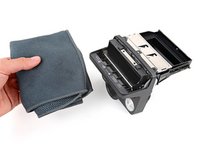
  21. Front Shell Removal, Remove the film door: crwdns2935265:021crwdnd2935265:01crwdnd2935265:03crwdne2935265:0 Front Shell Removal, Remove the film door: crwdns2935265:021crwdnd2935265:02crwdnd2935265:03crwdne2935265:0 Front Shell Removal, Remove the film door: crwdns2935265:021crwdnd2935265:03crwdnd2935265:03crwdne2935265:0
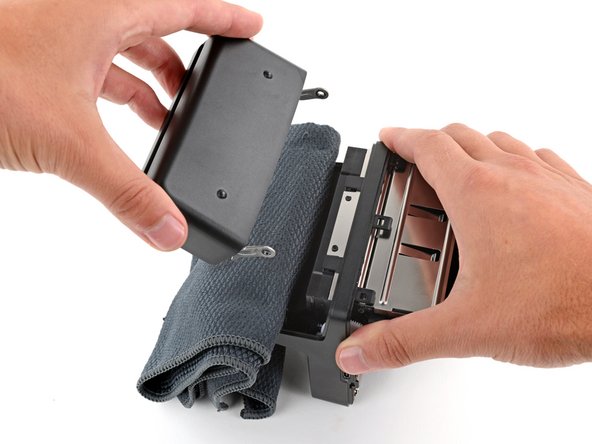
    • Lift the film door and remove it.

    • At this point, you can remove the cloth from the film door compartment.

    • During reassembly:

    • Make sure there are grommets installed in the film door hinges. To install them, press the grommets into the film door hinges, with the wide end facing in.

    • Hook one of the hinges on its post and then push the other one into place until it snaps over its post.

  22. Front Shell Removal, Flip your camera over: crwdns2935265:022crwdnd2935265:01crwdnd2935265:01crwdne2935265:0
    • Flip the camera over and position it so the lens is facing away from you.

  23. Front Shell Removal, Remove the front shell screws: crwdns2935265:023crwdnd2935265:01crwdnd2935265:03crwdne2935265:0 Front Shell Removal, Remove the front shell screws: crwdns2935265:023crwdnd2935265:02crwdnd2935265:03crwdne2935265:0 Front Shell Removal, Remove the front shell screws: crwdns2935265:023crwdnd2935265:03crwdnd2935265:03crwdne2935265:0
    crwdns2935267:0crwdne2935267:0
    Phillips #00 Screwdriver
    $5.49
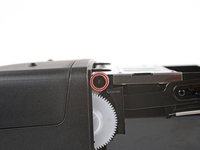
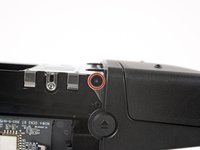
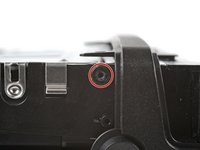
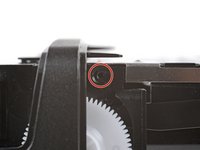
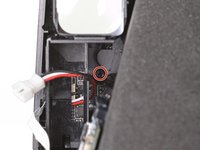
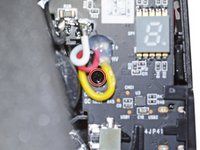
    • Use a Phillips screwdriver to remove the three screws securing the front shell:

    • Two 5.9 mm‑long screws hidden in recesses on the left and right sides (one near the battery recess and one with a cutout in the main board)

    • You may need a flashlight to see the screws, as well as a skinny, long‑shank screwdriver to reach the one with a cutout in the main board.

    • One 5.4 mm‑long screw on the top edge of the main board

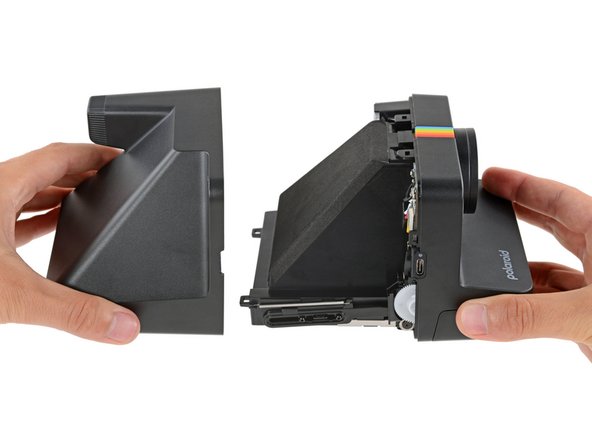
  24. Front Shell Removal, Remove the front shell: crwdns2935265:024crwdnd2935265:01crwdnd2935265:03crwdne2935265:0 Front Shell Removal, Remove the front shell: crwdns2935265:024crwdnd2935265:02crwdnd2935265:03crwdne2935265:0 Front Shell Removal, Remove the front shell: crwdns2935265:024crwdnd2935265:03crwdnd2935265:03crwdne2935265:0
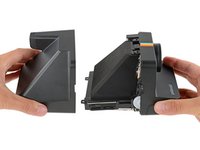
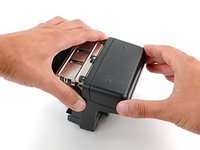
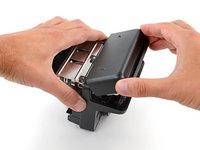
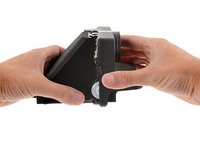
    • Plastic clips loosely secure the top and bottom edges of the front shell.

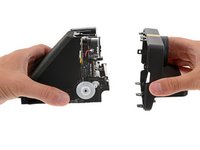
    • With the right side of the camera facing up, hold the main body of your camera in one hand and the front shell in the other.

    • Holding the camera with the right side up helps prevent the white plastic gear from falling out when removing the shell.

    • Gently squeeze the sides of the front shell to release the clips and pull the shell off the main body of the camera.

crwdns2935217:0crwdne2935217:0

Spencer Day

crwdns2935283:009/14/22crwdne2935283:0

104,231 crwdns2915208:0crwdne2915208:0

crwdns2935297:0740crwdne2935297:0

crwdns2915084:0crwdne2915084:0

iFixit crwdns2935289:0iFixitcrwdne2935289:0

Staff

crwdns2931471:0121crwdne2931471:0

crwdns2935297:019,763crwdne2935297:0

crwdns2947412:00crwdne2947412:0

crwdns2917038:0crwdne2917038:0

crwdns2936625:0crwdne2936625:0:

crwdns2936751:024crwdne2936751:0 0

crwdns2936753:07crwdne2936753:0 2

crwdns2936753:030crwdne2936753:0 2

crwdns2942667:0crwdne2942667:0 27