crwdns2933423:0crwdne2933423:0

Free Wheelchair Mission GEN 2 Assembly

crwdns2942213:0crwdne2942213:0

  1. Free Wheelchair Mission GEN 2 Assembly, Free Wheelchair Mission GEN 2 Assembly: crwdns2935265:01crwdnd2935265:01crwdnd2935265:03crwdne2935265:0 Free Wheelchair Mission GEN 2 Assembly, Free Wheelchair Mission GEN 2 Assembly: crwdns2935265:01crwdnd2935265:02crwdnd2935265:03crwdne2935265:0 Free Wheelchair Mission GEN 2 Assembly, Free Wheelchair Mission GEN 2 Assembly: crwdns2935265:01crwdnd2935265:03crwdnd2935265:03crwdne2935265:0
    • Align the crossbar (with the hole in the center) with the screw holes on the bottom of one frame piece.

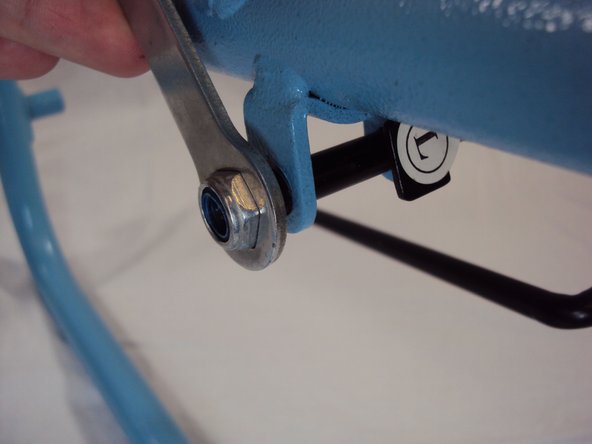
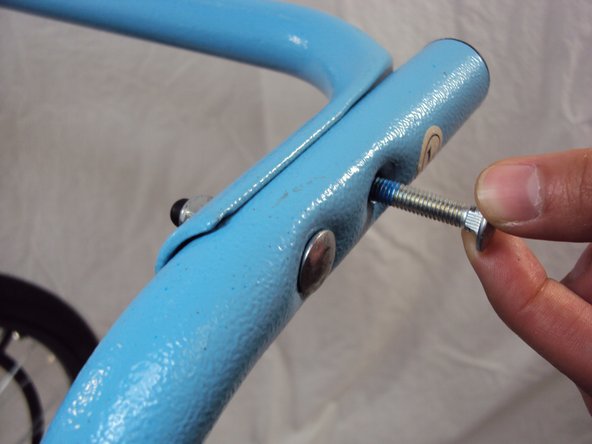
    • Attach the crossbar to the left frame piece with two [2] frame nuts and bolts.

    • Repeat on the opposite frame piece.

  2. Free Wheelchair Mission GEN 2 Assembly: crwdns2935265:02crwdnd2935265:01crwdnd2935265:03crwdne2935265:0 Free Wheelchair Mission GEN 2 Assembly: crwdns2935265:02crwdnd2935265:02crwdnd2935265:03crwdne2935265:0 Free Wheelchair Mission GEN 2 Assembly: crwdns2935265:02crwdnd2935265:03crwdnd2935265:03crwdne2935265:0
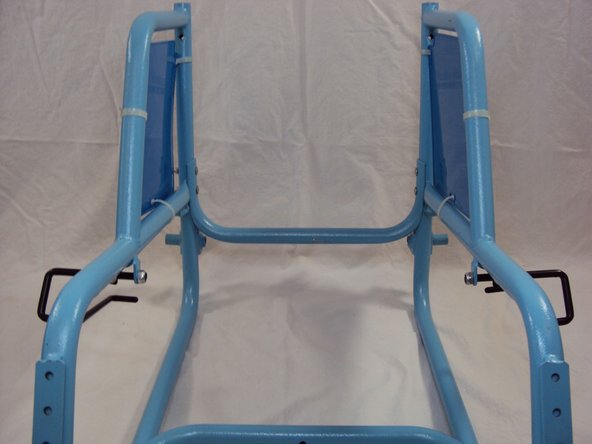
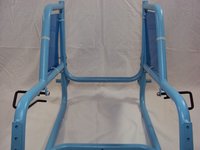
    • Align the second crossbar with the holes on the back of the frame.

    • This crossbar has two square holes on either side.

    • Attach the crossbar to the frame using four [4] frame nuts and bolts.

  3. Free Wheelchair Mission GEN 2 Assembly: crwdns2935265:03crwdnd2935265:01crwdnd2935265:03crwdne2935265:0 Free Wheelchair Mission GEN 2 Assembly: crwdns2935265:03crwdnd2935265:02crwdnd2935265:03crwdne2935265:0 Free Wheelchair Mission GEN 2 Assembly: crwdns2935265:03crwdnd2935265:03crwdnd2935265:03crwdne2935265:0
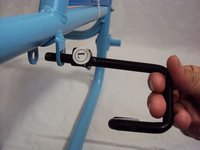
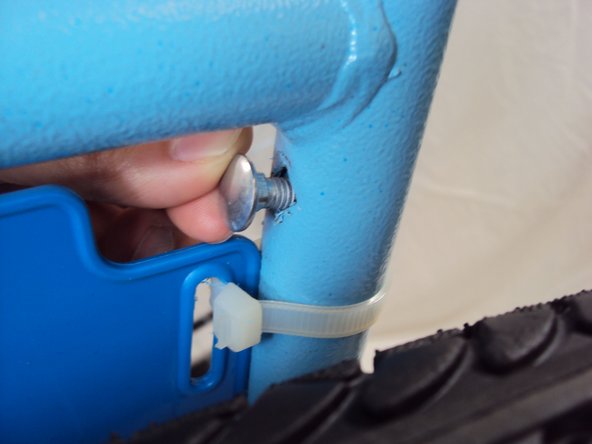
    • Align the left (L) frame piece with the brake hole on the left frame piece.

    • Insert and tighten using one [1] brake bolt.

    • Repeat using the right (R) brake with the right frame piece.

  4. Free Wheelchair Mission GEN 2 Assembly: crwdns2935265:04crwdnd2935265:01crwdnd2935265:02crwdne2935265:0 Free Wheelchair Mission GEN 2 Assembly: crwdns2935265:04crwdnd2935265:02crwdnd2935265:02crwdne2935265:0
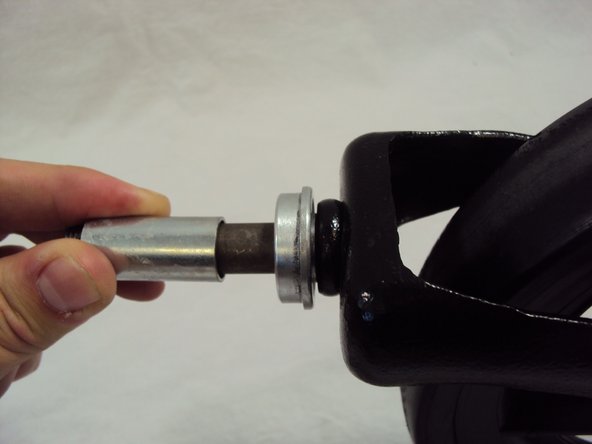
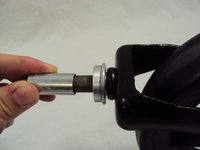
    • Slide the ring-shaped piece of one castor bearing onto the axle of one castor.

    • Slide the metal tube piece onto the axle of the castor.

    • Repeat for the second castor.

  5. Free Wheelchair Mission GEN 2 Assembly: crwdns2935265:05crwdnd2935265:01crwdnd2935265:03crwdne2935265:0 Free Wheelchair Mission GEN 2 Assembly: crwdns2935265:05crwdnd2935265:02crwdnd2935265:03crwdne2935265:0 Free Wheelchair Mission GEN 2 Assembly: crwdns2935265:05crwdnd2935265:03crwdnd2935265:03crwdne2935265:0
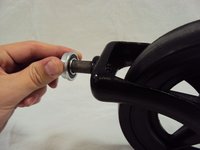
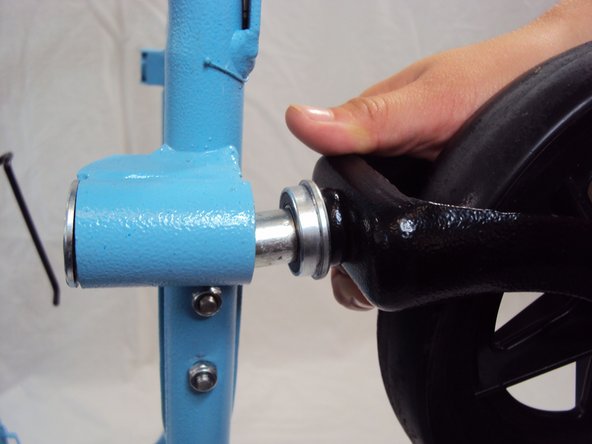
    • Slide another ring shaped bearing piece into the castor hole on the frame.

    • Insert the entire castor piece (castor, ring, and tube) into the opposite side of the hole.

    • Secure the castor and bearing pieces with a castor bolt.

    • Repeat on the opposite side of the frame.

  6. Free Wheelchair Mission GEN 2 Assembly: crwdns2935265:06crwdnd2935265:01crwdnd2935265:03crwdne2935265:0 Free Wheelchair Mission GEN 2 Assembly: crwdns2935265:06crwdnd2935265:02crwdnd2935265:03crwdne2935265:0 Free Wheelchair Mission GEN 2 Assembly: crwdns2935265:06crwdnd2935265:03crwdnd2935265:03crwdne2935265:0
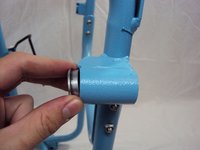
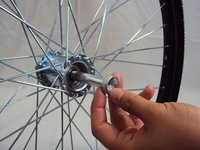
    • Insert an axle bolt through the center of a rear wheel.

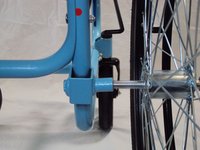
    • Insert the axle bolt with wheel into the axle hole on the frame.

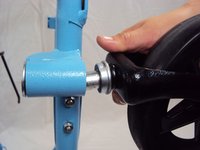
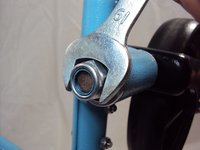
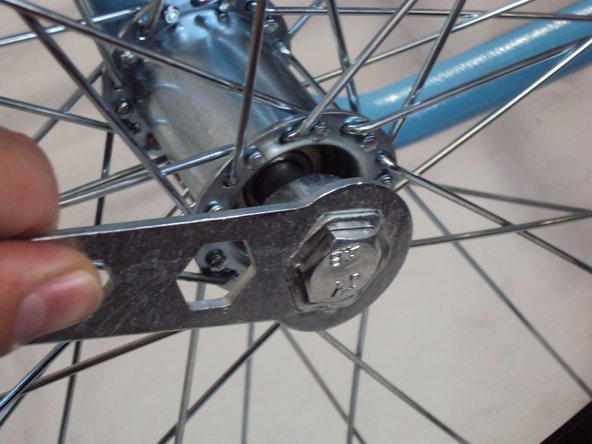
    • Tighten the axle bolt.

    • Secure the wheel with a bolt on the opposite side of the hole.

    • Repeat on the opposite side of the frame to attach the other wheel.

  7. Free Wheelchair Mission GEN 2 Assembly: crwdns2935265:07crwdnd2935265:01crwdnd2935265:03crwdne2935265:0 Free Wheelchair Mission GEN 2 Assembly: crwdns2935265:07crwdnd2935265:02crwdnd2935265:03crwdne2935265:0 Free Wheelchair Mission GEN 2 Assembly: crwdns2935265:07crwdnd2935265:03crwdnd2935265:03crwdne2935265:0
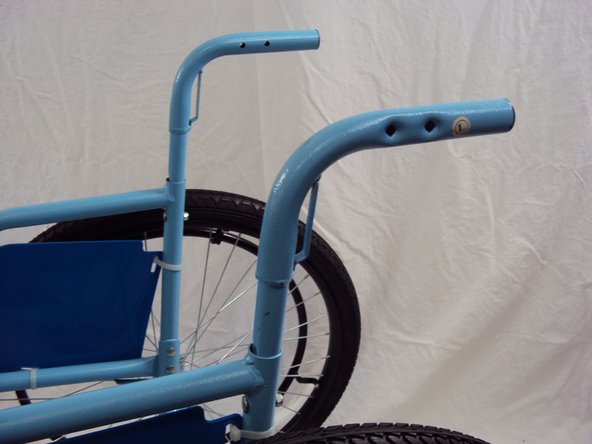
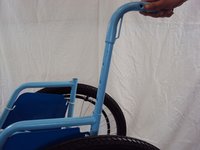
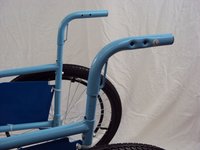
    • Slide each handle into the respective slot on the top of the wheelchair.

    • Adjust the handles up or down to your desired height.

    • Secure the handles in place with one bolt and nut for each side.

  8. Free Wheelchair Mission GEN 2 Assembly: crwdns2935265:08crwdnd2935265:01crwdnd2935265:02crwdne2935265:0 Free Wheelchair Mission GEN 2 Assembly: crwdns2935265:08crwdnd2935265:02crwdnd2935265:02crwdne2935265:0
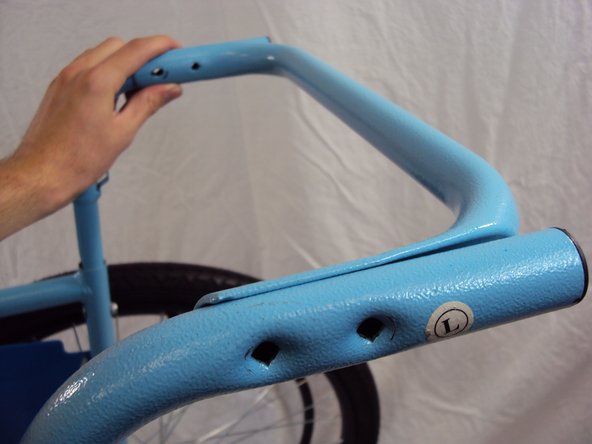
    • Insert the remaining crossbar between the handles, and align the holes on both sides.

    • Secure the crossbar with four [4] blue tipped bolts and rubber tipped nuts (two on each side).

  9. Free Wheelchair Mission GEN 2 Assembly: crwdns2935265:09crwdnd2935265:01crwdnd2935265:02crwdne2935265:0 Free Wheelchair Mission GEN 2 Assembly: crwdns2935265:09crwdnd2935265:02crwdnd2935265:02crwdne2935265:0
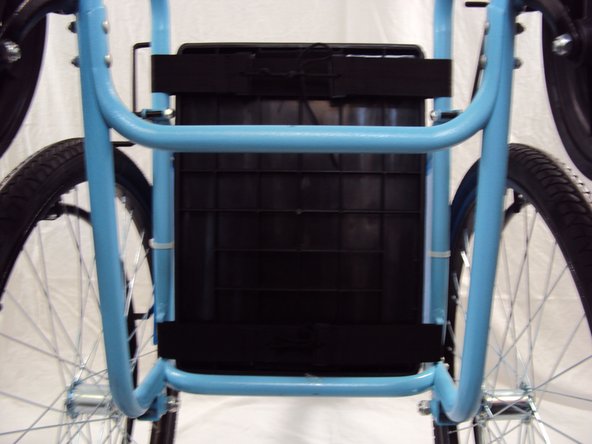
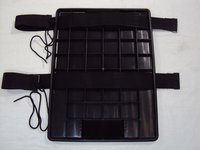
    • Orient the plastic seat with the smooth side up.

    • The rear strap can be attached to the seat in one of three positions in order to accommodate for people of different heights.

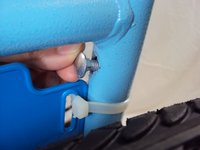
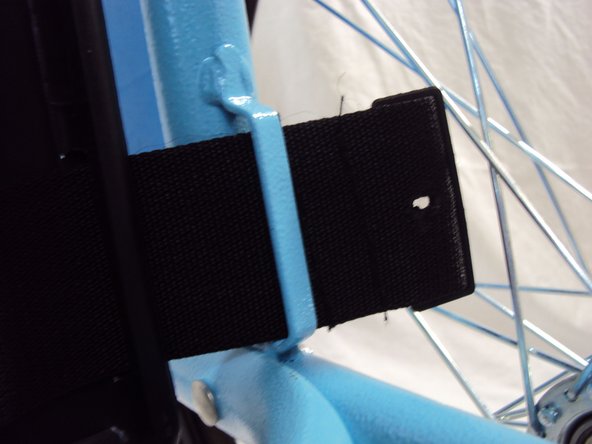
    • Loop the straps over the bars of the frame on either side.

    • Rotate the wheelchair onto its back side.

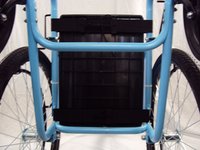
    • Secure the seat by tying each strap together.

    • Make sure that the straps are tied tightly so that the seat does not fall off the wheelchair.

  10. Free Wheelchair Mission GEN 2 Assembly: crwdns2935265:010crwdnd2935265:01crwdnd2935265:02crwdne2935265:0 Free Wheelchair Mission GEN 2 Assembly: crwdns2935265:010crwdnd2935265:02crwdnd2935265:02crwdne2935265:0
    • Reorient the chair so it is upright.

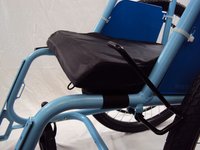
    • Place the seat cushion on top of the plastic seat with the angled side in front.

  11. Free Wheelchair Mission GEN 2 Assembly: crwdns2935265:011crwdnd2935265:01crwdnd2935265:01crwdne2935265:0
    • Place the bottom of the backrest against the back of the seat cushion.

    • Loop each strap behind the vertical bars of the frame.

    • Secure the backrest by tying each strap together.

    • Make sure that the straps are tied tightly so that the backrest does not fall off the wheelchair.

  12. Free Wheelchair Mission GEN 2 Assembly: crwdns2935265:012crwdnd2935265:01crwdnd2935265:03crwdne2935265:0 Free Wheelchair Mission GEN 2 Assembly: crwdns2935265:012crwdnd2935265:02crwdnd2935265:03crwdne2935265:0 Free Wheelchair Mission GEN 2 Assembly: crwdns2935265:012crwdnd2935265:03crwdnd2935265:03crwdne2935265:0
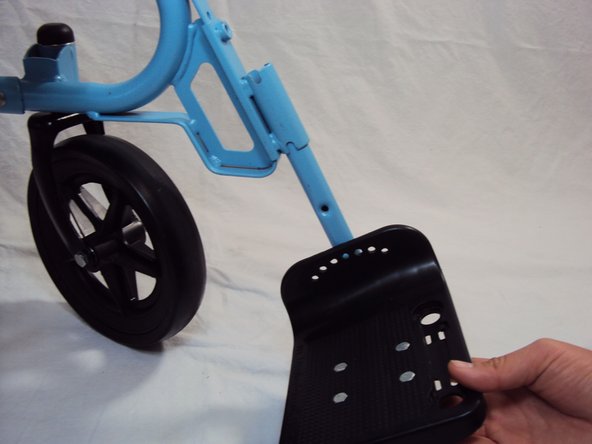
    • Slide a footrest socket over the rail located near the front of the seat.

    • Insert a footrest through the bottom of the footrest socket.

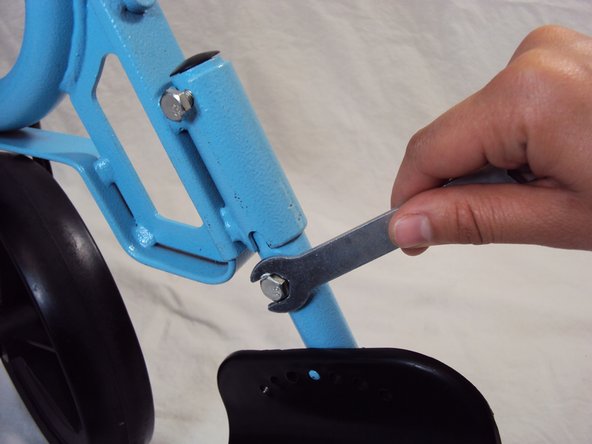
    • Secure the footrest with a bolt above and below the socket.

    • Adjust the footrest socket to your desired height.

    • Align the socket's bolt with the nearest hole in the rail, and tighten the bolt.

    • Repeat this step on the opposite rail.

  13. Free Wheelchair Mission GEN 2 Assembly: crwdns2935265:013crwdnd2935265:01crwdnd2935265:01crwdne2935265:0
    • Adjust the footrest socket to your desired height.

    • Align the socket's bolt with the nearest hole in the rail, and tighten the bolt.

    • Repeat this step on the opposite rail.

  14. Free Wheelchair Mission GEN 2 Assembly: crwdns2935265:014crwdnd2935265:01crwdnd2935265:01crwdne2935265:0
    • Insert the pump bracket through the lower crossbar.

    • Secure the bracket with a rubber tipped nut.

    • Place the tire pump in the bracket.

crwdns2915888:0crwdne2915888:0

To disasemble your device, follow these instructions in reverse order.

crwdns2935227:0crwdne2935227:0

Garrett Goff

crwdns2935283:004/19/13crwdne2935283:0

146 crwdns2915208:0crwdne2915208:0

crwdns2935295:0crwdne2935295:0

crwdns2915084:0crwdne2915084:0

Cal Poly, Team 14-8, Maness Spring 2013 crwdns2935289:0Cal Poly, Team 14-8, Maness Spring 2013crwdne2935289:0

CPSU-MANESS-S13S14G8

crwdns2931471:05crwdne2931471:0

crwdns2935297:07crwdne2935297:0

crwdns2944067:00crwdne2944067:0

crwdns2917038:0crwdne2917038:0

crwdns2936625:0crwdne2936625:0:

crwdns2936751:024crwdne2936751:0 0

crwdns2936753:07crwdne2936753:0 3

crwdns2936753:030crwdne2936753:0 14

crwdns2942667:0crwdne2942667:0 1,245