crwdns2933423:0crwdne2933423:0

Framework Desktop Primary Storage Removal

crwdns2862623:0crwdne2862623:0
crwdns2942641:0crwdne2942641:0
  1. Framework Desktop Primary Storage Removal, Loosen the SSD screw: crwdns2935265:01crwdnd2935265:01crwdnd2935265:02crwdne2935265:0 Framework Desktop Primary Storage Removal, Loosen the SSD screw: crwdns2935265:01crwdnd2935265:02crwdnd2935265:02crwdne2935265:0
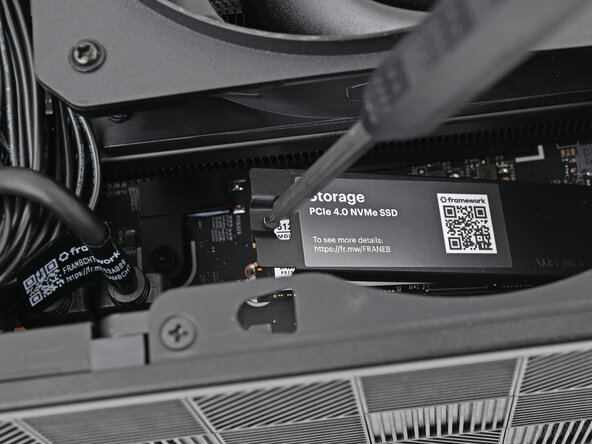
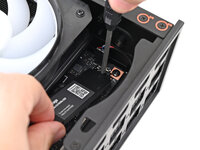
    • Use your Framework Desktop Screwdriver to loosen the captive T5 Torx screw securing the SSD.

    • The SSD and its heat spreader will pop up to an angle when its screw is fully loosened.

  2. Framework Desktop Primary Storage Removal, Remove the SSD: crwdns2935265:02crwdnd2935265:01crwdnd2935265:03crwdne2935265:0 Framework Desktop Primary Storage Removal, Remove the SSD: crwdns2935265:02crwdnd2935265:02crwdnd2935265:03crwdne2935265:0 Framework Desktop Primary Storage Removal, Remove the SSD: crwdns2935265:02crwdnd2935265:03crwdnd2935265:03crwdne2935265:0
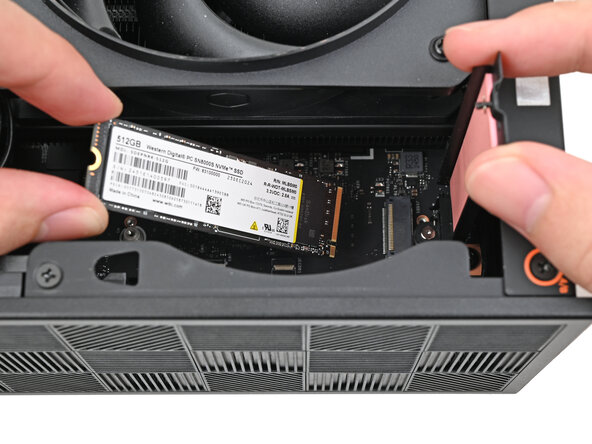
    • While holding the heat spreader upright, grab the SSD by its edges and pull it out of its socket.
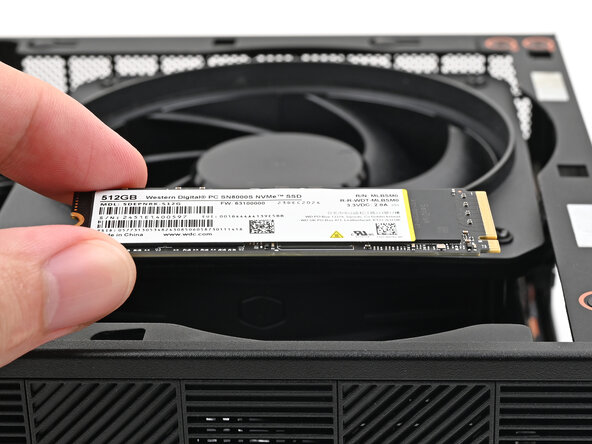
    • Remove the SSD.

  3. Framework Desktop Primary Storage Removal, Remove the primary storage heat spreader screw: crwdns2935265:03crwdnd2935265:01crwdnd2935265:03crwdne2935265:0 Framework Desktop Primary Storage Removal, Remove the primary storage heat spreader screw: crwdns2935265:03crwdnd2935265:02crwdnd2935265:03crwdne2935265:0 Framework Desktop Primary Storage Removal, Remove the primary storage heat spreader screw: crwdns2935265:03crwdnd2935265:03crwdnd2935265:03crwdne2935265:0
    • If your replacement SSD comes with a pre-installed heat spreader, follow the next two steps. Otherwise skip here.

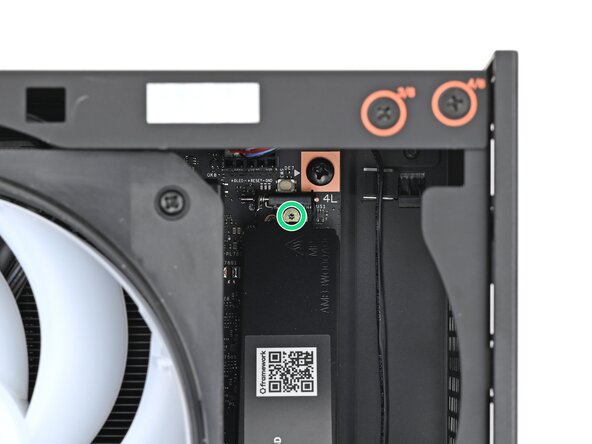
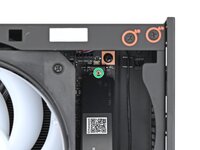
    • While securing the primary storage heat spreader with one hand, use your Framework Desktop Screwdriver to remove the 4.5 mm‑long T5 Torx screw securing it.

  4. Framework Desktop Primary Storage Removal, Remove the primary storage heat spreader: crwdns2935265:04crwdnd2935265:01crwdnd2935265:01crwdne2935265:0
    • Lift the primary storage heat spreader out of the Desktop and remove it.

    • Follow the guide normally, making sure to ignore instructions that involve the primary storage heat spreader.

crwdns2915888:0crwdne2915888:0

To reassemble your device, follow these instructions in reverse order.

Alex Diaz-Kokaisl

crwdns2935283:001/16/22crwdne2935283:0

174.043 crwdns2915208:0crwdne2915208:0

crwdns2935297:0798crwdne2935297:0

crwdns2947412:00crwdne2947412:0

crwdns2917038:0crwdne2917038:0

crwdns2936625:0crwdne2936625:0:

crwdns2936751:024crwdne2936751:0 1

crwdns2936753:07crwdne2936753:0 1

crwdns2936753:030crwdne2936753:0 11

crwdns2942667:0crwdne2942667:0 18