crwdns2933423:0crwdne2933423:0

Fluke 175 Multimeter Fuse Replacement

crwdns2942213:0crwdne2942213:0

  1. Fluke 175 Multimeter Fuse Replacement, Pre-Disassembly: crwdns2935265:01crwdnd2935265:01crwdnd2935265:01crwdne2935265:0
    • Turn off meter and disconnect test leads.

    • Warning: To prevent possible electrical shock, fire, personal injury, or damage to the product:

    • Remove the test leads and any input signals before replacing the fuse.

    • Use ONLY fuses with the amperage, interrupt, voltage, and speed ratings specified.

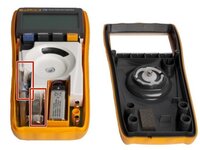
    • Replace the battery as soon as the low battery indicator appears.

  2. Fluke 175 Multimeter Fuse Replacement, Back Cover Removal: crwdns2935265:02crwdnd2935265:01crwdnd2935265:02crwdne2935265:0 Fluke 175 Multimeter Fuse Replacement, Back Cover Removal: crwdns2935265:02crwdnd2935265:02crwdnd2935265:02crwdne2935265:0
    • Use a Phillips PH1 driver.

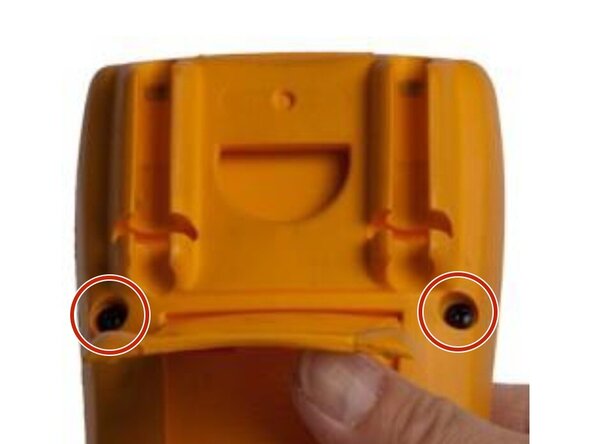
    • Remove the 2 bottom screws by turning counterclockwise.

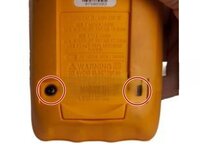
    • Remove the 2 top screws.

  3. Fluke 175 Multimeter Fuse Replacement, Remove Back Panel: crwdns2935265:03crwdnd2935265:01crwdnd2935265:01crwdne2935265:0
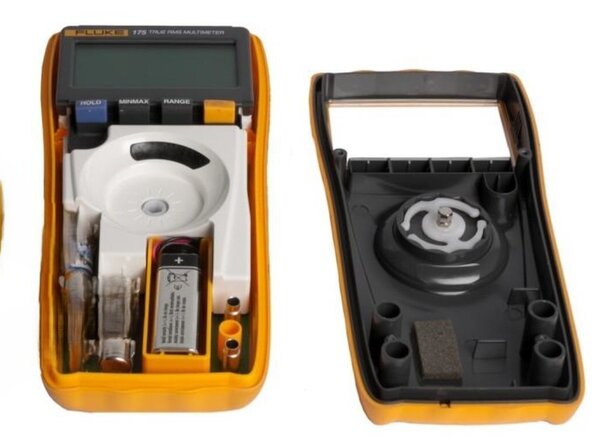
    • Carefully remove the front panel from the back section.

    • Do not move control knob while device is open.

  4. Fluke 175 Multimeter Fuse Replacement, Remove Fuses: crwdns2935265:04crwdnd2935265:01crwdnd2935265:02crwdne2935265:0 Fluke 175 Multimeter Fuse Replacement, Remove Fuses: crwdns2935265:04crwdnd2935265:02crwdnd2935265:02crwdne2935265:0
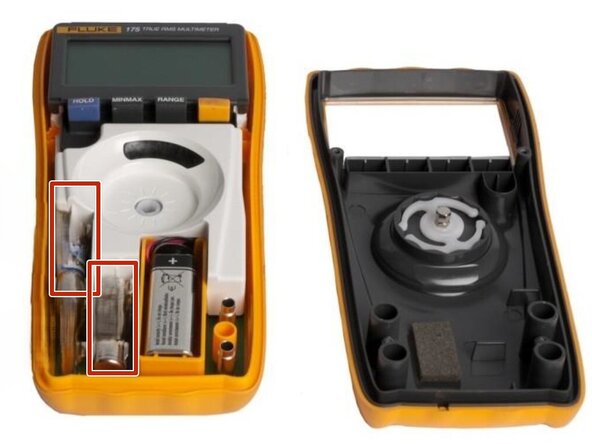
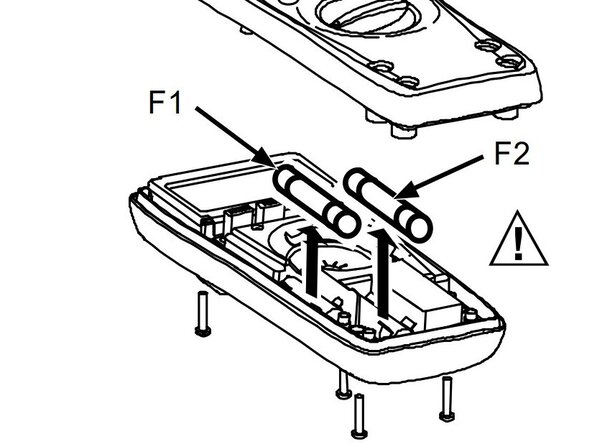
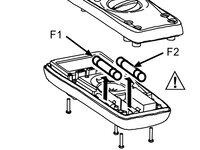
    • Remove and replace fuses.

    • F1 Fuse, 440 mA, 1000 V, FAST

    • F2 Fuse, 11 A, 1000V, FAST

crwdns2915888:0crwdne2915888:0

To reassemble your device, follow these instructions in reverse order.

Richard

crwdns2935283:009/14/25crwdne2935283:0

109 crwdns2915208:0crwdne2915208:0

crwdns2935295:0crwdne2935295:0

crwdns2947412:00crwdne2947412:0

crwdns2917038:0crwdne2917038:0

crwdns2936625:0crwdne2936625:0:

crwdns2936751:024crwdne2936751:0 1

crwdns2936753:07crwdne2936753:0 1

crwdns2936753:030crwdne2936753:0 13

crwdns2942667:0crwdne2942667:0 25