crwdns2933423:0crwdne2933423:0

Flip Video Directional button replacement or cleaning

crwdns2942213:0crwdne2942213:0

  1. Flip Video Directional button replacement or cleaning, Outer Shell: crwdns2935265:01crwdnd2935265:01crwdnd2935265:02crwdne2935265:0 Flip Video Directional button replacement or cleaning, Outer Shell: crwdns2935265:01crwdnd2935265:02crwdnd2935265:02crwdne2935265:0
    • Turn off the device and take the batteries out.

    • Remove metal sticker under the LCD screen with a spudger.

    • This may require a large force to pry off the glued sticker.

  2. Flip Video Directional button replacement or cleaning: crwdns2935265:02crwdnd2935265:01crwdnd2935265:01crwdne2935265:0
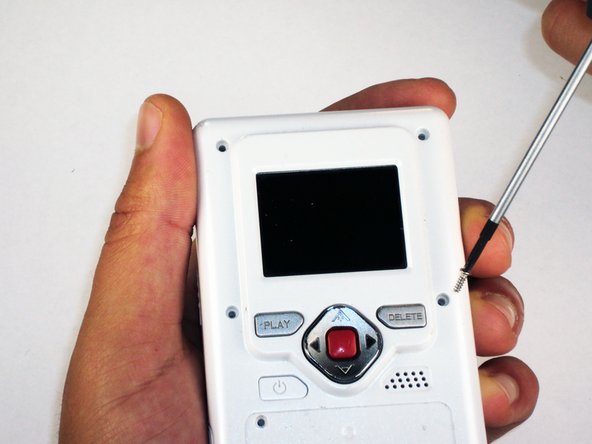
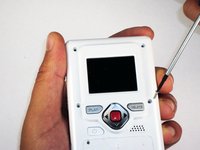
    • Remove the 4 gray screw caps with the spudger. These cover the screw heads and protect from dirt or grime.

  3. Flip Video Directional button replacement or cleaning: crwdns2935265:03crwdnd2935265:01crwdnd2935265:02crwdne2935265:0 Flip Video Directional button replacement or cleaning: crwdns2935265:03crwdnd2935265:02crwdnd2935265:02crwdne2935265:0
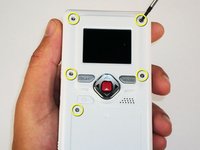
    • Remove the 5 10mm screws with the #00 Phillips screwdriver. These connect the back of the outer shell to the front of the outer shell.

  4. Flip Video Directional button replacement or cleaning: crwdns2935265:04crwdnd2935265:01crwdnd2935265:01crwdne2935265:0
    • Open battery door. This can be done by gently depressing and sliding the battery down downward.

  5. Flip Video Directional button replacement or cleaning: crwdns2935265:05crwdnd2935265:01crwdnd2935265:01crwdne2935265:0
    • Use the spudger to separate outer shells.

    • The spudger must be inserted between the shell halves to pry the edges apart.

    • Slowly work around the outside to separate the halves.

  6. Flip Video Directional button replacement or cleaning, Flip Video Directional button replacement or cleaning: crwdns2935265:06crwdnd2935265:01crwdnd2935265:01crwdne2935265:0
    • Remove the silicone directional pad insert from the front outer shell.

    • Clean the buttons with soapy water before reassembling the device.

    • Make sure it is completely dry before placing back into the device.

crwdns2915888:0crwdne2915888:0

To reassemble your device, follow these instructions in reverse order.

crwdns2935227:0crwdne2935227:0
Elizabeth

crwdns2935283:004/15/10crwdne2935283:0

100 crwdns2915208:0crwdne2915208:0

crwdns2935297:06crwdne2935297:0

crwdns2915084:0crwdne2915084:0

Cal Poly, Team 26-21, Regan Spring 2010 crwdns2935289:0Cal Poly, Team 26-21, Regan Spring 2010crwdne2935289:0

CPSU-REGAN-S10S26G21

crwdns2931471:04crwdne2931471:0

crwdns2935297:012crwdne2935297:0

crwdns2944067:00crwdne2944067:0

crwdns2917038:0crwdne2917038:0

crwdns2936625:0crwdne2936625:0:

crwdns2936751:024crwdne2936751:0 0

crwdns2936753:07crwdne2936753:0 0

crwdns2936753:030crwdne2936753:0 12

crwdns2942667:0crwdne2942667:0 1,953