crwdns2933423:0crwdne2933423:0

Fix Redmi Note 9 Pro Stuck On MIUI Logo

crwdns2942213:0crwdne2942213:0

crwdns2936621:0crwdne2936621:0

  1. Fix Redmi Note 9 Pro Stuck On MIUI Logo, Back cover removal: crwdns2935265:01crwdnd2935265:01crwdnd2935265:02crwdne2935265:0 Fix Redmi Note 9 Pro Stuck On MIUI Logo, Back cover removal: crwdns2935265:01crwdnd2935265:02crwdnd2935265:02crwdne2935265:0
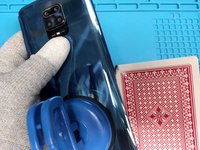
    • Warm up the device to soften the adhesive.

    • To separate the back cover, use plastic tools, a playing card, isopropyl alcohol and a suction cup.

  2. Fix Redmi Note 9 Pro Stuck On MIUI Logo, Motherboard plastics shield: crwdns2935265:02crwdnd2935265:01crwdnd2935265:03crwdne2935265:0 Fix Redmi Note 9 Pro Stuck On MIUI Logo, Motherboard plastics shield: crwdns2935265:02crwdnd2935265:02crwdnd2935265:03crwdne2935265:0 Fix Redmi Note 9 Pro Stuck On MIUI Logo, Motherboard plastics shield: crwdns2935265:02crwdnd2935265:03crwdnd2935265:03crwdne2935265:0
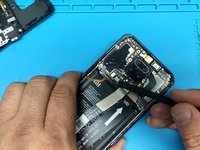
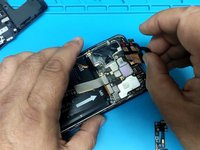
    • You can now remove the screws holding the plastic motherboard cover.

    • Pry the cover free.

  3. Fix Redmi Note 9 Pro Stuck On MIUI Logo, Main cameras removal: crwdns2935265:03crwdnd2935265:01crwdnd2935265:03crwdne2935265:0 Fix Redmi Note 9 Pro Stuck On MIUI Logo, Main cameras removal: crwdns2935265:03crwdnd2935265:02crwdnd2935265:03crwdne2935265:0 Fix Redmi Note 9 Pro Stuck On MIUI Logo, Main cameras removal: crwdns2935265:03crwdnd2935265:03crwdnd2935265:03crwdne2935265:0
    • Disconnect the battery.

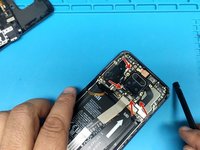
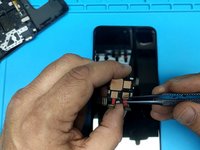
    • Disconnect all cameras flex cables (x4) and remove them.

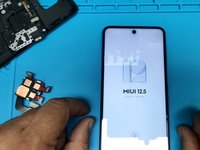
    • Now test the device without the camera.

  4. Fix Redmi Note 9 Pro Stuck On MIUI Logo, Cleaning the device: crwdns2935265:04crwdnd2935265:01crwdnd2935265:03crwdne2935265:0 Fix Redmi Note 9 Pro Stuck On MIUI Logo, Cleaning the device: crwdns2935265:04crwdnd2935265:02crwdnd2935265:03crwdne2935265:0 Fix Redmi Note 9 Pro Stuck On MIUI Logo, Cleaning the device: crwdns2935265:04crwdnd2935265:03crwdnd2935265:03crwdne2935265:0
    • If the phone starts normally, check and clean main camera connectors.

    • Check all conductive adhesive tapes and recover them.

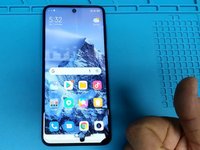
    • Now you are ready to assemble the device.

crwdns2915888:0crwdne2915888:0

To reassemble your device, follow these instructions in reverse order.

crwdns2935229:010crwdne2935229:0

ZFix

crwdns2935283:012/09/13crwdne2935283:0

194 325 crwdns2915208:0crwdne2915208:0

crwdns2935297:0330crwdne2935297:0

crwdns2915084:0crwdne2915084:0

Master Techs crwdns2935289:0Master Techscrwdne2935289:0

Community

crwdns2931471:0327crwdne2931471:0

crwdns2935297:01 677crwdne2935297:0

crwdns2947412:02crwdne2947412:0

Thank you for the detailed instructions helped me in the repair.

AlGorFun - crwdns2934203:0crwdne2934203:0

crwdns2917038:0crwdne2917038:0

crwdns2936625:0crwdne2936625:0:

crwdns2936751:024crwdne2936751:0 3

crwdns2936753:07crwdne2936753:0 45

crwdns2936753:030crwdne2936753:0 229

crwdns2942667:0crwdne2942667:0 13,533