crwdns2915892:0crwdne2915892:0
Is your touchscreen not working? The touchscreen sensor may need to be replaced. Read this guide to learn how to replace the touchscreen sensor, but keep in mind that you will need to cut the wristband in order to complete this repair and the band cannot be reattached.
crwdns2942213:0crwdne2942213:0
-
-
-
Unscrew all four black 3 mm screws on the underside of the watch using a T5 screwdriver.
 crwdns2952109:0crwdne2952109:0
-
-
-
Use an X-Acto knife to cut the band above, on either side, and in between the 2 screws.
-
Note: Part of the band is hard plastic.
-
Caution: Once the band is cut it cannot be reattached.
-
-
-
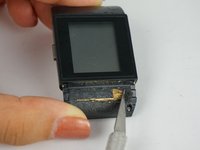
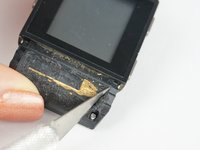
Scrape away the glue beneath the hard shell portion of the band to reveal the GPS.
-
-
-
-
Use a PH000 screw head to undo the newly revealed silver 4 mm Phillips screws that were hidden beneath the glue.
-
-
-
Using a metal spudger, push down on the plastic gray square clamps on the underside of the device to dislodge the whole silver backing.
-
Note: the buttons will also come off.
-
-
-
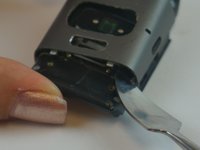
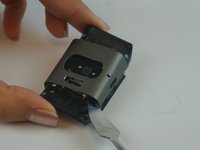
Use a thin tool to pry the the device apart by lodging it between the clock face and back side of the device.
-
Note: A spudger may not be thin enough to fit in the seam of the device. We used the 6 inch metal ruler from the Pro Tech Toolkit.
-
-
-
Remove the touchscreen sensor using a spudger or your fingers.
-
Note: In this photo we removed the metal cover on the main PCB, but you do not need to remove it for this guide.
-
-






To reassemble your device, follow these instructions in reverse order. Keep in mind that the wristband will need to be cut for this repair and it cannot be reattached.
crwdns2935221:0crwdne2935221:0
crwdns2935229:07crwdne2935229:0

crwdns2935287:0crwdne2935287:0

USF Tampa, Team 1-3, Leahy Fall 2016 crwdns2935289:0USF Tampa, Team 1-3, Leahy Fall 2016crwdne2935289:0
USFT-LEAHY-F16S1G3
crwdns2931471:03crwdne2931471:0
crwdns2935297:020crwdne2935297:0
crwdns2947412:05crwdne2947412:0
Is there a company that will perform this fix for me?
Terry Brown - crwdns2934203:0crwdne2934203:0 crwdns2950251:0crwdne2950251:0
Where can I get a replacement sensor?
Francisco Cortez - crwdns2934203:0crwdne2934203:0 crwdns2950251:0crwdne2950251:0
Isn’t any step missing in that instruction ?
Removing sensor will solve the issue ? How about adding new one ?
Erazm Gondoresku - crwdns2934203:0crwdne2934203:0 crwdns2950251:0crwdne2950251:0
Hi, I didnt get the point, what should I do after removing sensor? Should I clean it or something? If I need to place a new one, maybe someone knows where to get one?
viktoras - crwdns2934203:0crwdne2934203:0 crwdns2950251:0crwdne2950251:0
Is anyway I can buy the bus
Ajay Kumar - crwdns2934203:0crwdne2934203:0 crwdns2950251:0crwdne2950251:0
