crwdns2915892:0crwdne2915892:0
If the volume knob on your Fender Stratocaster is producing a crackling sound when turned or not properly modulating the volume of your guitar when it's plugged into an amp, use this guide to replace its potentiometer.
If turning your volume knob produces a crackling sound, the potentiometer could be either either dirty or damaged. Before using this guide, turn the knob back and forth to clear any potential debris stuck within the pot. If the problem persists, the potentiometer is likely damaged and needs to be replaced.
Steps 8-9, 13, and 15 require a soldering iron to remove and replace the old potentiometer with the new one. Make sure you are familiar with how to solder and desolder electrical components, as well as following proper safety measures. If not, we suggest reading the How To Solder and Desolder Connections iFixit guide before continuing with this fix.
Before performing this fix, ensure that your guitar is not plugged into an amp.
crwdns2942213:0crwdne2942213:0
-
-
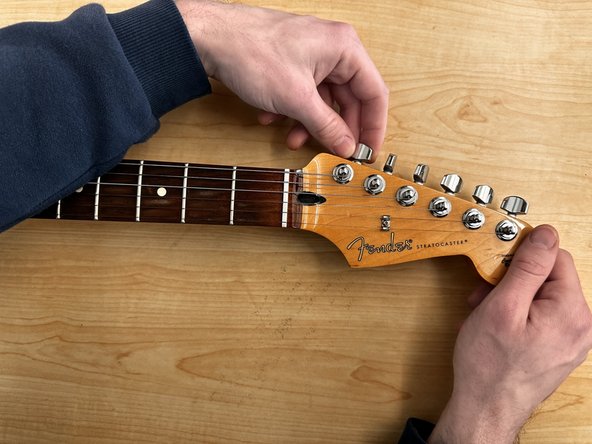
Loosen the low E string of the guitar by turning it's tuning peg in the clockwise direction.
-
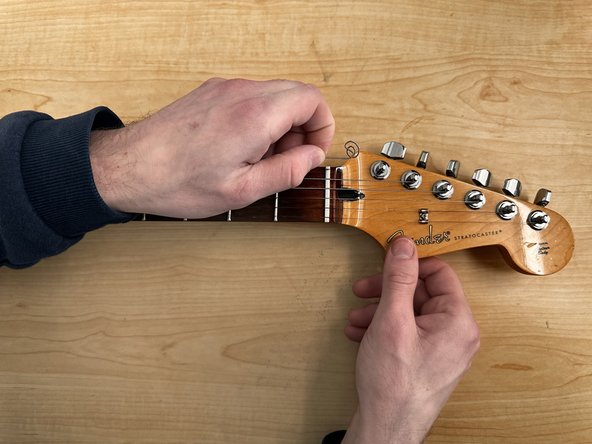
Once completely loosened, pull the string out of its tuning post.
-
Repeat the previous two bullets for the rest of the strings.
-
-
-
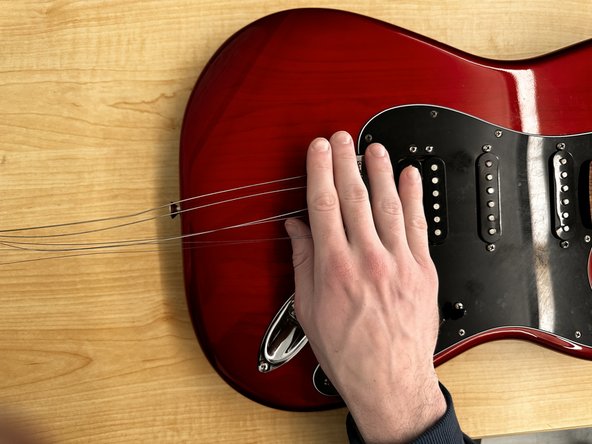
After pulling out all of the strings from their tuning pegs, grab them and fold them over the bottom of the guitar.
-
-
-
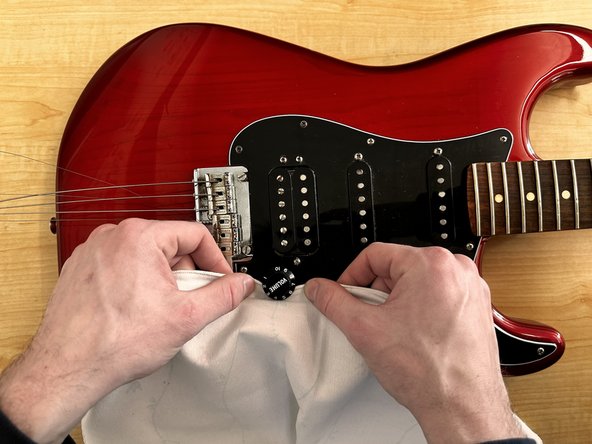
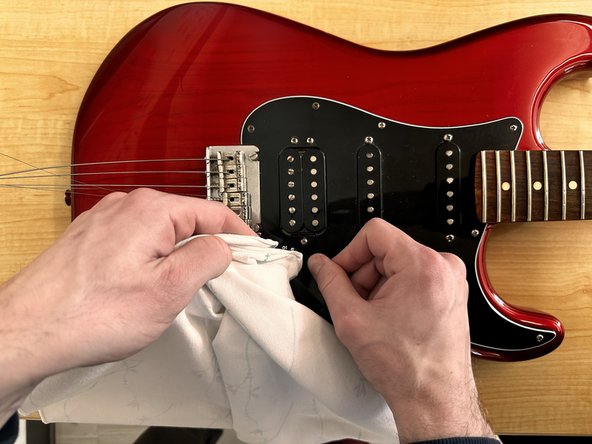
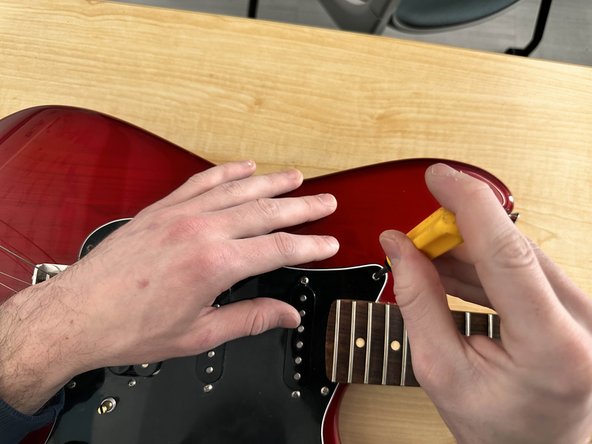
Take a cloth and slip it underneath one end of the volume knob.
-
Wrap the cloth around the rest of the knob such that it makes contact with most of the knob's underside.
-
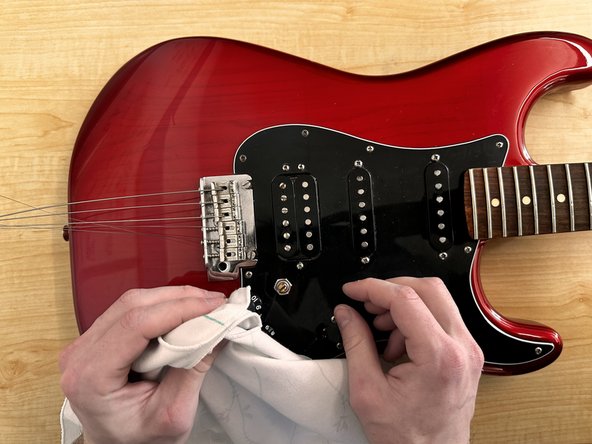
Once the cloth is fully secured, grab it right above the knob and pull straight up.
-
-
-
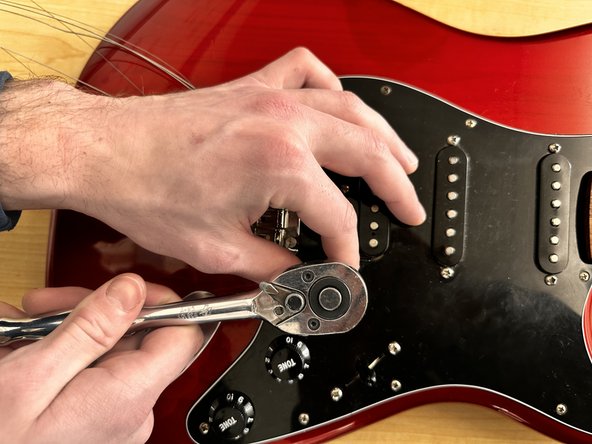
Take the socket wrench and place it onto the mounting nut.
-
Loosen the mounting nut and then take it off.
-
-
-
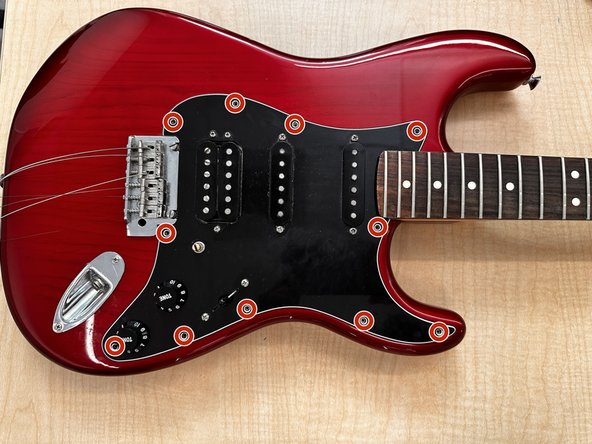
Use a Phillips screwdriver to remove all of the screws on the perimeter of the pickguard.
-
-
-
-
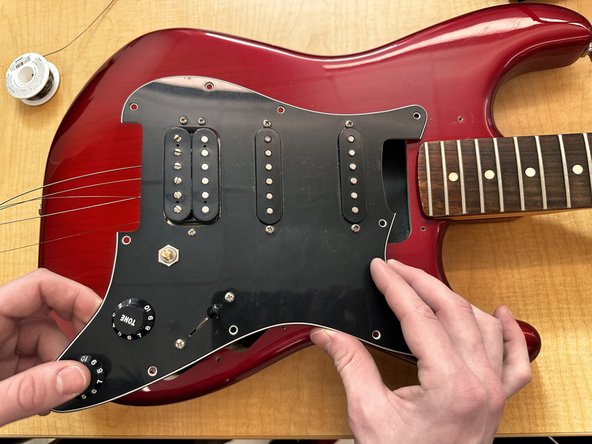
Lift the pickguard up slightly on the side closest to the guitar strings, or furthest from the neck.
-
Pull the pickguard towards the strings to slide it out from under the neck.
-
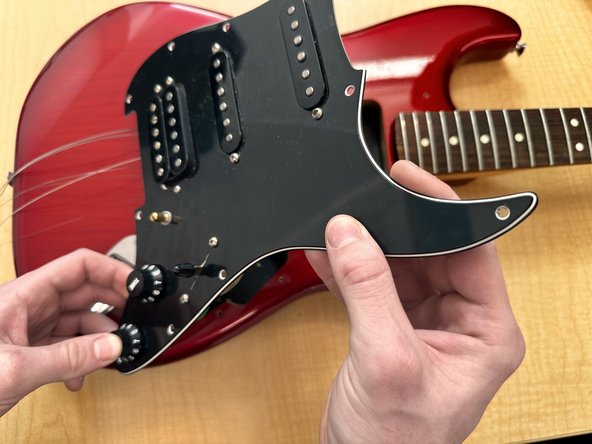
Flip the pickguard upside down and let it rest on top of the guitar.
-
-
-
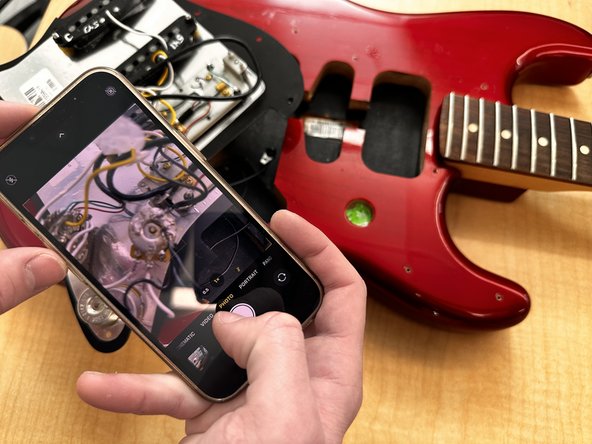
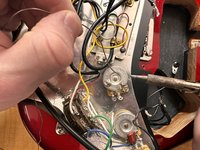
Take multiple pictures of the potentiometer to ensure you have a reference showing how each component is wired.
-
-
-
Plug in and heat up your soldering iron.
-
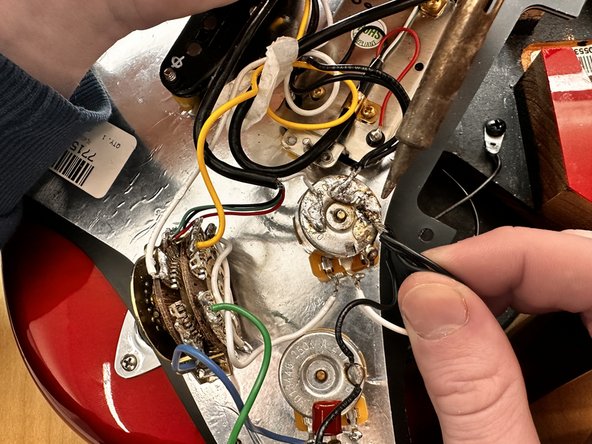
Once your soldering iron is hot, prepare to desolder the ground wires (the wires connected to the cylindrical base of the potentiometer).
-
Grab the wire, and gently pull it away from the potentiometer.
-
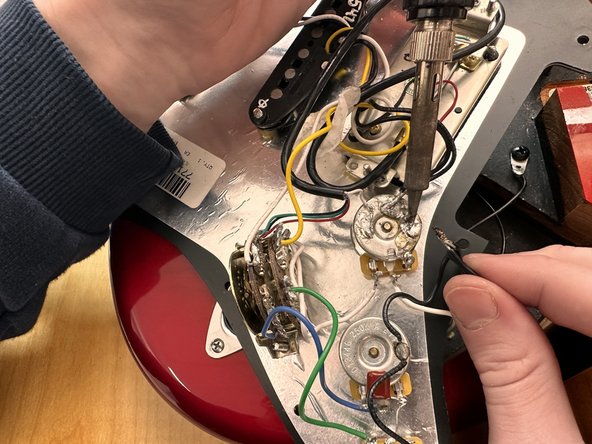
Melt the solder on the ground connections by touching the tip of the soldering iron to it. Continue pulling on the wire with your other hand.
-
Once the solder is melted enough, the wire will easily pull away.
-
Use desoldering wick to clean up the remaining solder.
-
-
-
Repeat the previous step with the remaining ground wires.
-
-
-
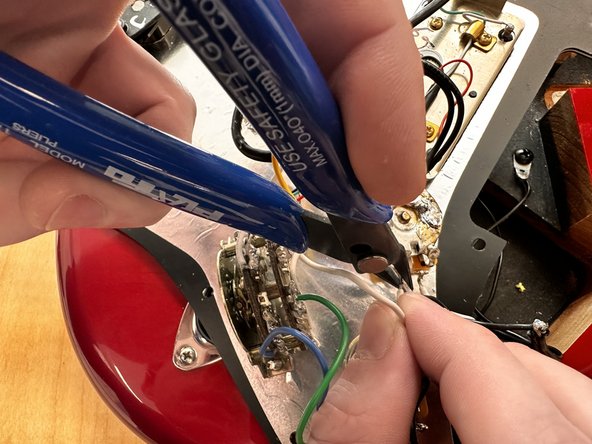
Take your wire cutters and cut as little of the wire off as possible. If the metal of the wire is no longer visible after cutting, slightly roll up the wire insulation.
-
Repeat these steps for the last remaining wire.
-
-
-
Pull the potentiometer out of its socket.
-
-
-
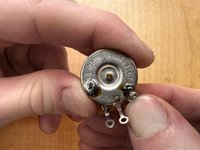
Take the washer off of the old potentiometer, and place it onto the replacement one.
-
Alternatively, if using the official Fender replacement kit, use the washer from the kit.
-
-
-
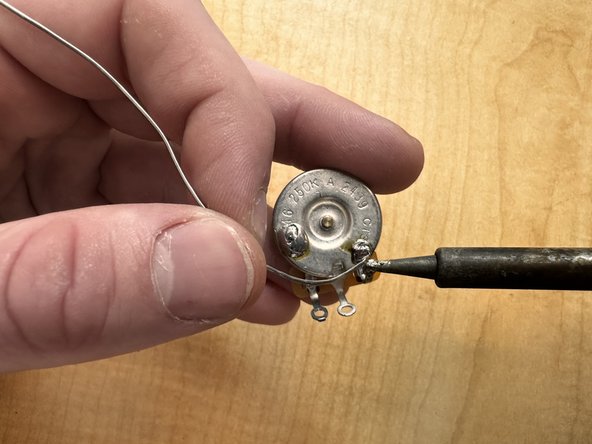
Holding the potentiometer upside down, bend the rightmost leg to touch the body of the pot.
-
Solder the leg to the body.
-
-
-
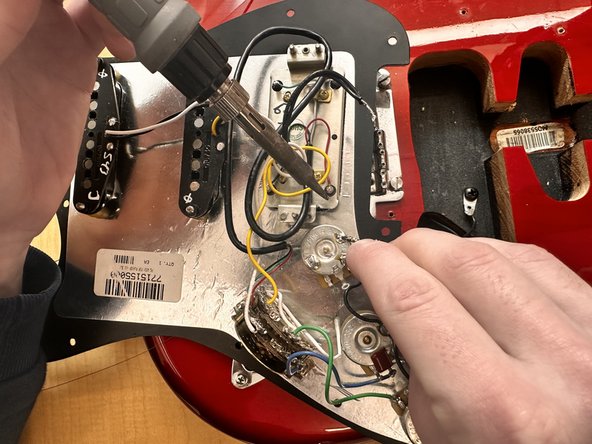
Insert the potentiometer and its washer back into the pickguard and secure it with the mounting nut.
-
Try to keep the orientation of the potentiometer the same as it had been originally, with the legs pointing towards the two other potentiometers.
-
-
-
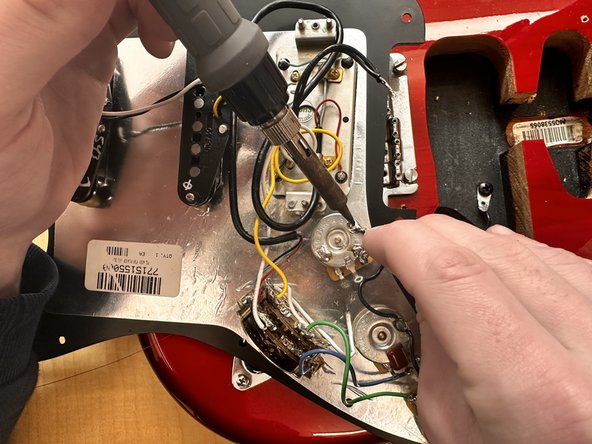
Solder the ground wires to the new potentiometer.
-
For the ground wires, begin by melting a bit of solder onto the potentiometer.
-
Then, with the hand not holding the soldering iron, take the wires and place them into the solder. Keep holding the iron to the solder and wire until the wire is submerged in the solder.
-
Remove the soldering iron. Keep on holding the wire until the solder solidifies, then you may let go as a connection has been made.
-
Repeat this with the rest of wires.
-


To reassemble the guitar, follow steps 1-6 in reverse order.
To reassemble the guitar, follow steps 1-6 in reverse order.

crwdns2915084:0crwdne2915084:0

UC Davis, Team 1-6, Morris Winter 2025 crwdns2935289:0UC Davis, Team 1-6, Morris Winter 2025crwdne2935289:0
UCD-MORRIS-W25S1G6
crwdns2931471:03crwdne2931471:0
crwdns2935303:01crwdne2935303:0