crwdns2933423:0crwdne2933423:0

Female DIN connector

crwdns2942213:0crwdne2942213:0

  1. Female DIN connector, Open the base: crwdns2935265:01crwdnd2935265:01crwdnd2935265:03crwdne2935265:0 Female DIN connector, Open the base: crwdns2935265:01crwdnd2935265:02crwdnd2935265:03crwdne2935265:0 Female DIN connector, Open the base: crwdns2935265:01crwdnd2935265:03crwdnd2935265:03crwdne2935265:0
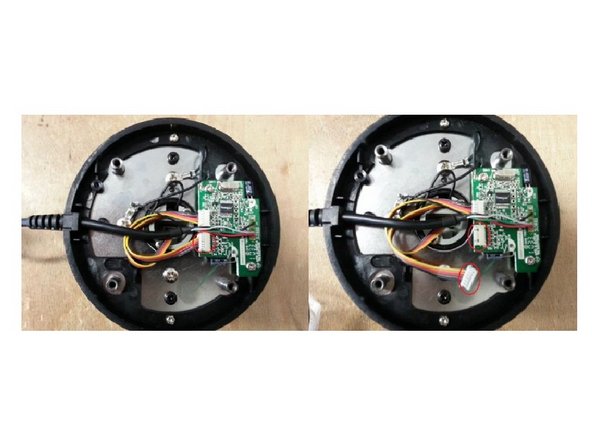
    • Remove 4 screws highlighted on the first picture.

    • Unplug the white connector highlighted in the second picture.

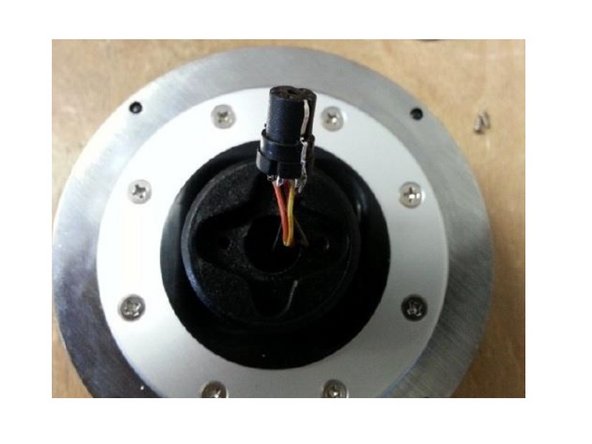
    • Remove 2 screws highlighted in 3rd picture.

  2. Female DIN connector, Remove the DIN connector: crwdns2935265:02crwdnd2935265:01crwdnd2935265:03crwdne2935265:0 Female DIN connector, Remove the DIN connector: crwdns2935265:02crwdnd2935265:02crwdnd2935265:03crwdne2935265:0 Female DIN connector, Remove the DIN connector: crwdns2935265:02crwdnd2935265:03crwdnd2935265:03crwdne2935265:0
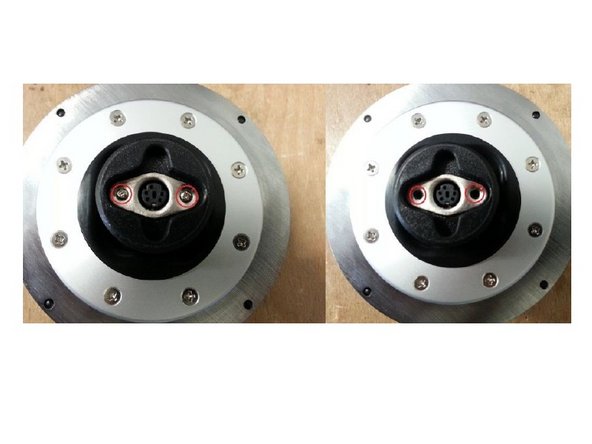
    • Remove the metal ring around the DIN connector.

    • Apply some glue around the DIN connector.

  3. Female DIN connector, Replace the metal collar: crwdns2935265:03crwdnd2935265:01crwdnd2935265:01crwdne2935265:0
    • Replace the metal collar on the DIN connector.

crwdns2915888:0crwdne2915888:0

To reassemble your device, follow the instructions in reverse order.

crwdns2935227:0crwdne2935227:0

crwdns2934873:0crwdne2934873:0

fr en

100%

crwdns2934885:0crwdne2934885:0 crwdns2934875:0crwdne2934875:0
crwdns2934877:0crwdne2934877:0 ›

Avrila

crwdns2935283:007/25/24crwdne2935283:0

1,362 crwdns2915208:0crwdne2915208:0

crwdns2935297:05crwdne2935297:0

crwdns2947412:00crwdne2947412:0

crwdns2917038:0crwdne2917038:0

crwdns2936625:0crwdne2936625:0:

crwdns2936751:024crwdne2936751:0 0

crwdns2936753:07crwdne2936753:0 7

crwdns2936753:030crwdne2936753:0 27

crwdns2942667:0crwdne2942667:0 254