crwdns2915892:0crwdne2915892:0
Some vital parts of the vacuum cleaner require you to remove the casing in order to replace them. This guide serves as a prerequisite only to the guides on how to replace those parts.
crwdns2942213:0crwdne2942213:0
-
-
Unscrew the two 18.1 mm PH2 Phillips head screws on the bottom of the vacuum.
-
-
-
Pry off the Riser Visor using the plastic opening tool.
-
-
-
-
Remove the screw cap using the metal spudger.
-
-
-
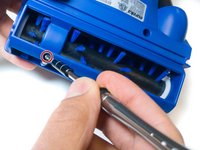
Unscrew the 14mm PH2 Phillips head screw.
-
Pull the bottom cover off of the rest of the casing.
-
-
-
Pull the power switch all the way up and remove the dust cup.
-
-
-
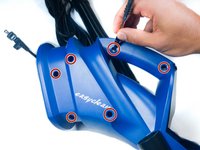
Unscrew the six 18.1mm PH2 Phillips head screws on the side of the vacuum.
-
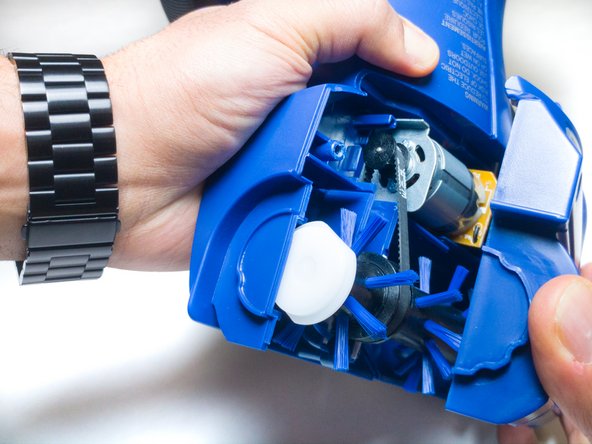
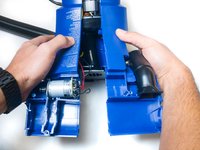
Pull the casing apart.
-


To reassemble your device, follow these instructions in reverse order.
crwdns2935221:0crwdne2935221:0
crwdns2935227:0crwdne2935227:0
crwdns2935287:0crwdne2935287:0

IUPUI, Team S6-G4, Baechle Fall 2017 crwdns2935289:0IUPUI, Team S6-G4, Baechle Fall 2017crwdne2935289:0
IUPUI-BAECHLE-F17S6G4
crwdns2931471:03crwdne2931471:0
crwdns2935297:012crwdne2935297:0