crwdns2915892:0crwdne2915892:0
This guide will show you how to replace the adjustable foot in the Epson Powerlite S4 projector. The adjustable foot is a component used to raise or lower the projected image. It can be found next to the lens at the front of the power light. If the adjustable foot is unable to be adjusted, it may need to be replaced.
crwdns2942213:0crwdne2942213:0
-
-
Press the power button located on top of the projector.
-
-
-
Using the Phillips #1 screwdriver, loosen the single captive screw on the right side of the projector.
-
Slide the panel off and remove it from the device.
-
-
-
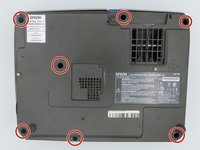
Remove seven black 10 mm screws from the bottom of the device using a Phillips #1 screwdriver.
-
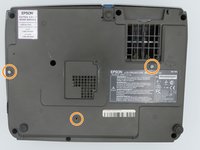
Remove three smaller silver screws using a Phillips #1 screwdriver.
-
-
-
-
Turn the projector so the power button is on top.
-
Gently pull up the cover until it pops off.
-
Disconnect the ribbon cable that attaches the cover to the motherboard.
-
Remove the cover and place to the side.
-
-
-
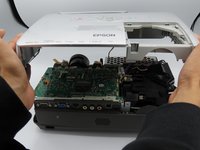
Remove the three screws holding down the motherboard using a Phillips #1 screwdriver.
-
-
-
Ensure that the two large cable cords located in the center are disconnected.
-
-
-
Remove the nine cables that are running to the motherboard by pulling them up out of their sockets.
-
-
-
Carefully lift the motherboard from the edges.
-
Remove from base and set aside.
-
-
-
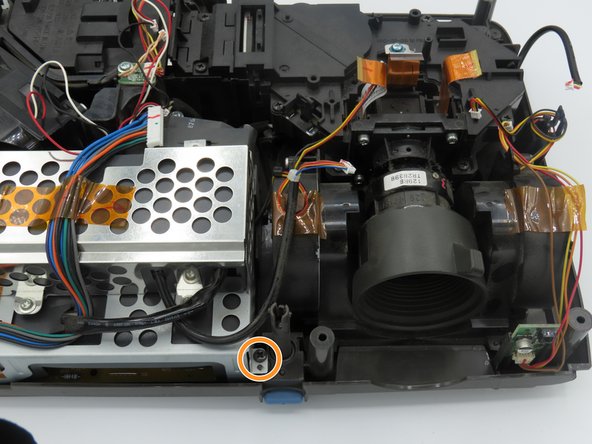
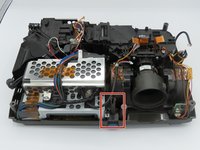
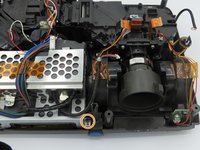
To the left of the lens, you'll find the adjustable foot.
-
Remove the screw to the left of the adjustable foot using a Phillips #0 screwdriver.
-
Lift up the adjustable foot to remove it from the projector.
-


To reassemble your device, follow these instructions in reverse order.
To reassemble your device, follow these instructions in reverse order.

crwdns2915084:0crwdne2915084:0

University of Kentucky, Team 1-2, Kaufmann Spring 2023 crwdns2935289:0University of Kentucky, Team 1-2, Kaufmann Spring 2023crwdne2935289:0
UKY-KAUFMANN-S23S1G2
crwdns2931471:03crwdne2931471:0
crwdns2935297:02crwdne2935297:0