crwdns2915892:0crwdne2915892:0
If the fan in your Epson Powerlite 410W projector seems to be running very loudly, not working at all, or the temp light is flashing, you will most likely need to replace the fan. If you are unsure what is wrong with your device, please visit our troubleshooting page.
The fan is set in the projector below the lamp and lens. It helps to cool down the body of the projector when it is working hard so that it does not overheat. Before replacing the fan, make sure it cannot be fixed from just cleaning and re-greasing the fan.
crwdns2942213:0crwdne2942213:0
-
-
Press the power button located on top of the projector.
-
-
-
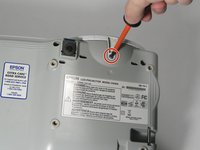
Remove eight screws from the bottom of the device using a Phillips #00 screwdriver.
-
-
-
Turn the projector so the power button is on top.
-
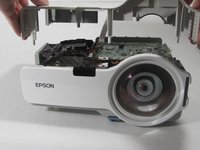
Gently pull up the cover until it pops off.
-
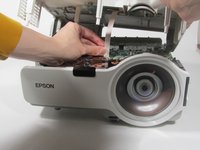
Disconnect the ribbon cable that attaches the cover to the motherboard.
-
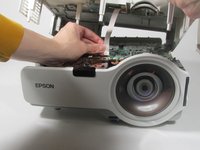
Remove the cover and place to the side.
-
-
-
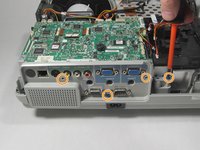
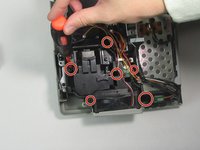
Remove the two screws holding down the motherboard using a Phillips #00 screwdriver.
-
Remove the four screws holding down the I/O board using a Phillips #00 screwdriver.
-
-
-
-
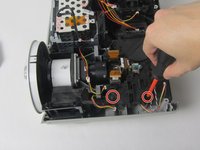
Remove the seven cables that are running to the motherboard by pulling them out of their sockets.
-
-
crwdns2935267:0crwdne2935267:0Tweezers$4.99
-
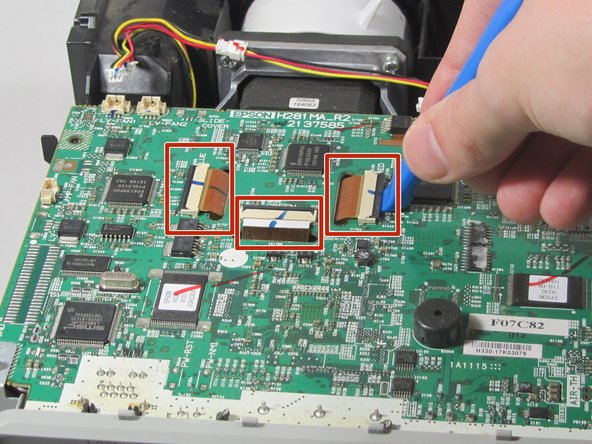
Using a plastic opening tool, gently pry up the black tabs holding in the ribbon cables on the motherboard.
-
Using tweezers, gently pull the ribbon cables out of the sockets.
-
-
-
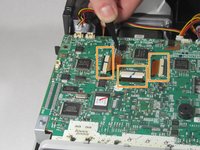
Gently pull the motherboard up and tilt it back, revealing the last cable attached to the motherboard. Disconnect this cable.
-
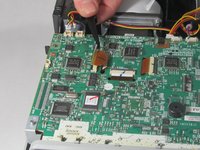
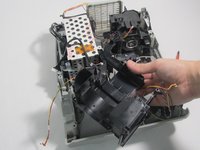
Remove the motherboard from the projector.
-
-
-
Remove the screws that are holding the front cover in place.
-
Remove the white front cover by pulling it away from the lens.
-
-
-
Remove the screws from the L-shaped lens assembly that you see under the motherboard.
-
Remove the lens assembly to gain access to the lamp.
-
-
-
Remove the screws holding the lamp in place.
-
Remove the lamp by gently pulling it out of the device.
-
-
-
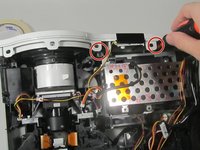
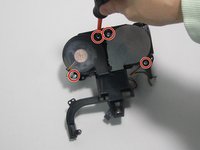
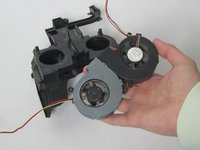
Remove the two screws that hold each fan in its place.
-


To reassemble your device, follow these instructions in reverse order.
crwdns2935221:0crwdne2935221:0
crwdns2935227:0crwdne2935227:0
crwdns2935287:0crwdne2935287:0

Illinois Wesleyan University, Team 1-4, Bullock Spring 2022 crwdns2935289:0Illinois Wesleyan University, Team 1-4, Bullock Spring 2022crwdne2935289:0
IWU-BULLOCK-S22S1G4
crwdns2931471:03crwdne2931471:0
crwdns2935297:05crwdne2935297:0