crwdns2915892:0crwdne2915892:0
If you need to replace the motherboard of your Epson PowerLite 83+, this guide will take you through the steps.
A faulty motherboard may cause ports to cease functioning, the device to not power on, or other issues preventing use of the projector. Cleaning the motherboard and checking the connections may remedy issues. If that doesn't work, you may need to purchase a new one and replace it.
Before beginning this guide, be sure to power off the device and unplug from the power adapter.
crwdns2942213:0crwdne2942213:0
-
-
Remove the eight 5mm Phillips #2 screws securing the projector's bottom cover.
-
-
-
Flip the projector over and lift the top cover from the rear of the projector.
-
Disconnect the slide cover JST connector. Grip the connector and rock it back and forth while apply gentle pressure.
-
-
-
Using a spudger, lift the ribbon cable's locking tab along the length of the cable.
-
Remove the ribbon cable from the connector and place the projector's top cover aside.
-
-
-
-
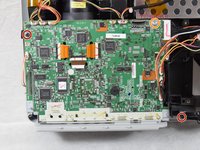
Remove the two 6 mm Phillips #2 screws.
-
Remove the single silver 5 mm Phillips #2 screw.
-
-
-
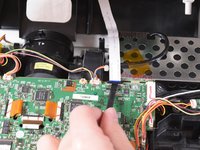
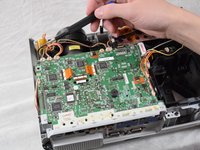
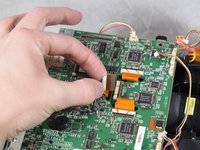
Using your fingernails or a spudger, remove the eleven JST connectors attached to the motherboard.
-
-
-
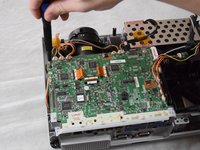
Using a spudger, flip up the plastic locking tabs and gently remove the three ribbon cables from their connectors.
-
-
-
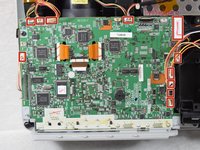
Ensure all JST connectors are clear of the motherboard and that the ribbon cables freely move in their motherboard cutouts.
-
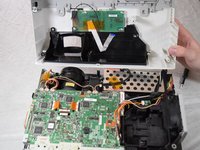
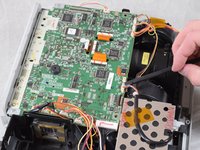
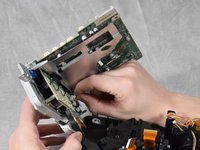
Lift the motherboard from the front side of the projector to clear the ribbon cables.
-
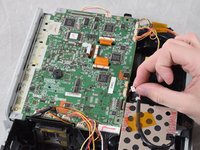
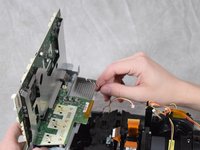
Disconnect the speaker's JST connector on the underside of the motherboard using your fingernails.
-
Remove the motherboard from the case.
-


To reassemble your device, follow these instructions in reverse order.
To reassemble your device, follow these instructions in reverse order.
crwdns2915084:0crwdne2915084:0

Clemson, Team 2-4, Hunter Spring 2022 crwdns2935289:0Clemson, Team 2-4, Hunter Spring 2022crwdne2935289:0
CLEM-HUNTER-S22S2G4
crwdns2931471:04crwdne2931471:0
crwdns2935297:06crwdne2935297:0