crwdns2933423:0crwdne2933423:0

Entry Door Weatherstripping Replacement

crwdns2942213:0crwdne2942213:0

  1. Entry Door Weatherstripping Replacement, Weatherstripping: crwdns2935265:01crwdnd2935265:01crwdnd2935265:02crwdne2935265:0 Entry Door Weatherstripping Replacement, Weatherstripping: crwdns2935265:01crwdnd2935265:02crwdnd2935265:02crwdne2935265:0
    • Use the putty knife to loosen the weatherstripping from the groove.

    • Push outwards from the groove using the putty knife, so the groove doesn't get damaged.

    • The groove is located behind the exterior of the door frame

  2. Entry Door Weatherstripping Replacement: crwdns2935265:02crwdnd2935265:01crwdnd2935265:03crwdne2935265:0 Entry Door Weatherstripping Replacement: crwdns2935265:02crwdnd2935265:02crwdnd2935265:03crwdne2935265:0 Entry Door Weatherstripping Replacement: crwdns2935265:02crwdnd2935265:03crwdnd2935265:03crwdne2935265:0
    • Pull out the Weatherstripping from the groove

    • Use the putty knife if assistance is needed by pushing the weatherstripping outward from the groove

  3. Entry Door Weatherstripping Replacement: crwdns2935265:03crwdnd2935265:01crwdnd2935265:01crwdne2935265:0
    • After removing the weatherstripping, measure the door frame using the measuring tape.

  4. Entry Door Weatherstripping Replacement: crwdns2935265:04crwdnd2935265:01crwdnd2935265:02crwdne2935265:0 Entry Door Weatherstripping Replacement: crwdns2935265:04crwdnd2935265:02crwdnd2935265:02crwdne2935265:0
    • After measuring the door use a pen to mark the new weatherstrip and cut it with the scissors.

    • Be careful when handling scissors.

  5. Entry Door Weatherstripping Replacement: crwdns2935265:05crwdnd2935265:01crwdnd2935265:02crwdne2935265:0 Entry Door Weatherstripping Replacement: crwdns2935265:05crwdnd2935265:02crwdnd2935265:02crwdne2935265:0
    • Using the putty knife, push the new weatherstripping into the door groove.

  6. Entry Door Weatherstripping Replacement: crwdns2935265:06crwdnd2935265:01crwdnd2935265:03crwdne2935265:0 Entry Door Weatherstripping Replacement: crwdns2935265:06crwdnd2935265:02crwdnd2935265:03crwdne2935265:0 Entry Door Weatherstripping Replacement: crwdns2935265:06crwdnd2935265:03crwdnd2935265:03crwdne2935265:0
    • Repeat the process from steps 1-5 for the weatherstrip for the top and left of the doorframe.

  7. Entry Door Weatherstripping Replacement: crwdns2935265:07crwdnd2935265:01crwdnd2935265:01crwdne2935265:0
    • Now measure the door’s width using the measuring tape.

  8. Entry Door Weatherstripping Replacement: crwdns2935265:08crwdnd2935265:01crwdnd2935265:02crwdne2935265:0 Entry Door Weatherstripping Replacement: crwdns2935265:08crwdnd2935265:02crwdnd2935265:02crwdne2935265:0
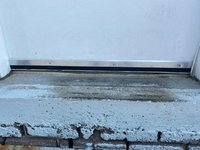
    • Install the Door Sweep by drilling it in using a cordless drill.

    • Drill can be hazardous if not handled with care

crwdns2915888:0crwdne2915888:0

To reassemble your device, follow these instructions in reverse order.

Agilakumaran Shanmugalingam

crwdns2935283:005/10/21crwdne2935283:0

157 crwdns2915208:0crwdne2915208:0

crwdns2935295:0crwdne2935295:0

crwdns2915084:0crwdne2915084:0

York University, Team S1-G26, O'Regan Summer 2021 crwdns2935289:0York University, Team S1-G26, O'Regan Summer 2021crwdne2935289:0

YORK-O'REGAN-SU21S1G26

crwdns2934841:01crwdne2934841:0

crwdns2935303:01crwdne2935303:0

crwdns2944067:00crwdne2944067:0

crwdns2917038:0crwdne2917038:0

crwdns2936625:0crwdne2936625:0:

crwdns2936751:024crwdne2936751:0 3

crwdns2936753:07crwdne2936753:0 26

crwdns2936753:030crwdne2936753:0 172

crwdns2942667:0crwdne2942667:0 4,808