crwdns2915892:0crwdne2915892:0
I LOVE MY 14 Oz EMBER MUG 2. It keeps my coffee at Goldilocks Just-Right temperature all morning. Is a $100+ coffee cup indulgent? Absolutely. Does it bring me joy every day? Yes.
But there's a substantial design flaw. The Ember Mug's battery is not designed to be replaceable and it only last a few years. Around 2 years in, I noticed it was not holding a charge for the 90 minutes or so it did when I got it. This got progressively worse until finally it held no charge at all.
Ember will sell you a replacement mug only but still charge $100 for just the replacement unit. I couldn't stomach that and it felt so wasteful.
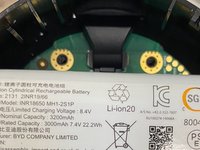
The battery I used was SKU CS-EMB200SL and it cost me $35 on batteryclerk.com. It's a Li-Ion battery pack that comes all connected. Inside are two 18650 Li-Ion batteries. If you really wanted to save $$ you could probably take apart the battery pack and just replace those- maybe another user can do that and upload a guide.
Note: This is for the larger 14 oz version of the regular ember mug 2. The 10 oz version may have a different battery or different design internally.
-
-
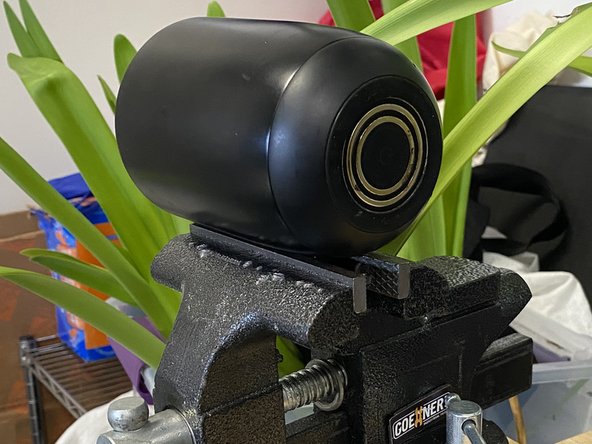
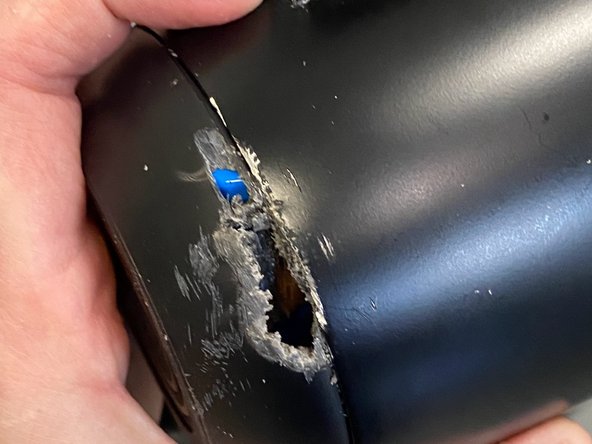
This is the worst part. It does not twist off manually- even with a very strong person (not me) trying. Some have claimed they can twist it off. Kudos to them. . . twisting off was absolutely impossible with this mug.
-
I held it in a vice and cut a small hole in the base right where it is attached to the mug using an oscillating saw. This was overkill of a tool but it worked.
-
Do not cut where I did. I cut on the side opposite of the "Ember" logo just lateral to the handle. This was NOT the best option, but I was lucky (see step 2). If I were to do this again, I would cut on the other side of the handle just between the handle and the "r" of "Ember" logo.
-
Wherever you cut, make sure it is shallow and angle up towards the opening of the mug to avoid the circuit board.
-
-
-
Once you have a hole, brute force the base off.
-
I used a screwdriver to wiggle the base back and forth and once I had a hole in it. It eventually twists off but only after I had created significant movement in it relative to the cup.
-
Be careful to not pull the base too hard as there's a ~1 inch ribbon connector between the base and the mug.
-
Note my terrible choice of where to put the hole- it's right next to the ribbon connector. Again, it would have have been much safer to have gone on the other side of the handle.
-
-
-
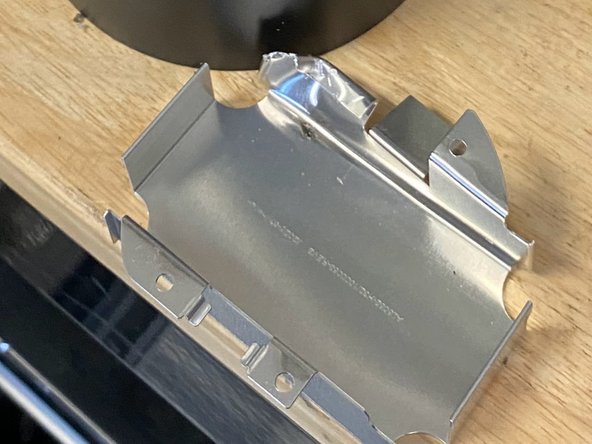
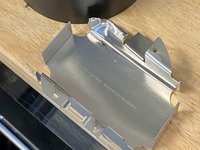
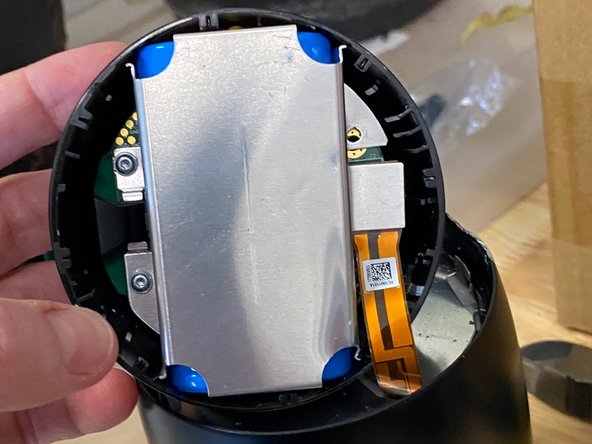
Take out the four screws holding the metal battery cover against the base. I used size 6 Torx bit.
-
Note there's a LOT of open room and nothing important on the other side of the battery cover on the side of the "ember" logo. The yellow arrow points to a little black clip that covers the light on the circuit board and lines up with the logo on the mug. The safest spot to cut and brute force open would be on either side of that plastic clip.
-
Circled in pink you can see the direction of the pins that hold the base against the mug and the direction it eventually twists.
-
In the second photo you can see where I mangled the bottom corner of the metal cover where I had cut a hole in the base- I just cut off the mangled part before replacing it.
-
The third photo shows the base after removing the metal cover.
-
-
-
The ribbon connector pulls off easily
-
In this photo there's a fourth screw holding the board to the base - because I had mangled the metal cover I could take it off without removing the fourth screw. To take the circuit board off the base, I had to remove this screw.
-
-
-
-
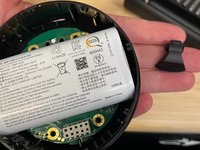
Remove this little plastic piece that holds the board to the base. It is not glued on- it just wiggles off. It covers the light on the circuit board.
-
-
-
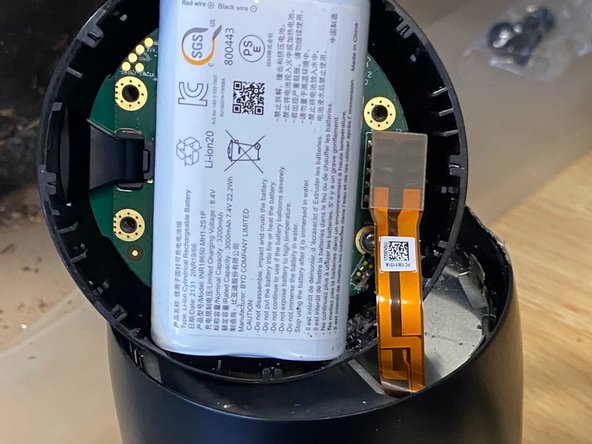
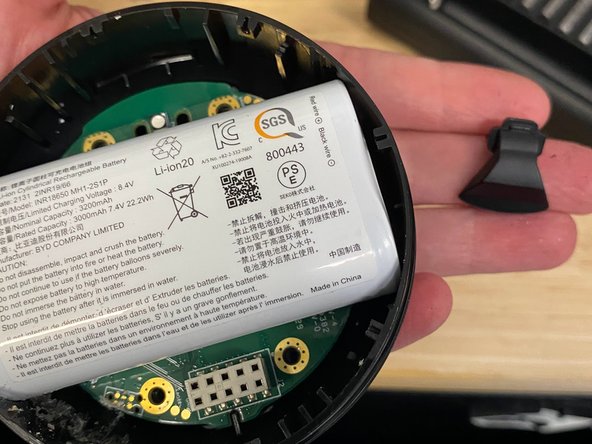
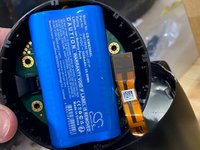
Gently pry the old battery off the circuit board. There's a weak adhesive holding it on.
-
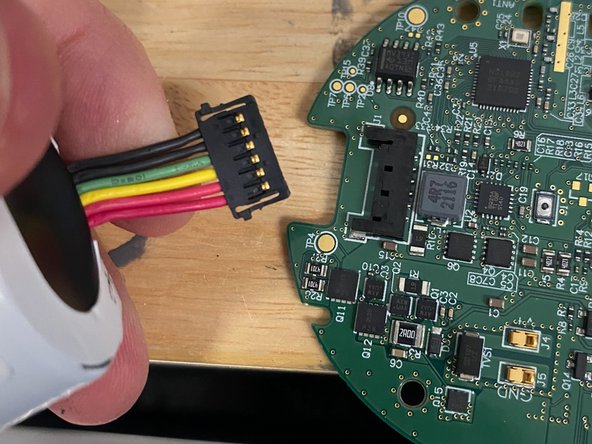
The battery plugs in the back of the board. Press the tiny clips on the side of the wire connector to disconnect.
-
Plug in the new battery. The light will cycle through a few colors for a bit when you plug it back in.
-
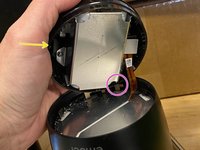
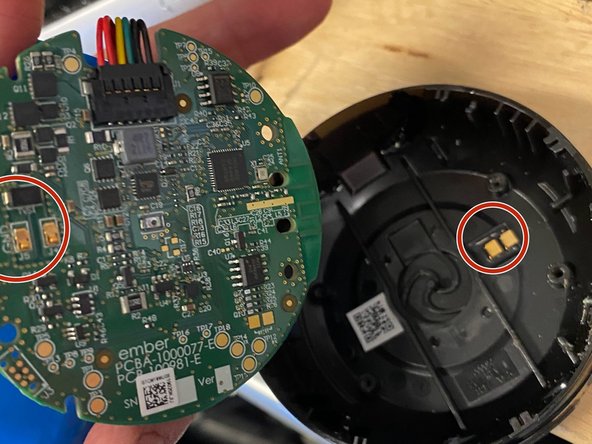
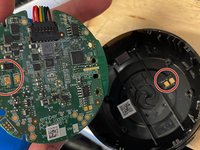
To put it back on the base, use the two metal charging squares on the base and where they connect to the two little pins on the circuit board as your guide (circled in red in the third photo). (or just pay attention as you take it apart).
-
-
-
Put it all back together in reverse order.
-
-
-
I struggled to get the mug back on the base. I blamed this vertical pin (yellow circle) which I think IS the locking pin and the reason the base doesn't twist off. Rather than cut it off, I just bent it flat against the mug and then put the mug back on.
-
I couldn't get the mug to twist back, but I had to lightly hammer it to get back together, and it seemed solid, so I just left it as is.
-
-
-
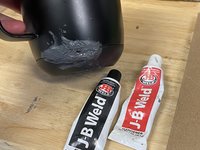
I filed down the mangled plastic and then filled the hole with what I had on hand - JB weld. This doesn't touch the contents so doesn't matter that it's not food safe.
-
One person commented this may not be water-tight any more. The seal seems pretty good all around but I would avoid getting it too wet on the outside (better anyway to prevent corrosion on the underside)
-
-
-
Voila! Because I didn't twist it back on the logo doesn't line up with the light any more but the mug is fully functional.
-


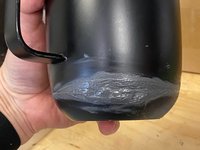


This wasn't the prettiest fix but it works and I'm thrilled to not have had to throw out the entire mug to get it working again.
This wasn't the prettiest fix but it works and I'm thrilled to not have had to throw out the entire mug to get it working again.
crwdns2935221:0crwdne2935221:0
crwdns2935229:04crwdne2935229:0
crwdns2947412:04crwdne2947412:0
This is fantastic! Thanks so much for all the effort you put into this. My Ember is still fully functional, but I know the day will come when it isn't. Lets hope that Ember sees the light and redesigns these mugs for battery replacement. If they don't, I guarantee someone else will.
If there is a product that doesn't need to be connected to an app and allows for simple and quick battery replacement, would you be willing to give it a try?
Walmarts knockoff works as well as my Ember, but is larger, has a lid, and cost $25.
Ember battery in my lasts about 20 minutes now.
Hey thanks so much for the walk through. I just want to add some advise if I may:
I used a small strap wrench- most commonly used for loosening oil filters on vehicles to loosen the base. It turns only about an eight or less of a turn clockwise while the cup is flipped upside down. Then I was able to pry the cup open just using my fingers a little at a time. Mark the cup with a line from the cup through to the bottom once turned with a dry erase or removable mark so you know exactly where to put it back together at. Use the strap wrench to twist it back square with the ember emblem. Thanks!