crwdns2937539:0crwdnd2937539:0crwdne2937539:0
crwdns2942213:0crwdne2942213:0
-
-
Unplug the wall outlet.
-
Release the water hose.
-
Loosen the 4 Phillips screws at the top and 2 1/4 screws below.
-
-
-
Fasten the lid of the washing machine with a large crepe tape. Do not open when removing the top of the machine.
-
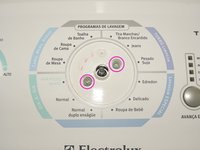
There is no need to remove the glass cover to remove the top of the machine.
-
-
-
Open the top of the washer. Lift the back first. And then the front.
-
Grip the top of the machine with care. Take care not to drop and break the cover glass.
-
Release the power cord and hose clips from the pressure switch.
-
-
-
Remove the Phillips screw.
-
Remove the two plastic fasteners.
-
Remove the protective cap (semi-transparent) on the left side.
-
-
-
Remove the two Phillips screws.
-
Remove the protective cap (semi-transparent) on the right side.
-
-
-
-
To loosen the Control Panel cover, loosen the two Phillips screws. (Left side).
-
-
-
To loosen the Control Panel cover, also loosen the two Phillips screws on the right side.
-
-
-
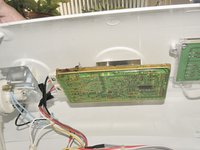
Carefully lift the cover of the Control Panel. In this photo, the glass cover was removed to enlarge the image.
-
-
-
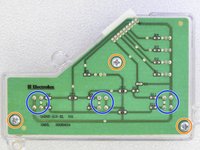
If there is a need to replace the Power Circuit Board, carefully pull out the program select button.
-
And then loosen the two Phillips screws.
-
Disconnect the cables carefully.
-
-
-
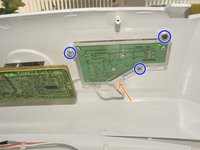
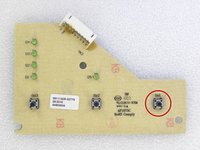
To remove the circuit board from the Panel buttons, remove the three Phillips screws. Disconnect the cable carefully.
-
When removing the circuit board from the buttons, be aware of the three button springs.
-
-
-
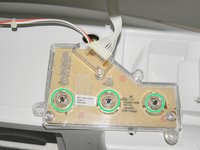
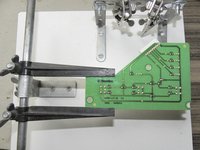
If you need to replace any components on the button circuit board, loosen the three Phillips screws to remove the acrylic shield.
-
The problem with my machine was the power button. With a soldering iron and a sucker, I switched on the power switch.
-
-
-
To change the pressure switch, cut the clamp and remove the
-
Disconnect wires.
-
And then loosen the two Phillips screws.
-
-
-
To assemble the Washing Machine, follow the same procedure, in the reverse order.
-


To reassemble your device, Follow these instructions in reverse order.
To reassemble your device, Follow these instructions in reverse order.
crwdns2935221:0crwdne2935221:0
crwdns2935229:05crwdne2935229:0
crwdns2934873:0crwdne2934873:0
100%

crwdns2934883:0irlandacrwdne2934883:0 crwdns2934875:0crwdne2934875:0
crwdns2934877:0crwdne2934877:0 ›

crwdns2947412:015crwdne2947412:0
muito boa a espricação
Ola amigos boa noite. Estou como uma maquina de lavar eletrolux lt12f já troquei a placa de potencia e a de interface, agora ela fica com todos os leds ligados e o buzzer bipando sem parar.
Será que os amigos podem ame ajudar a identificar qual o problema?
Anael, reveja todas as conexões e certifique-se que a placa principal é do modelo correto.
Sugiro desconectar os outros cabos e fazer um teste.
Minha máquina está girando de um lado só,ela não gira para os dois lados, só para o lado esquerdo,já olhei em baixo,tudo,fios as peças,oque pode ser?De resto tudo funciona,
Emanuela, a placa de circuito é que controla o motor. Portanto essa placa pode estar com defeito.