crwdns2933423:0crwdne2933423:0

Electro-Harmonix Bass Mono Synth Wiring Repair

crwdns2942213:0crwdne2942213:0

  1. Electro-Harmonix Bass Mono Synth Wiring Repair, Electro-Harmonix Bass Mono Synth Wiring Repair: crwdns2935265:01crwdnd2935265:01crwdnd2935265:02crwdne2935265:0 Electro-Harmonix Bass Mono Synth Wiring Repair, Electro-Harmonix Bass Mono Synth Wiring Repair: crwdns2935265:01crwdnd2935265:02crwdnd2935265:02crwdne2935265:0
    • Gently pry the five knobs with an opening tool until they are loose.

    • Once the knobs are loose, gently pull them off.

    • Be careful not to scratch or damage the pedal's paint.

  2. Electro-Harmonix Bass Mono Synth Wiring Repair: crwdns2935265:02crwdnd2935265:01crwdnd2935265:02crwdne2935265:0 Electro-Harmonix Bass Mono Synth Wiring Repair: crwdns2935265:02crwdnd2935265:02crwdnd2935265:02crwdne2935265:0
    • Using the adjustable wrench, loosen the hex nuts by turning them counterclockwise.

    • Once the hex nuts are loose, remove them and their washers by hand.

    • Remember to keep each size of hex nut and washer separate for easy reassembly.

  3. Electro-Harmonix Bass Mono Synth Wiring Repair: crwdns2935265:03crwdnd2935265:01crwdnd2935265:02crwdne2935265:0 Electro-Harmonix Bass Mono Synth Wiring Repair: crwdns2935265:03crwdnd2935265:02crwdnd2935265:02crwdne2935265:0
    • Using the adjustable wrench, remove the hex nuts from the stomp buttons.

    • The stomp buttons will become loose as the hex nuts are removed.

  4. Electro-Harmonix Bass Mono Synth Wiring Repair: crwdns2935265:04crwdnd2935265:01crwdnd2935265:03crwdne2935265:0 Electro-Harmonix Bass Mono Synth Wiring Repair: crwdns2935265:04crwdnd2935265:02crwdnd2935265:03crwdne2935265:0 Electro-Harmonix Bass Mono Synth Wiring Repair: crwdns2935265:04crwdnd2935265:03crwdnd2935265:03crwdne2935265:0
    • Using the adjustable wrench, remove the hex nuts and their washers from the left and right sides of the pedal.

  5. Electro-Harmonix Bass Mono Synth Wiring Repair: crwdns2935265:05crwdnd2935265:01crwdnd2935265:03crwdne2935265:0 Electro-Harmonix Bass Mono Synth Wiring Repair: crwdns2935265:05crwdnd2935265:02crwdnd2935265:03crwdne2935265:0 Electro-Harmonix Bass Mono Synth Wiring Repair: crwdns2935265:05crwdnd2935265:03crwdnd2935265:03crwdne2935265:0
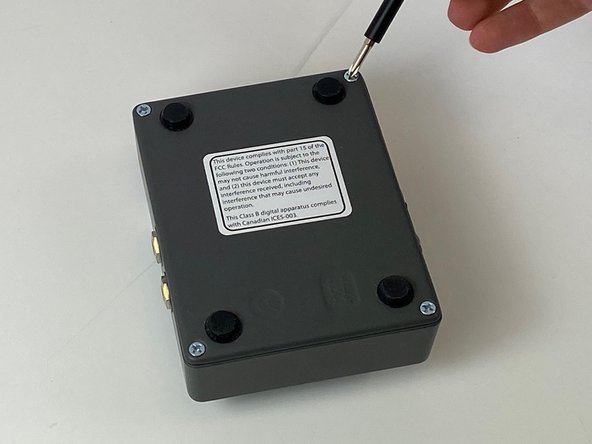
    • Use a Phillips #1 screwdriver to remove all four screws from the back of the device.

    • Remove the back plate from the pedal.

  6. Electro-Harmonix Bass Mono Synth Wiring Repair: crwdns2935265:06crwdnd2935265:01crwdnd2935265:03crwdne2935265:0 Electro-Harmonix Bass Mono Synth Wiring Repair: crwdns2935265:06crwdnd2935265:02crwdnd2935265:03crwdne2935265:0 Electro-Harmonix Bass Mono Synth Wiring Repair: crwdns2935265:06crwdnd2935265:03crwdnd2935265:03crwdne2935265:0
    • The motherboard will be loose at this step except for the 9V power port which is snug in the case.

    • Using an opening tool, push or pry the 9V power port free of the case.

    • Gently remove the motherboard.

    • The stomp buttons will be loose at this step, so remember where they came from.

  7. Electro-Harmonix Bass Mono Synth Wiring Repair: crwdns2935265:07crwdnd2935265:01crwdnd2935265:01crwdne2935265:0
    • Put on personal protective equipment. This includes safety goggles, gloves, and closed toed shoes.

    • Using the soldering tool, solder the damaged connections of the I/O jacks on the bottom of the motherboard.

    • If you have no experience with soldering, follow this guide.

crwdns2915888:0crwdne2915888:0

To reassemble your device, follow these instructions in reverse order.

crwdns2935227:0crwdne2935227:0

Augustine Barr

crwdns2935283:009/08/21crwdne2935283:0

163 crwdns2915208:0crwdne2915208:0

crwdns2935295:0crwdne2935295:0

crwdns2915084:0crwdne2915084:0

Embry-Riddle Aeronautical University, Team 9-12, Rauch Fall 2021 crwdns2935289:0Embry-Riddle Aeronautical University, Team 9-12, Rauch Fall 2021crwdne2935289:0

ERAU-RAUCH-F21S9G12

crwdns2931471:03crwdne2931471:0

crwdns2935297:02crwdne2935297:0

crwdns2944067:00crwdne2944067:0

crwdns2917038:0crwdne2917038:0

crwdns2936625:0crwdne2936625:0:

crwdns2936751:024crwdne2936751:0 0

crwdns2936753:07crwdne2936753:0 4

crwdns2936753:030crwdne2936753:0 12

crwdns2942667:0crwdne2942667:0 358