crwdns2933423:0crwdne2933423:0
crwdns2947577:0crwdnd2947577:0crwdne2947577:0

Eee Pad Transformer Prime TF201 LED Chip Replacement

crwdns2869540:0crwdne2869540:0: 885

crwdns2959988:0crwdne2959988:0

crwdns2959990:0crwdne2959990:0
3
crwdns2959992:0crwdne2959992:0
19
crwdns2959994:0crwdne2959994:0
102
crwdns2959996:0crwdne2959996:0
885
crwdns2955950:0crwdne2955950:0: 2

crwdns2960004:02crwdne2960004:0.

crwdns2959984:0crwdne2959984:0: 0

crwdns2959956:0crwdne2959956:0

crwdns2959986:0crwdne2959986:0: 0

crwdns2959958:0crwdne2959958:0

crwdns2955944:0crwdne2955944:0: crwdns2931287:010crwdne2931287:0
crwdns2955970:0crwdne2955970:0: crwdns2937799:0crwdne2937799:0
Eee Pad Transformer Prime TF201 LED Chip Replacement

crwdns2915892:0crwdne2915892:0

crwdns2959928:0crwdne2959928:0 ↓

The LED Chip is responsible for the rear camera flash and flashlight functions. This is a guide to replacing the chip with a new one, if the current one in your device is malfunctioning.

NOTE: You may omit step six of this guide, removing the battery.

crwdns2959930:0crwdne2959930:0

crwdns2943215:0crwdne2943215:0

    1. Eee Pad Transformer Prime TF201 LED Chip Replacement, Opening Your Device: crwdns2935265:01crwdnd2935265:01crwdnd2935265:01crwdne2935265:0
      • Power down your device.

      • Place the small suction cup on a corner of the screen and lightly pull up to expose a seam between the screen and case.

      crwdns2952109:0crwdne2952109:0

      crwdns2917038:0crwdne2917038:0

    2. Eee Pad Transformer Prime TF201 LED Chip Replacement: crwdns2935265:02crwdnd2935265:01crwdnd2935265:03crwdne2935265:0 Eee Pad Transformer Prime TF201 LED Chip Replacement: crwdns2935265:02crwdnd2935265:02crwdnd2935265:03crwdne2935265:0 Eee Pad Transformer Prime TF201 LED Chip Replacement: crwdns2935265:02crwdnd2935265:03crwdnd2935265:03crwdne2935265:0
      • Insert the plastic opening tool into the seam near the corner of the device.

      • Slowly slide the tool around the perimeter of the device, gradually prying up the screen.

      • It is normal to hear snaps as the spring clips holding the screen in place are released.

      • It is also normal to hear adhesive separating, as a small amount is used to help secure the screen.

      crwdns2952109:0crwdne2952109:0

      crwdns2917038:0crwdne2917038:0

    3. Eee Pad Transformer Prime TF201 LED Chip Replacement: crwdns2935265:03crwdnd2935265:01crwdnd2935265:03crwdne2935265:0 Eee Pad Transformer Prime TF201 LED Chip Replacement: crwdns2935265:03crwdnd2935265:02crwdnd2935265:03crwdne2935265:0 Eee Pad Transformer Prime TF201 LED Chip Replacement: crwdns2935265:03crwdnd2935265:03crwdnd2935265:03crwdne2935265:0
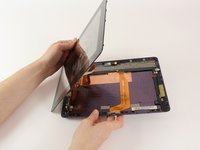
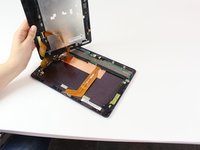
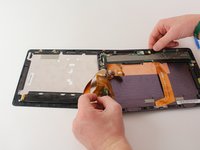
      • When the screen is free of all spring clips and adhesive, slowly open the device like a clam shell with the hinge being the left hand side of the device.

      • Do not completely separate the screen from the case by more than a few inches, as they are still connected by three orange ribbon cables.

      • Safely place the device back on the table by laying the screen face down.

      • There will be some slight overlapping of the back of the case over the screen.

      crwdns2952109:0crwdne2952109:0

      crwdns2917038:0crwdne2917038:0

    4. Eee Pad Transformer Prime TF201 LED Chip Replacement: crwdns2935265:04crwdnd2935265:01crwdnd2935265:02crwdne2935265:0 Eee Pad Transformer Prime TF201 LED Chip Replacement: crwdns2935265:04crwdnd2935265:02crwdnd2935265:02crwdne2935265:0
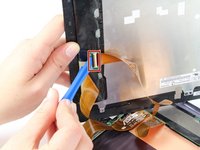
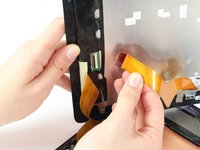
      • Disconnect the ribbon cable by placing a plastic opening tool under the black plastic tab that is on the opposite side of the port as the ribbon cable.

      • Pry upward until the black tab moves 90 degrees, and gently pull the ribbon cable out of the port.

      crwdns2952109:0crwdne2952109:0

      crwdns2917038:0crwdne2917038:0

    5. Eee Pad Transformer Prime TF201 LED Chip Replacement: crwdns2935265:05crwdnd2935265:01crwdnd2935265:01crwdne2935265:0
      • Place a plastic opening tool under the white plastic tab on one of the ribbon cable ports.

      • Pry upward until the black tab moves 90 degrees, and gently pull the ribbon cable out of the port.

      • Repeat the previous process to remove the other ribbon cable.

      crwdns2952109:0crwdne2952109:0

      crwdns2917038:0crwdne2917038:0

    6. Eee Pad Transformer Prime TF201 LED Chip Replacement: crwdns2935265:06crwdnd2935265:01crwdnd2935265:01crwdne2935265:0
      • Remove the battery (secured by six screws and a white wire connector) by following the removal portion of this battery replacement guide.

      • The device that we wrote this guide for did not come with a battery, so we cannot include it in our own guide steps.

      • The battery is removed during all repairs to protect against short circuits, shocks, and internal damage to the device.

      crwdns2952109:0crwdne2952109:0

      crwdns2917038:0crwdne2917038:0

    1. Eee Pad Transformer Prime TF201 LED Chip Replacement, LED Chip: crwdns2935265:07crwdnd2935265:01crwdnd2935265:02crwdne2935265:0 Eee Pad Transformer Prime TF201 LED Chip Replacement, LED Chip: crwdns2935265:07crwdnd2935265:02crwdnd2935265:02crwdne2935265:0
      crwdns2935267:0crwdne2935267:0
      Tweezers
      $4.99
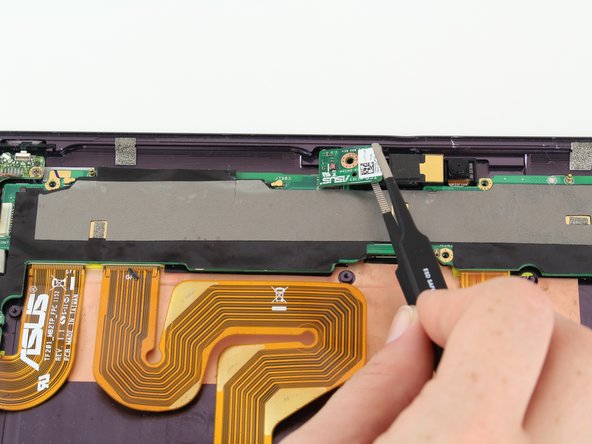
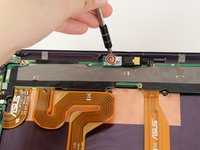
      • With a Phillips #00 screwdriver, remove the one 3.8 mm screw in the LED chip. The LED chip is a small green chip (about 1 square centimeter) located at the top center of the device.

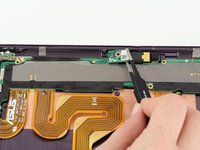
      • Gently remove the chip with a pair of precision tweezers by grabbing the chip from one side, being careful not to pinch on a black piece of hardware on the chip.

      crwdns2952109:0crwdne2952109:0

      crwdns2917038:0crwdne2917038:0

crwdns2915888:0crwdne2915888:0

To reassemble your device, follow these instructions in reverse order.

crwdns2935221:0crwdne2935221:0

Aaron Morland

crwdns2935283:010/06/16crwdne2935283:0

346 crwdns2915208:0crwdne2915208:0

crwdns2935297:03crwdne2935297:0

crwdns2935287:0crwdne2935287:0

Cal Poly, Team 10-1, Livingston Fall 2016 crwdns2935289:0Cal Poly, Team 10-1, Livingston Fall 2016crwdne2935289:0

CPSU-LIVINGSTON-F16S10G1

crwdns2931471:02crwdne2931471:0

crwdns2935297:072crwdne2935297:0

crwdns2947412:00crwdne2947412:0

crwdns2917038:0crwdne2917038:0

crwdns2936625:0crwdne2936625:0:

crwdns2936751:024crwdne2936751:0 3

crwdns2936753:07crwdne2936753:0 19

crwdns2936753:030crwdne2936753:0 102

crwdns2959996:0crwdne2959996:0 885