crwdns2933423:0crwdne2933423:0
crwdns2947577:0crwdnd2947577:0crwdne2947577:0

Eclipse 180BL Battery Replacement

crwdns2942213:0crwdne2942213:0

    1. Eclipse 180BL Battery Replacement, Battery: crwdns2935265:01crwdnd2935265:01crwdnd2935265:01crwdne2935265:0
      • Remove the two screws located on the bottom of the device with a phillips head screw driver.

      • The two screws can be removed using the PH00 head from the iFixit repair toolkit.

      • Both screws are 1/8 inch in length.

      • The bottom cap will come off to reveal the inside main component.

      crwdns2952109:0crwdne2952109:0

      crwdns2917038:0crwdne2917038:0

    2. Eclipse 180BL Battery Replacement: crwdns2935265:02crwdnd2935265:01crwdnd2935265:02crwdne2935265:0 Eclipse 180BL Battery Replacement: crwdns2935265:02crwdnd2935265:02crwdnd2935265:02crwdne2935265:0
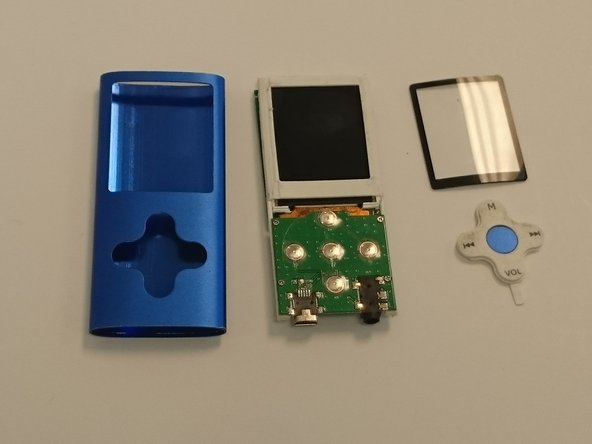
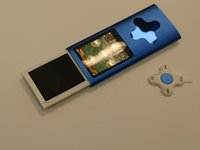
      • Remove the main inner component using Spudger, by pushing on the USB port. This will take some force.

      • Hold on the sides with your fingers, and push to release from the top.

      crwdns2952109:0crwdne2952109:0

      crwdns2917038:0crwdne2917038:0

    3. Eclipse 180BL Battery Replacement: crwdns2935265:03crwdnd2935265:01crwdnd2935265:03crwdne2935265:0 Eclipse 180BL Battery Replacement: crwdns2935265:03crwdnd2935265:02crwdnd2935265:03crwdne2935265:0 Eclipse 180BL Battery Replacement: crwdns2935265:03crwdnd2935265:03crwdnd2935265:03crwdne2935265:0
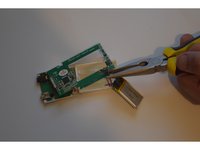
      • The plastic LCD cover and the key pad will now be loose; they were held in place by the tension between the case and the internal main component.

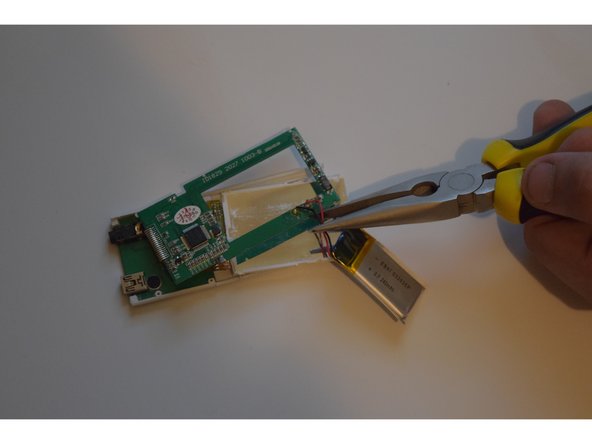
      • Locate the large square pack with a black and red wire coming out of it, this is the battery.

      • Cut the red and black wires to remove the old battery.

      crwdns2952109:0crwdne2952109:0

      crwdns2917038:0crwdne2917038:0

    4. Eclipse 180BL Battery Replacement: crwdns2935265:04crwdnd2935265:01crwdnd2935265:01crwdne2935265:0
      • To Replace, connect the two new lines ( red and black) between the new battery and the device.

      • You have successfully replaced the battery!

      crwdns2952109:0crwdne2952109:0

      crwdns2917038:0crwdne2917038:0

crwdns2915888:0crwdne2915888:0

To reassemble your device, follow these instructions in reverse order.

crwdns2935221:0crwdne2935221:0

crwdns2935229:03crwdne2935229:0

Thomas Schwarz

crwdns2935283:009/07/15crwdne2935283:0

523 crwdns2915208:0crwdne2915208:0

crwdns2935297:03crwdne2935297:0

crwdns2947412:00crwdne2947412:0

crwdns2917038:0crwdne2917038:0

crwdns2936625:0crwdne2936625:0:

crwdns2936751:024crwdne2936751:0 2

crwdns2936753:07crwdne2936753:0 34

crwdns2936753:030crwdne2936753:0 85

crwdns2942667:0crwdne2942667:0 2,331