crwdns2915892:0crwdne2915892:0
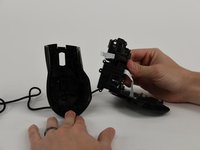
This guide contains steps to clean and disassemble the EVGA x17 gaming mouse. To ensure easy and simple repairs follow this guide to assist in disassembling of the mouse and proper careful cleaning to eliminate troubleshooting caused by dirt and debris.
crwdns2942213:0crwdne2942213:0
-
-
Remove the mouse skates to reveal 5 screws.
-
-
-
Use a Phillips #00 screwdriver to remove the 5 screws that secure the bottom panel
-
-
-
Remove the weight chamber cover and clean with a Q-tip or soft fabric.
-
-
-
Slowly slide a spudger into and around the bottom of the panel, prying until a "popping" sound is heard.
-
Use a Q-tip or soft fabric to clean the bottom panel.
-
-
-
-
Remove the 13 screws on the interior.
-
-
-
Once all screws are removed, carefully slide the middle section out and clean with a Q–tip or soft fabric.
-
Clean the top panel with a Q-tip or soft fabric.
-
-
-
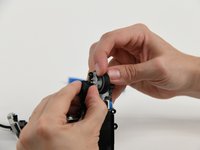
Remove the smaller sized cross head screws from the piece labeled A29N001-C V1.0 RU 94V-0. Remove truss head tapping screws from the side of the mouse wheel.
-
Remove 4 screws from the piece labeled AZAC001-A V1.0.
-
-
-
Pull transistor from the side of the mouse wheel.
-
-
-
Carefully slide a spudger between the opaque plastic that holds the scroll wheel in place.
-
Pry the plastic away from the wheel, allowing for the scroll wheel to be removed.
-
-
-
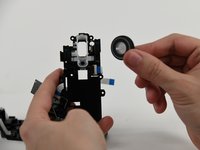
Remove the scroll wheel cover and replace plastic wheel (or cover if that appears to be the issue.) Clean both with Q-tip or soft fabric.
-


To reassemble your device, follow these instructions in reverse order.
crwdns2935221:0crwdne2935221:0
crwdns2935227:0crwdne2935227:0
crwdns2935287:0crwdne2935287:0

University of Colorado Denver, Team 1-4, Campeau Fall 2023 crwdns2935289:0University of Colorado Denver, Team 1-4, Campeau Fall 2023crwdne2935289:0
UCDENVER-CAMPEAU-F23S1G4
crwdns2931471:07crwdne2931471:0
crwdns2935297:06crwdne2935297:0
crwdns2947410:01crwdne2947410:0
Thanks for this walkthrough!