crwdns2915892:0crwdne2915892:0
In this guide you will be able to remove the cover on the power cord and remove and reattach the power cord for the Dyson Ball Animal.
crwdns2942213:0crwdne2942213:0
-
-
Turn off and unplug the vacuum.
-
Remove the vacuum canister from the front of the vacuum.
-
-
-
Flip the vacuum around and remove the hose so it is not blocking the back of the vacuum.
-
-
-
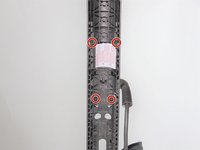
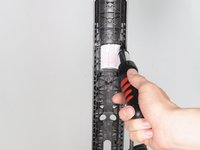
There are four 15mm screws that must be removed with a Torx T15 screwdriver.
-
-
-
-
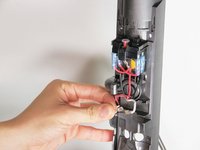
After all the screws are released there are two tabs that must be pressed in and towards the center.
-
-
-
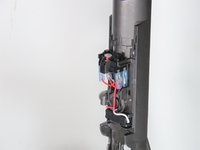
After removing the two tabs gently pull the face off the power supply.
-
-
-
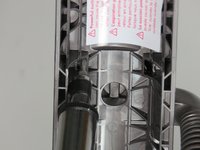
Follow the black cord from the power cord.
-
Pinch the plastic piece.
-
Remove from the metal tongue.
-
-
-
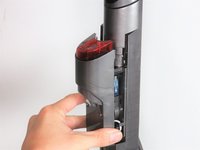
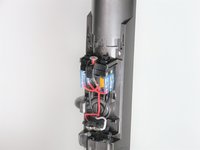
There is also a black case that needs to be opened in order to remove the power cord.
-
After opening the case pull apart the wire and attach the new wire.
The link from the section on this page Dyson Ball Animal Troubleshooting
which was about the brush not working took me to this page in error.
Me too. Now where do I go to troubleshoot the brush bar? So frustrating!
PUBLIC SERVICE ANNOUNCEMENT - Do NOT follow these instructions, they are a road to nowhere!! IF there was any value to them, the author would instruct you to purchase a new electric wire as the first step. Even then, the author would leave you hanging as to exactly how to replace it. It's not so easy to put housing back together again after you've dismantled it. Tiny springs and level, lots of headaches. AVOID!!!
I would go with what Eric Spryra advises. I tried following a Dyson engineer's video to replace the power cable. It is a lot more complicated to do than what is shown here. Even the Dysons engineers' video, which shows more than this, is difficult to follow. Ended up replacing the cable but neither of the push switches work now. On opening the housing, all components fell out. Leave till you get more detailed instructions.
Raymond Bellamy.
-


To reassemble your device, follow these instructions in reverse order.
To reassemble your device, follow these instructions in reverse order.
crwdns2935221:0crwdne2935221:0
crwdns2935229:04crwdne2935229:0
crwdns2915084:0crwdne2915084:0

Cal Poly, Team S15-G5, Banghart Spring 2017 crwdns2935289:0Cal Poly, Team S15-G5, Banghart Spring 2017crwdne2935289:0
CPSU-BANGHART-S17S15G5
crwdns2931471:04crwdne2931471:0
crwdns2935297:017crwdne2935297:0
crwdns2947412:03crwdne2947412:0
Great tutorial! The pictures were awesome, I replaced my cord in about 15 minutes thanks to this post. The only thing you might want to add is the gray switch with the spring. Mine fell out while I was trying to put the unit back together and I had to research how it went back together correctly. Thanks again!
Jim
I had the same spring lever issue. This video shows how to replace them.
Thank you for the YouTube link on the button reassembly. I should have expected it to be sitting loaded when I disassembled it.