crwdns2931315:0crwdnd2931315:0crwdne2931315:0
crwdns2942213:0crwdne2942213:0
-
crwdns2935201:0crwdne2935201:0 crwdns2935203:0crwdne2935203:0
-
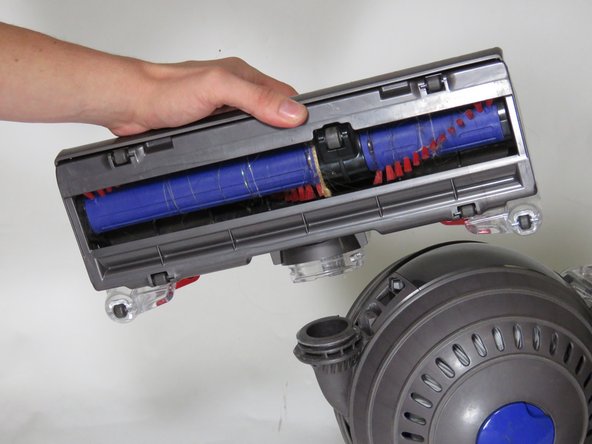
Recline the vacuum on its back and position the brushbar up in the air.
-
-
crwdns2935201:0crwdne2935201:0 crwdns2935203:0crwdne2935203:0
-
Pull the red ring around the base of the brush head down and away from the body.
-
-
-
crwdns2935201:0crwdne2935201:0 crwdns2935203:0crwdne2935203:0
-
Pull the brushbar out from the vacuum.
-
-
crwdns2935201:0crwdne2935201:0 crwdns2935203:0crwdne2935203:0
-
Pull up the red tabs on the top of the brushbar.
-
-
crwdns2935201:0crwdne2935201:0 crwdns2935203:0crwdne2935203:0
-
Remove the front panel of the brushbar.
-
-
crwdns2935201:0crwdne2935201:0 crwdns2935203:0crwdne2935203:0
-
Remove the four screws with a Torx T10 Screwdriver.
-
-
crwdns2935201:0crwdne2935201:0 crwdns2935203:0crwdne2935203:0
-
Lift the brushbar away from the housing while pulling it out to the side.
-


crwdns2935221:0crwdne2935221:0
crwdns2935229:021crwdne2935229:0
crwdns2915084:0crwdne2915084:0

Cal Poly, Team S15-G5, Banghart Spring 2017 crwdns2935289:0Cal Poly, Team S15-G5, Banghart Spring 2017crwdne2935289:0
CPSU-BANGHART-S17S15G5
crwdns2931471:04crwdne2931471:0
crwdns2935297:016crwdne2935297:0
crwdns2944067:015crwdne2944067:0
I'm like to know if this works for the Dyson ball animal2 as well
It does work
ade 23 -
We used this guide to clean the brushbar assembly of the DC41 animal too. Thank you SO MUCH for writing it!!! We’d never have tried pulling the bar off sideways.
Thanks to MaireadNye for the easy to follow guide. I used this to remove and clean the brush bar and its housing on a Dyson Animal 2 upright vacuum. The four screws securing the brush bar were not T10 Torx, but rather Phillips head, so no big deal. What took the longest amount of time was searching for my Torx tools before I began, which is unlike me. I usually grab tools as I go, but since only one was required, I decided to (unnecessarily) have it ready to go. I used vinegar first to get out a soy sauce type smell, but dish soap was what worked. Thanks again!
(And thanks to Dyson for making stuff like this user-friendly!)
what is the part and part number of the wheel in between the brush bar?