crwdns2933423:0crwdne2933423:0

DualShock 4 Charging Port Replacement

crwdns2942213:0crwdne2942213:0

  1. DualShock 4 Charging Port Replacement, Controller: crwdns2935265:01crwdnd2935265:01crwdnd2935265:01crwdne2935265:0
    • Using the Phillips #00 Screwdriver, remove the four 6.0 mm screws securing the rear cover to the controller.

    • Be careful loosening the screws, using the wrong sized screwdriver, or letting the screwdriver slip can permanently damage the screw heads, making removal extremely difficult.

  2. DualShock 4 Charging Port Replacement: crwdns2935265:02crwdnd2935265:01crwdnd2935265:03crwdne2935265:0 DualShock 4 Charging Port Replacement: crwdns2935265:02crwdnd2935265:02crwdnd2935265:03crwdne2935265:0 DualShock 4 Charging Port Replacement: crwdns2935265:02crwdnd2935265:03crwdnd2935265:03crwdne2935265:0
    • Four fragile plastic clips hold the casing together. You can see their locations more clearly in this guide.

    • The clips help hold the seams together. If you break these clips, the controller will still work.

    • Beginning with the left handle:

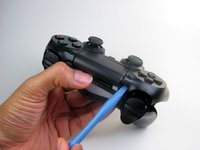
    • Pinch the left handle of the controller to introduce an opening.

    • Wedge a plastic opening tool into the opening and slide it up towards the joystick.

    • Pull down on tool to pry open the casing.

    • Repeat these steps for the right handle.

  3. DualShock 4 Charging Port Replacement: crwdns2935265:03crwdnd2935265:01crwdnd2935265:03crwdne2935265:0 DualShock 4 Charging Port Replacement: crwdns2935265:03crwdnd2935265:02crwdnd2935265:03crwdne2935265:0 DualShock 4 Charging Port Replacement: crwdns2935265:03crwdnd2935265:03crwdnd2935265:03crwdne2935265:0
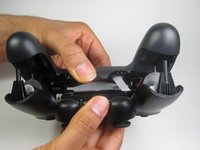
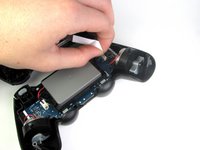
    • Wedge a plastic opening tool into the case-splittings and pull down to crack open the casing near the following buttons:

    • Share button

    • Options button

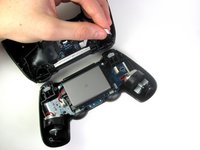
    • Split the plastic covers of the controller apart, taking note that they will still be attached by circuit board ribbons.

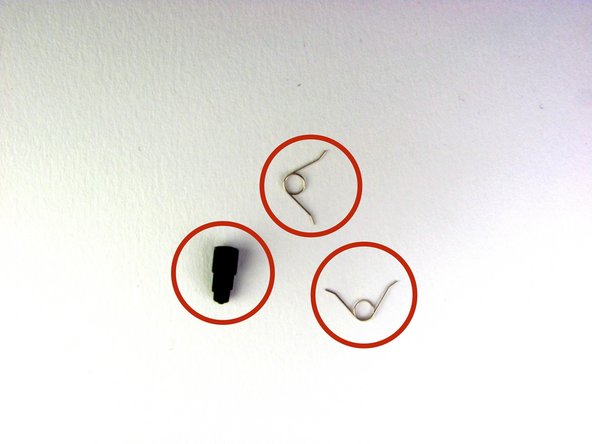
    • Three small pieces are often released from the framework. To prevent loss, maintain a controlled work field.

    • 2 Trigger Springs

    • 1 Grey Reset Button Extension

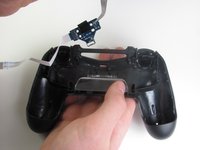
  4. DualShock 4 Charging Port Replacement, Charging Port: crwdns2935265:04crwdnd2935265:01crwdnd2935265:03crwdne2935265:0 DualShock 4 Charging Port Replacement, Charging Port: crwdns2935265:04crwdnd2935265:02crwdnd2935265:03crwdne2935265:0 DualShock 4 Charging Port Replacement, Charging Port: crwdns2935265:04crwdnd2935265:03crwdnd2935265:03crwdne2935265:0
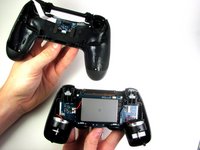
    • Detach the motherboard ribbon connecting the two sides of the controller by using your fingers.

    • After the two halves are separated, place the top of the controller off to the side.

  5. DualShock 4 Charging Port Replacement: crwdns2935265:05crwdnd2935265:01crwdnd2935265:03crwdne2935265:0 DualShock 4 Charging Port Replacement: crwdns2935265:05crwdnd2935265:02crwdnd2935265:03crwdne2935265:0 DualShock 4 Charging Port Replacement: crwdns2935265:05crwdnd2935265:03crwdnd2935265:03crwdne2935265:0
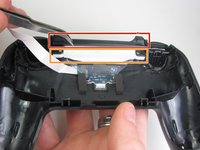
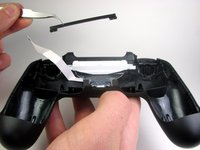
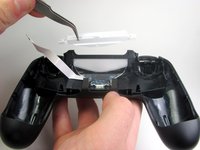
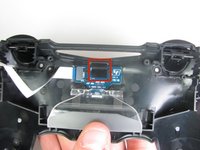
    • Remove the two screws holding the sub-assembly together. Then use the blunt forceps to grab the 2 inch black plastic connector labeled in the picture with the red box.

    • Use the blunt forceps to grab the 2 inch white piece of plastic labeled with the orange box.

  6. DualShock 4 Charging Port Replacement: crwdns2935265:06crwdnd2935265:01crwdnd2935265:03crwdne2935265:0 DualShock 4 Charging Port Replacement: crwdns2935265:06crwdnd2935265:02crwdnd2935265:03crwdne2935265:0 DualShock 4 Charging Port Replacement: crwdns2935265:06crwdnd2935265:03crwdnd2935265:03crwdne2935265:0
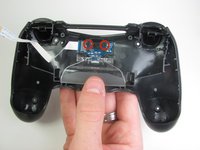
    • With the clear piece of plastic pushed in, take the transparent white piece out from the top of the controller.

    • Keep the clear plastic piece on the controller, but keep it pushed down to provide room for charger port replacement.

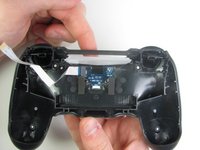
    • Use the Philips #00 Screwdriver to unscrew the two 4.0 mm screws that attach the charging port to the rear cover.

  7. DualShock 4 Charging Port Replacement: crwdns2935265:07crwdnd2935265:01crwdnd2935265:03crwdne2935265:0 DualShock 4 Charging Port Replacement: crwdns2935265:07crwdnd2935265:02crwdnd2935265:03crwdne2935265:0 DualShock 4 Charging Port Replacement: crwdns2935265:07crwdnd2935265:03crwdnd2935265:03crwdne2935265:0
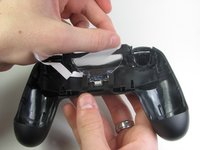
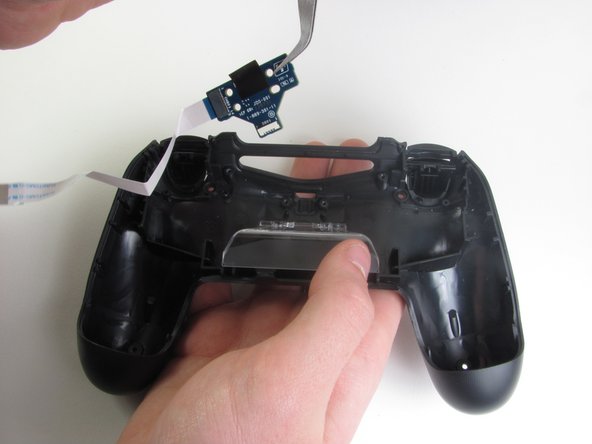
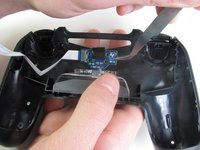
    • With the blunt forceps remove the top part of the black tape connecting the charging port to the plastic portion of the controller.

    • Grab the PCB of the charging port from the side and pull upwards slowly to remove from the controller.

    • Do NOT pull the blue PCB rapidly upwards; instead move the piece side to side to create some free space between the controller and PCB.

crwdns2915888:0crwdne2915888:0

To reassemble your device, follow these instructions in reverse order.

crwdns2935229:095crwdne2935229:0

Bijan Vakilifathi

crwdns2935283:001/21/14crwdne2935283:0

1,687 crwdns2915208:0crwdne2915208:0

crwdns2935295:0crwdne2935295:0

crwdns2915084:0crwdne2915084:0

Cal Poly, Team 6-21, Maness Winter 2014 crwdns2935289:0Cal Poly, Team 6-21, Maness Winter 2014crwdne2935289:0

CPSU-MANESS-W14S6G21

crwdns2931471:04crwdne2931471:0

crwdns2935297:040crwdne2935297:0

crwdns2944067:032crwdne2944067:0

Where can i get the USB charger part from? mine is damaged so the lightbar and charger doesnt work but it will still connect to my PS4 until the battery runs out.

Matthew - crwdns2934203:0crwdne2934203:0

Did you get it repaired? I need help with mine

Ken Wood -

Where can you get a new DualShock 4 Charging Port Replacement?

Tony - crwdns2934203:0crwdne2934203:0

Have you found them?

jee -

Looking for a new charging port .?

Scott Ruskay - crwdns2934203:0crwdne2934203:0

crwdns2917038:0crwdne2917038:0

crwdns2936625:0crwdne2936625:0:

crwdns2936751:024crwdne2936751:0 45

crwdns2936753:07crwdne2936753:0 331

crwdns2936753:030crwdne2936753:0 1,347

crwdns2942667:0crwdne2942667:0 327,350