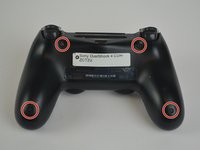
crwdns2915892:0crwdne2915892:0
This will show you how to remove the outer shell of the Dualshock 4 so you can replace it or get inside the controller.
crwdns2942213:0crwdne2942213:0
-
-
Unscrew the four 6.5mm screws, using a Phillips-Head screwdriver.
-
Pry the two halves of the shell apart using a plastic opening tool.
-
-
-
crwdns2935267:0crwdne2935267:0Tweezers$4.99
-
Pull the ribbon cable out of the motherboard port to fully separate the two halves, using a pair of tweezers.
-


To reassemble your device, follow these instructions in reverse order.
To reassemble your device, follow these instructions in reverse order.
crwdns2935221:0crwdne2935221:0
crwdns2935229:07crwdne2935229:0
crwdns2915084:0crwdne2915084:0

USF Tampa, Team S1-G5, Leahy Fall 2017 crwdns2935289:0USF Tampa, Team S1-G5, Leahy Fall 2017crwdne2935289:0
USFT-LEAHY-F17S1G5
crwdns2931471:03crwdne2931471:0
crwdns2935297:028crwdne2935297:0
crwdns2947410:01crwdne2947410:0
FYI for anyone looking: re-shelling a v1 controller with v2 innards is possible but incredibly time consuming. My 20th anniversary controller died (v3 circuit board) so I transplanted all parts from a PS-Pro controller. It requires lots of cutting and trimming of the shell to match the inner profile of the newer shell to enable it to close up cleanly. There are no cuts or modifications needed to the V2 controller components however, but the new style light bar need migrating across.