crwdns2933423:0crwdne2933423:0

Droid Ultra XT1080 Battery Replacement

crwdns2942213:0crwdne2942213:0

  1. Droid Ultra XT1080 Battery Replacement, Battery: crwdns2935265:01crwdnd2935265:01crwdnd2935265:01crwdne2935265:0
    • Remove the SIM card tray from the side of the device using a plastic opening tool.

  2. Droid Ultra XT1080 Battery Replacement: crwdns2935265:02crwdnd2935265:01crwdnd2935265:01crwdne2935265:0
    • After properly removing the SIM card tray take your spudger and press it in between the plastic case and the frame of the device until you hear a snap.

    • Work your way from the top and the other side to confirm all the clips are disconnected.

    • Be gentle when performing this so you don't crack or break the plastic.

  3. Droid Ultra XT1080 Battery Replacement: crwdns2935265:03crwdnd2935265:01crwdnd2935265:01crwdne2935265:0
    • Remove the five screws on top of the device with a T5 Torx.

    • Remove the single screw holding the camera with a T4 Torx.

    • Remove the two screws on the bottom of the device with a T5 Torx.

  4. Droid Ultra XT1080 Battery Replacement: crwdns2935265:04crwdnd2935265:01crwdnd2935265:02crwdne2935265:0 Droid Ultra XT1080 Battery Replacement: crwdns2935265:04crwdnd2935265:02crwdnd2935265:02crwdne2935265:0
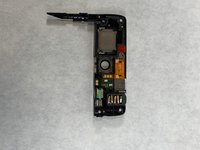
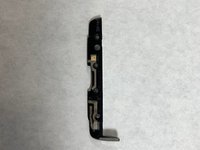
    • After the top and bottom screws are removed remove the top and bottom plastic pieces that were secured to the device.

  5. Droid Ultra XT1080 Battery Replacement: crwdns2935265:05crwdnd2935265:01crwdnd2935265:01crwdne2935265:0
    • Begin to gently pry up the battery from the frame with a plastic opening tool to release it from its adhesive securing.

  6. Droid Ultra XT1080 Battery Replacement: crwdns2935265:06crwdnd2935265:01crwdnd2935265:01crwdne2935265:0
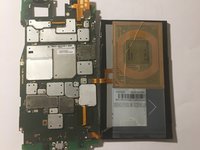
    • Remove the four T5 Torx screws securing the motherboard.

  7. Droid Ultra XT1080 Battery Replacement: crwdns2935265:07crwdnd2935265:01crwdnd2935265:02crwdne2935265:0 Droid Ultra XT1080 Battery Replacement: crwdns2935265:07crwdnd2935265:02crwdnd2935265:02crwdne2935265:0
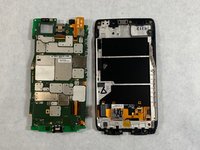
    • Gently pry the motherboard out of the frame using the nylon spudger.

    • Make sure not to damage the LCD cable in the process.

  8. Droid Ultra XT1080 Battery Replacement: crwdns2935265:08crwdnd2935265:01crwdnd2935265:01crwdne2935265:0
    • Disconnect the LCD cable with a spudger from the motherboard by gently lifting up the two connectors.

crwdns2915888:0crwdne2915888:0

To reassemble your device, follow these instructions in reverse order.

crwdns2935229:03crwdne2935229:0

knoyes

crwdns2935283:010/30/18crwdne2935283:0

785 crwdns2915208:0crwdne2915208:0

crwdns2935297:05crwdne2935297:0

crwdns2915084:0crwdne2915084:0

UMass Dartmouth, Team S3-G8, Peak Fall 2018 crwdns2935289:0UMass Dartmouth, Team S3-G8, Peak Fall 2018crwdne2935289:0

UMASSD-PEAK-F18S3G8

crwdns2931471:03crwdne2931471:0

crwdns2935297:010crwdne2935297:0

crwdns2944067:00crwdne2944067:0

crwdns2917038:0crwdne2917038:0

crwdns2936625:0crwdne2936625:0:

crwdns2936751:024crwdne2936751:0 0

crwdns2936753:07crwdne2936753:0 2

crwdns2936753:030crwdne2936753:0 9

crwdns2942667:0crwdne2942667:0 2,972