crwdns2933423:0crwdne2933423:0

Dragon Touch MID 7138 Motherboard Replacement

crwdns2942213:0crwdne2942213:0

  1. Dragon Touch MID 7138 Motherboard Replacement, Back Cover: crwdns2935265:01crwdnd2935265:01crwdnd2935265:01crwdne2935265:0
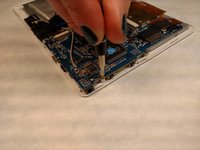
    • Wedge a plastic spudger between the back panel and the screen to begin lifting the back cover.

    • Wedge around all edges until the back cover pops off entirely.

  2. Dragon Touch MID 7138 Motherboard Replacement: crwdns2935265:02crwdnd2935265:01crwdnd2935265:01crwdne2935265:0
    • Gently pry the back cover from the screen using your hands.

  3. Dragon Touch MID 7138 Motherboard Replacement, Motherboard: crwdns2935265:03crwdnd2935265:01crwdnd2935265:03crwdne2935265:0 Dragon Touch MID 7138 Motherboard Replacement, Motherboard: crwdns2935265:03crwdnd2935265:02crwdnd2935265:03crwdne2935265:0 Dragon Touch MID 7138 Motherboard Replacement, Motherboard: crwdns2935265:03crwdnd2935265:03crwdnd2935265:03crwdne2935265:0
    • Remove tape covering wire joints

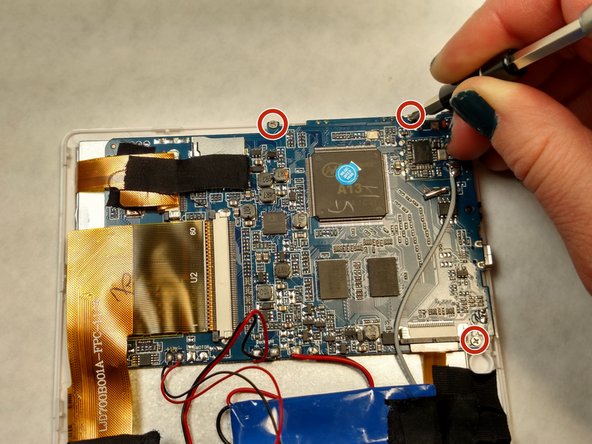
    • Remove (3) 2.5mm screws using a PH001 screw driver.

    • The screws locations are highlighted in the image to the left.

  4. Dragon Touch MID 7138 Motherboard Replacement: crwdns2935265:04crwdnd2935265:01crwdnd2935265:01crwdne2935265:0
    • Remove black tape and using your fingers, pull the orange ribbon labeled BSR028-V3-KDX out of its port.

  5. Dragon Touch MID 7138 Motherboard Replacement: crwdns2935265:05crwdnd2935265:01crwdnd2935265:01crwdne2935265:0
    • Similar to previous step, pull the large U2 ribbon gentle out of its port.

  6. Dragon Touch MID 7138 Motherboard Replacement: crwdns2935265:06crwdnd2935265:01crwdnd2935265:01crwdne2935265:0
    • Remove the last orange ribbon labeled 24 by pulling the motherboard away from the ribbon

  7. Dragon Touch MID 7138 Motherboard Replacement: crwdns2935265:07crwdnd2935265:01crwdnd2935265:02crwdne2935265:0 Dragon Touch MID 7138 Motherboard Replacement: crwdns2935265:07crwdnd2935265:02crwdnd2935265:02crwdne2935265:0
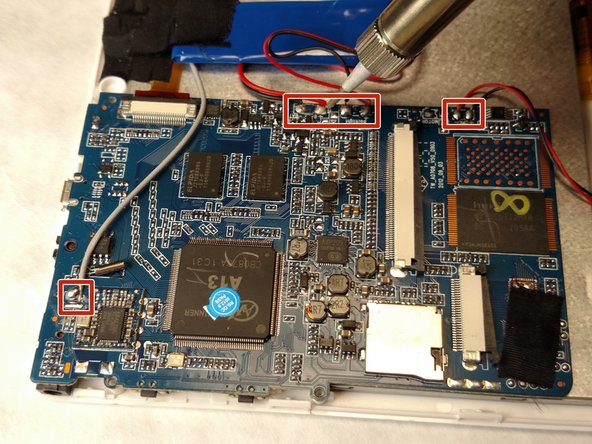
    • Desolder the wires attached to the mother board with a soldering iron.

    • Then pull the wires from the joints.

crwdns2915888:0crwdne2915888:0

To reassemble your device, follow these instructions in reverse order.

Trevor Farkas

crwdns2935283:001/26/17crwdne2935283:0

101 crwdns2915208:0crwdne2915208:0

crwdns2935295:0crwdne2935295:0

crwdns2915084:0crwdne2915084:0

IUPUI, Team 2-4, Baechle Spring 2017 crwdns2935289:0IUPUI, Team 2-4, Baechle Spring 2017crwdne2935289:0

IUPUI-BAECHLE-S17S2G4

crwdns2931471:04crwdne2931471:0

crwdns2935297:09crwdne2935297:0

crwdns2944067:00crwdne2944067:0

crwdns2917038:0crwdne2917038:0

crwdns2936625:0crwdne2936625:0:

crwdns2936751:024crwdne2936751:0 0

crwdns2936753:07crwdne2936753:0 0

crwdns2936753:030crwdne2936753:0 8

crwdns2942667:0crwdne2942667:0 575