crwdns2915892:0crwdne2915892:0
Doors are a major part of our lives, and we use them on a day-to-day basis. Some problems may occur with constant use and age, which can be solved with an extremely quick fix by replacing the door’s old hinge with a new one.
If your door is having problems opening and closing, it may be because of your old door hinge being damaged due to age and general wear-and-tear.
Before proceeding with this guide, you must know how to use a screwdriver and tape measure.
Step 2 requires you to secure the door to prevent it from falling over while you’re replacing the old hinge. Take extra precaution to prevent the door from falling over
crwdns2942213:0crwdne2942213:0
-
-
Take measurements of the door hinge using a tape measure and use the measurements to find a replacement door hinge.
-
-
-
Use two sturdy pieces of wood or cardboard that can keep the door in place and put them underneath the door.
-
-
-
Remove the three screws from the hinge that are connected to the door by using a Phillips 1 screwdriver.
-
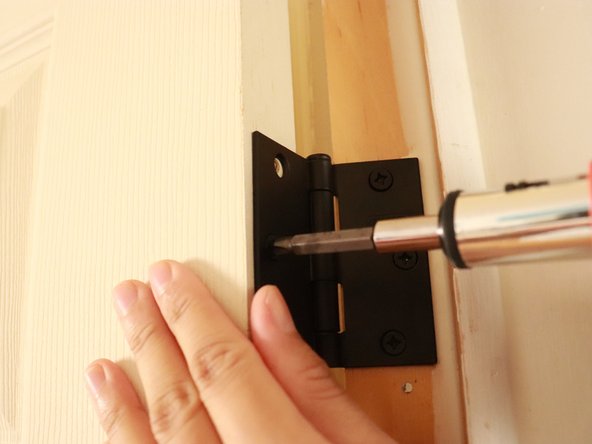
Remove the three screws from the hinge that are connected to the door frame using a Phillips #1 screwdriver.
-
-
-
-
Repeat Step 3 with the bottom hinge on the door.
-
-
-
Rub sandpaper on the areas where the new hinges will be.
-
-
-
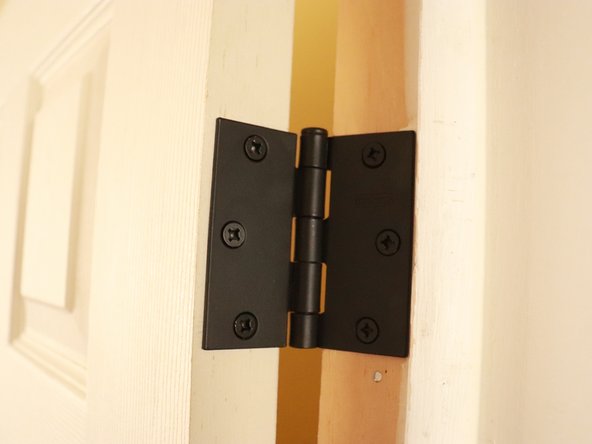
Align the new door hinge with the screw holes in the frame and screw in the new door hinge in the frame.
-
Repeat this with the bottom area of the door.
-
-
-
Align the new door hinge with the screw holes in the door and screw in the new door hinge.
-
Repeat this with the bottom area of the door.
-
-
-
Spray a small amount of WD-40 at the back top and bottom hinge and wipe it down with an old rag.
-


crwdns2935221:0crwdne2935221:0
crwdns2935227:0crwdne2935227:0

crwdns2915084:0crwdne2915084:0

York University, Team S1-G31, Woodhouse Winter 2021 crwdns2935289:0York University, Team S1-G31, Woodhouse Winter 2021crwdne2935289:0
YORK-WOODHOUSE-W21S1G31
crwdns2934841:01crwdne2934841:0
crwdns2935303:01crwdne2935303:0