crwdns2915892:0crwdne2915892:0
These instructions show you how to disassemble the housing of a Melitta Caffeo CI E970-101. The instructions were created based on the E970-101 model, but should also be helpful for other models.
Important: Disconnect the machine from the power supply!
crwdns2942213:0crwdne2942213:0
-
-
Disconnect the machine from the main power supply.
-
Remove all parts that are normally removed for cleaning the machine.
-
Remove the drip tray. (Not shown in the photos).
-
Remove the water tank.
-
Remove as many coffee beans as possible with a spoon.
-
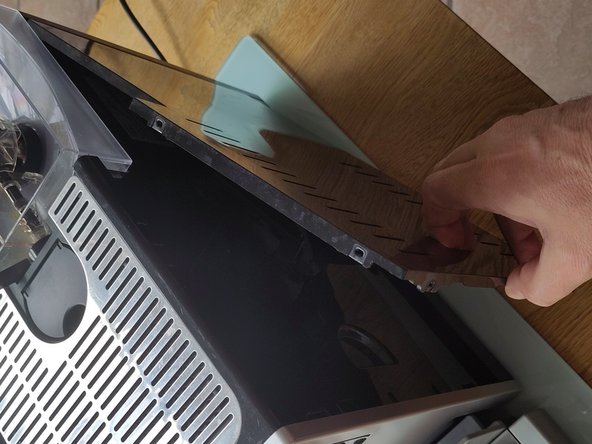
Remove the right side cover behind which the brewing unit is located. If the brewing unit can be removed, it can also be removed.
-
-
-
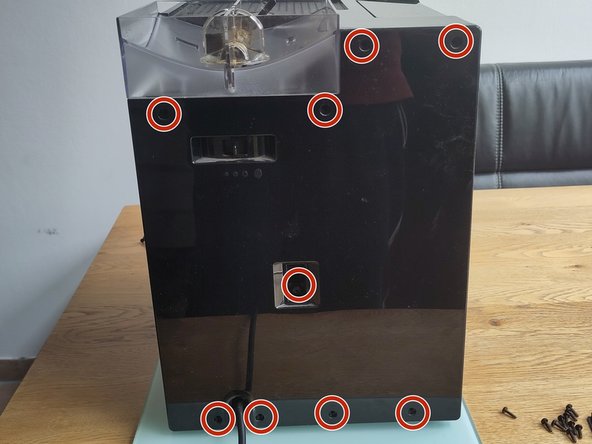
Remove the 9 Tx10 screws on the back. A small plastic plate will also come off with the middle screw.
-
The back panel can be pulled off; there are clips or hooks.
-
-
-
-
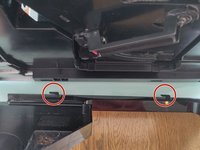
Remove the loose metal grille. Remove the two Tx10 screws underneath.
-
The cover cannot be removed yet; there are a total of 5 clips. Please proceed to the next steps.
-
-
-
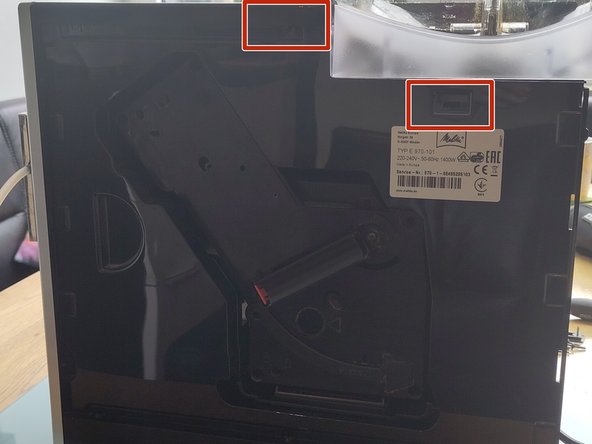
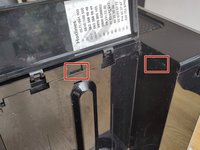
There are three clips on the side of the water tank. Two of them are marked in the first picture. The third clip is to the left of the two clips.
-
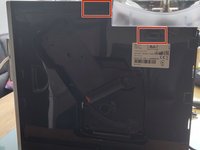
There are two clips on the other side. See the second picture.
-
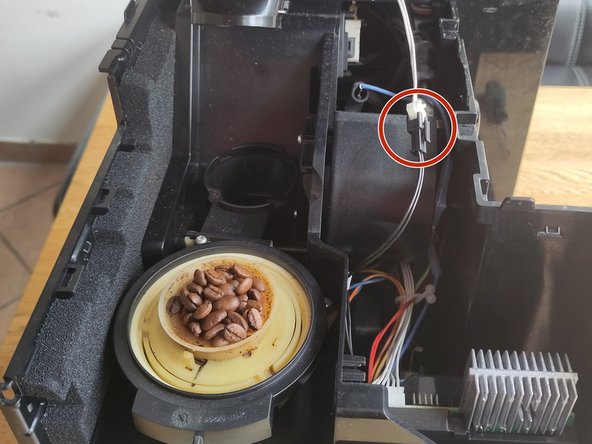
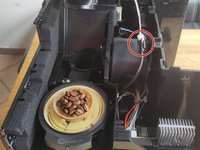
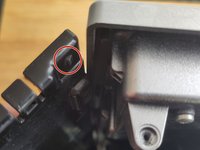
Disconnect the cable plug and remove the cover completely. The plug has a small lock; press the hook down.
-
Remove as many of the remaining coffee beans as possible. The rubber funnel can be removed or left on the machine.
-
-
-
First remove the right side panel, as is has no other cables or hoses connected to it.
-
There are tabs at the bottom of the side panel, so you have to pull the side panel backwards. You cannot pry it off.
-
There are smaller tabs on the front. The upper one can be loosened with a small flat screwdriver. This may make it easier to remove the side panel.
-
Pull the side panel firmly but carefully toward the rear. It can then be removed completely.
-
-
-
The same procedure applies as for the other side panel. Here, you just need to make sure that there are still two cable connections and one hose connection. Detach the side panel as described above, but leave it close to the housing.
-
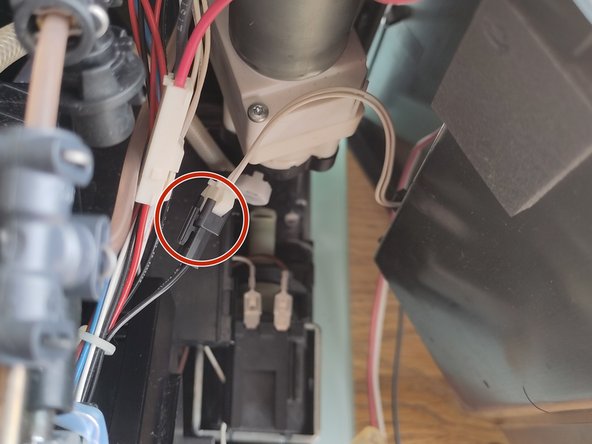
Disconnect the plug with the red, white, and black cables from the circuit board. It has a small hook that you have to press in.
-
Disconnect the water hose at the end that is attached to the side panel
-
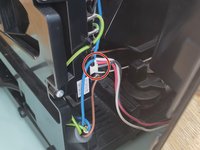
Disconnect the black and white plug; is has a small lock.
-
The side panel can now be completely removed.
-


Follow the steps in reverse order to reassemble your device.
crwdns2934873:0crwdne2934873:0
100%

crwdns2934883:0oldturkey03crwdne2934883:0 crwdns2934875:0crwdne2934875:0
crwdns2934877:0crwdne2934877:0 ›