crwdns2933423:0crwdne2933423:0
crwdns2947577:0crwdnd2947577:0crwdne2947577:0

Disassembling the Circuit Board

crwdns2942213:0crwdne2942213:0

    1. Disassembling the Circuit Board, Cracking the Case: crwdns2935265:01crwdnd2935265:01crwdnd2935265:01crwdne2935265:0
      • Turn the device upside down so that the three rubber pads are facing up.

      crwdns2952109:0crwdne2952109:0

      crwdns2917038:0crwdne2917038:0

    2. Disassembling the Circuit Board: crwdns2935265:02crwdnd2935265:01crwdnd2935265:01crwdne2935265:0
      • Use a heat gun (set to low) to apply heat to one of the rubber pads until you can easily remove the pad. This step takes around 5-7 minutes.

      crwdns2952109:0crwdne2952109:0

      crwdns2917038:0crwdne2917038:0

    3. Disassembling the Circuit Board: crwdns2935265:03crwdnd2935265:01crwdnd2935265:01crwdne2935265:0
      • Remove the heated rubber pad with a plastic opening tool.

      • Repeat steps 2 and 3 for the two remaining rubber pads.

      crwdns2952109:0crwdne2952109:0

      crwdns2917038:0crwdne2917038:0

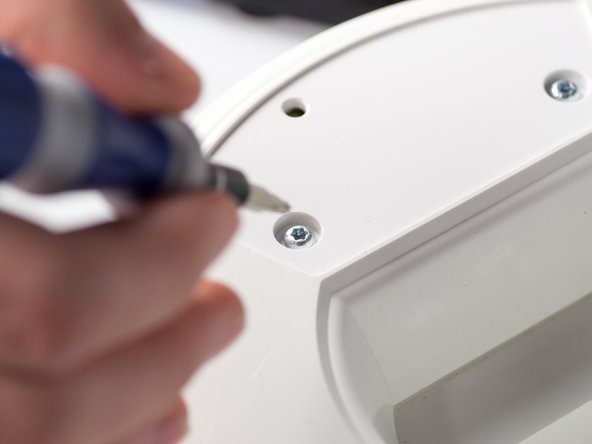
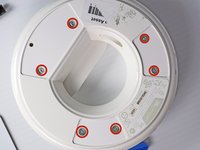
    4. Disassembling the Circuit Board: crwdns2935265:04crwdnd2935265:01crwdnd2935265:02crwdne2935265:0 Disassembling the Circuit Board: crwdns2935265:04crwdnd2935265:02crwdnd2935265:02crwdne2935265:0
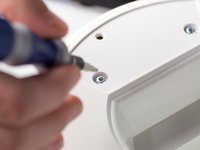
      • Remove the six 1cm T-10 torx screws on the bottom of the device (found under the rubber pads) using a T-10 Torx screwdriver.

      crwdns2952109:0crwdne2952109:0

      crwdns2917038:0crwdne2917038:0

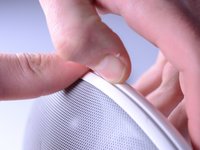
    5. Disassembling the Circuit Board: crwdns2935265:05crwdnd2935265:01crwdnd2935265:03crwdne2935265:0 Disassembling the Circuit Board: crwdns2935265:05crwdnd2935265:02crwdnd2935265:03crwdne2935265:0 Disassembling the Circuit Board: crwdns2935265:05crwdnd2935265:03crwdnd2935265:03crwdne2935265:0
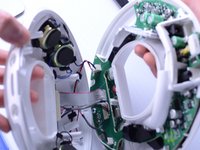
      • Open the device along its seam.

      • Be careful when separating the device because there are wires connecting the two seperate halves.

      crwdns2952109:0crwdne2952109:0

      crwdns2917038:0crwdne2917038:0

    6. Disassembling the Circuit Board: crwdns2935265:06crwdnd2935265:01crwdnd2935265:01crwdne2935265:0
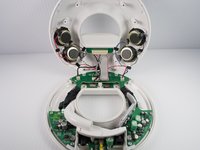
      • Disconnect the ribbon cable connector from the top half of the device by pulling outward and parallel to the connecting pins.

      crwdns2952109:0crwdne2952109:0

      crwdns2917038:0crwdne2917038:0

    7. Disassembling the Circuit Board: crwdns2935265:07crwdnd2935265:01crwdnd2935265:02crwdne2935265:0 Disassembling the Circuit Board: crwdns2935265:07crwdnd2935265:02crwdnd2935265:02crwdne2935265:0
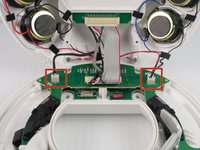
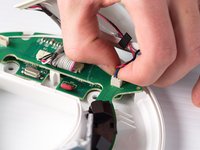
      • Locate and disconnect the two molex connectors found on either side of the ribbon cable connector on the bottom half of the device.

      crwdns2952109:0crwdne2952109:0

      crwdns2917038:0crwdne2917038:0

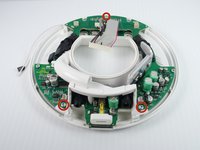
    1. Disassembling the Circuit Board, Circuit Board: crwdns2935265:08crwdnd2935265:01crwdnd2935265:02crwdne2935265:0 Disassembling the Circuit Board, Circuit Board: crwdns2935265:08crwdnd2935265:02crwdnd2935265:02crwdne2935265:0
      • Remove the three 1 cm T-10 Torx screws.

      crwdns2952109:0crwdne2952109:0

      crwdns2917038:0crwdne2917038:0

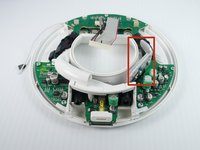
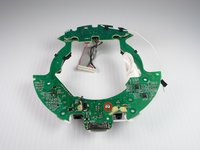
    2. Disassembling the Circuit Board: crwdns2935265:09crwdnd2935265:01crwdnd2935265:01crwdne2935265:0
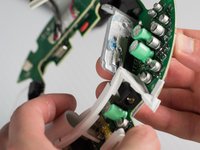
      • Carefully press out the white base tube and push up on the circuit board.

      • Note that there is a small wire connecting the circuit board to the base.

      crwdns2952109:0crwdne2952109:0

      crwdns2917038:0crwdne2917038:0

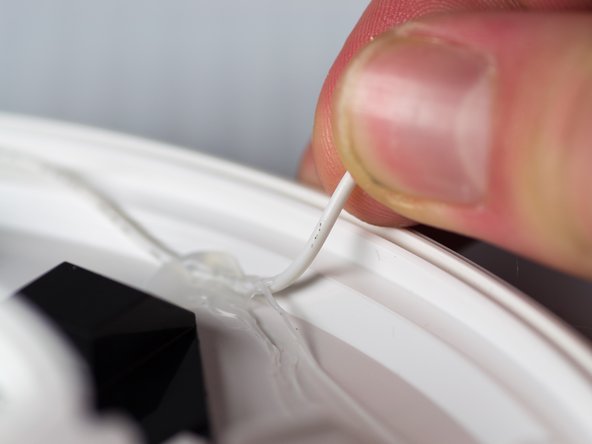
    3. Disassembling the Circuit Board: crwdns2935265:010crwdnd2935265:01crwdnd2935265:02crwdne2935265:0 Disassembling the Circuit Board: crwdns2935265:010crwdnd2935265:02crwdnd2935265:02crwdne2935265:0
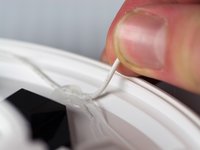
      • Pull the white wire out of the hot glue.

      crwdns2952109:0crwdne2952109:0

      crwdns2917038:0crwdne2917038:0

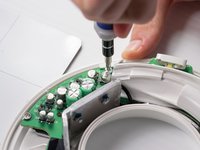
    4. Disassembling the Circuit Board: crwdns2935265:011crwdnd2935265:01crwdnd2935265:03crwdne2935265:0 Disassembling the Circuit Board: crwdns2935265:011crwdnd2935265:02crwdnd2935265:03crwdne2935265:0 Disassembling the Circuit Board: crwdns2935265:011crwdnd2935265:03crwdnd2935265:03crwdne2935265:0
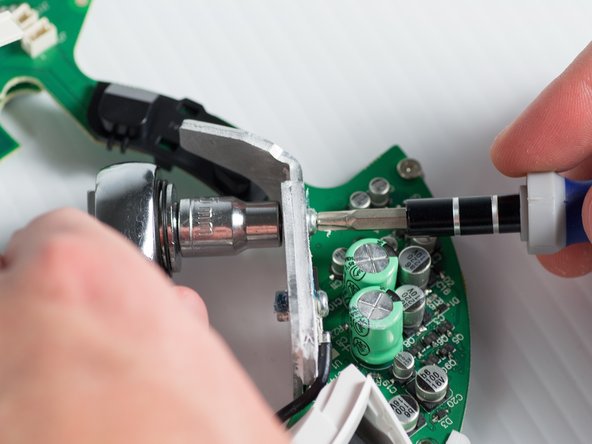
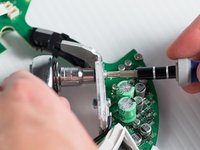
      • Unbolt the heatsink with a 5.5-mm socket and a Phillips PH1 screwdriver.

      • Remove the heat sink; it should detach from the bottom of the device.

      crwdns2952109:0crwdne2952109:0

      crwdns2917038:0crwdne2917038:0

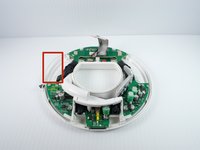
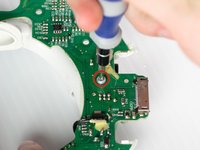
    5. Disassembling the Circuit Board: crwdns2935265:012crwdnd2935265:01crwdnd2935265:03crwdne2935265:0 Disassembling the Circuit Board: crwdns2935265:012crwdnd2935265:02crwdnd2935265:03crwdne2935265:0 Disassembling the Circuit Board: crwdns2935265:012crwdnd2935265:03crwdnd2935265:03crwdne2935265:0
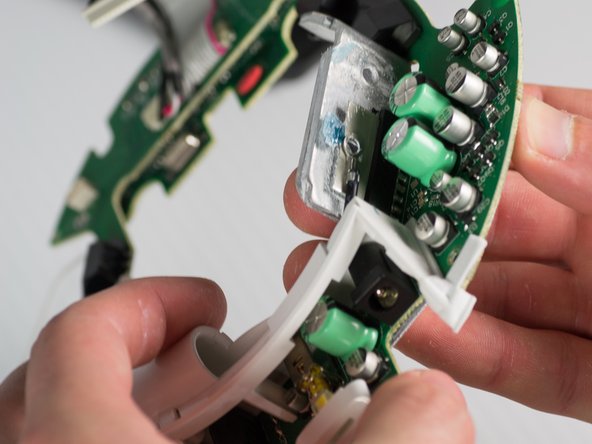
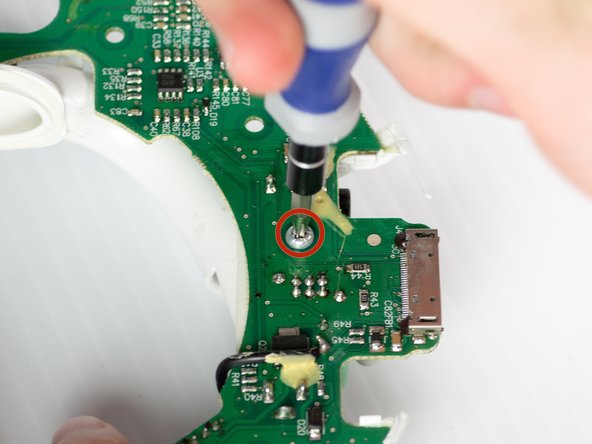
      • Remove the T-10 torx screw on the bottom of the device that attaches the base tube to the circuit board.

      • Turn the device so that the base tube is on top.

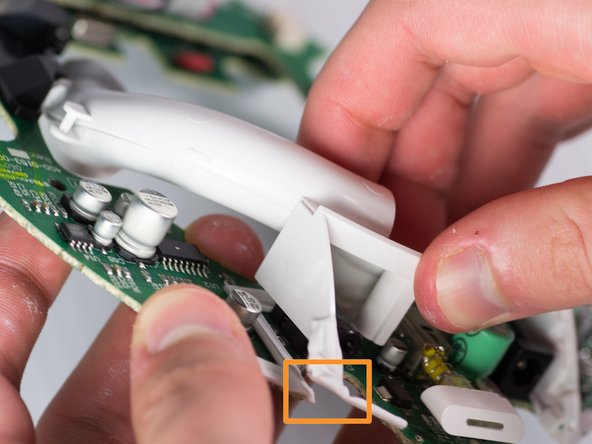
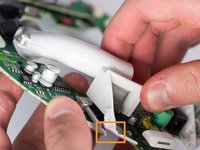
      • Remove the base tube by pulling up.

      • May need to cut the rubber adhesive between the base tube to the circuit board.

      crwdns2952109:0crwdne2952109:0

      crwdns2917038:0crwdne2917038:0

crwdns2915888:0crwdne2915888:0

To reassemble your device, follow these steps in reverse order.

crwdns2935221:0crwdne2935221:0

crwdns2935229:02crwdne2935229:0

Janessa D Cabrera

crwdns2935283:001/23/14crwdne2935283:0

547 crwdns2915208:0crwdne2915208:0

crwdns2935297:04crwdne2935297:0

crwdns2935287:0crwdne2935287:0

Cal Poly, Team 9-28, Maness Winter 2014 crwdns2935289:0Cal Poly, Team 9-28, Maness Winter 2014crwdne2935289:0

CPSU-MANESS-W14S9G28

crwdns2931471:04crwdne2931471:0

crwdns2935297:084crwdne2935297:0

crwdns2947412:00crwdne2947412:0

crwdns2917038:0crwdne2917038:0

crwdns2936625:0crwdne2936625:0:

crwdns2936751:024crwdne2936751:0 2

crwdns2936753:07crwdne2936753:0 33

crwdns2936753:030crwdne2936753:0 62

crwdns2942667:0crwdne2942667:0 5,473