crwdns2933423:0crwdne2933423:0

Disassembling the Samsung Laptop Ultrabook NP530U3B

crwdns2942213:0crwdne2942213:0

  1. Disassembling the Samsung Laptop Ultrabook NP530U3B, Disassembling the Samsung Laptop Ultrabook NP530U3B: crwdns2935265:01crwdnd2935265:01crwdnd2935265:01crwdne2935265:0
    • Remove the 8 small screws.

  2. Disassembling the Samsung Laptop Ultrabook NP530U3B: crwdns2935265:02crwdnd2935265:01crwdnd2935265:02crwdne2935265:0 Disassembling the Samsung Laptop Ultrabook NP530U3B: crwdns2935265:02crwdnd2935265:02crwdnd2935265:02crwdne2935265:0
    • Remove the other 6 screws.

    • Remove the hard disk and the RAM slots.

  3. Disassembling the Samsung Laptop Ultrabook NP530U3B: crwdns2935265:03crwdnd2935265:01crwdnd2935265:01crwdne2935265:0
    • This is the hard disk - Hitachi 500 GB

  4. Disassembling the Samsung Laptop Ultrabook NP530U3B: crwdns2935265:04crwdnd2935265:01crwdnd2935265:01crwdne2935265:0
    • Ensure that the hard disk has been removed. Carefully detach the bottom cover.

  5. Disassembling the Samsung Laptop Ultrabook NP530U3B: crwdns2935265:05crwdnd2935265:01crwdnd2935265:01crwdne2935265:0
    • Once the bottom cover is removed, your device should look like this.

  6. Disassembling the Samsung Laptop Ultrabook NP530U3B: crwdns2935265:06crwdnd2935265:01crwdnd2935265:01crwdne2935265:0
    • Remove the 4 screws to detach the battery.

    • Remove all of the sticky tape.

    • Carefully disconnect the small power connector by using a tool to push the connector out through the small gap in the middle of the connector.

    • The connector won't come out all the way, because the battery pack is in its way.

  7. Disassembling the Samsung Laptop Ultrabook NP530U3B: crwdns2935265:07crwdnd2935265:01crwdnd2935265:02crwdne2935265:0 Disassembling the Samsung Laptop Ultrabook NP530U3B: crwdns2935265:07crwdnd2935265:02crwdnd2935265:02crwdne2935265:0
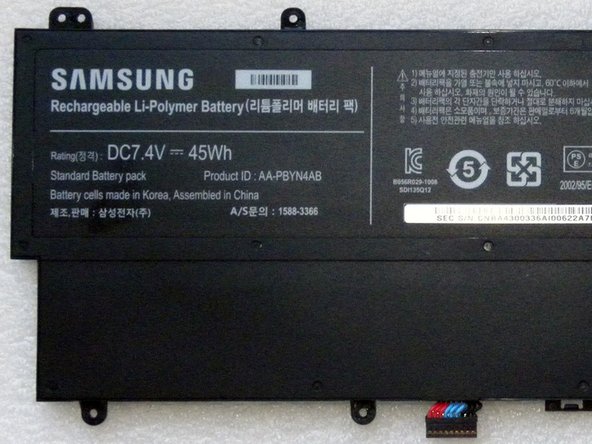
    • This is the Samsung 7.4V 45Wh battery.

    • Ensure that the battery is removed before continuing.

  8. Disassembling the Samsung Laptop Ultrabook NP530U3B: crwdns2935265:08crwdnd2935265:01crwdnd2935265:01crwdne2935265:0
    • When the battery is removed, this is how it will look.

  9. Disassembling the Samsung Laptop Ultrabook NP530U3B: crwdns2935265:09crwdnd2935265:01crwdnd2935265:01crwdne2935265:0
    • Remove the processor fan.

    • There are 2 screws holding it in place. Loosen and remove them.

  10. Disassembling the Samsung Laptop Ultrabook NP530U3B: crwdns2935265:010crwdnd2935265:01crwdnd2935265:01crwdne2935265:0
    • This is the processor fan.

  11. Disassembling the Samsung Laptop Ultrabook NP530U3B: crwdns2935265:011crwdnd2935265:01crwdnd2935265:01crwdne2935265:0
    • Remove the processor heat sink.

    • 3 screws hold this part in place. Loosen and remove them.

  12. Disassembling the Samsung Laptop Ultrabook NP530U3B: crwdns2935265:012crwdnd2935265:01crwdnd2935265:01crwdne2935265:0
    • Disconnect the antenna cables from the WiFi card.

    • Remove the screw.

    • Be sure to match the colors when reattaching the cables.

  13. Disassembling the Samsung Laptop Ultrabook NP530U3B: crwdns2935265:013crwdnd2935265:01crwdnd2935265:01crwdne2935265:0
    • Remove the screw.

    • Lift the latch upwards to loosen the cable.

  14. Disassembling the Samsung Laptop Ultrabook NP530U3B: crwdns2935265:014crwdnd2935265:01crwdnd2935265:01crwdne2935265:0
    • Remove the screw.

  15. Disassembling the Samsung Laptop Ultrabook NP530U3B: crwdns2935265:015crwdnd2935265:01crwdnd2935265:01crwdne2935265:0
    • Remove the screw.

  16. Disassembling the Samsung Laptop Ultrabook NP530U3B: crwdns2935265:016crwdnd2935265:01crwdnd2935265:01crwdne2935265:0
    • To remove the Motherboard, carefully disconnect the cables.

  17. Disassembling the Samsung Laptop Ultrabook NP530U3B: crwdns2935265:017crwdnd2935265:01crwdnd2935265:02crwdne2935265:0 Disassembling the Samsung Laptop Ultrabook NP530U3B: crwdns2935265:017crwdnd2935265:02crwdnd2935265:02crwdne2935265:0
    • This is the Motherboard - there is a front and rear view.

crwdns2915888:0crwdne2915888:0

To reassemble your device, follow these instructions in reverse order.

crwdns2935229:034crwdne2935229:0

Jose Gustavo Abreu Murta

crwdns2935283:007/06/10crwdne2935283:0

4,598 crwdns2915208:0crwdne2915208:0

crwdns2935297:09crwdne2935297:0

crwdns2944067:030crwdne2944067:0

Hello,

Do you know where can i reset the Bios CMOS in that motherboard?

I think there are people who wants to know becose system upgrade is leading to bios ACPI Error.

Thanks for your help

Luis Orland - crwdns2934203:0crwdne2934203:0

No, I do not know where is a reset pin of BIOS.

Try to disconnect NVRAM battery.

Wait 15 minutes and reconnect again.

Jose Gustavo Abreu Murta - crwdns2934203:0crwdne2934203:0

To reset BIOS this NP530U3, only disconnect all power supply (MAIN battery, CMOS battery and power source). And hold press POWER button for 1 min.

warmdk - crwdns2934203:0crwdne2934203:0

I try it but don't work, do you know another way to do this

manhique -

Hello,

I have seen many screens with model number LTN140AT21-XXX for this laptop. My laptop NP530u4b has a screen LTN140AT21-802. I would like to know if I can use a LTN140AT21-002 screen, or if only is good a screen with number LTN140AT21-8.

thanks for your help.

alex - crwdns2934203:0crwdne2934203:0

crwdns2917038:0crwdne2917038:0

crwdns2936625:0crwdne2936625:0:

crwdns2936751:024crwdne2936751:0 1

crwdns2936753:07crwdne2936753:0 22

crwdns2936753:030crwdne2936753:0 61

crwdns2942667:0crwdne2942667:0 52,876