crwdns2933423:0crwdne2933423:0
Disassembling RCA CC310 Left Cover

Disassembling RCA CC310 Left Cover

Ashley Katchadourian

crwdns2944107:0crwdnd2944107:0Ashley Katchadouriancrwdnd2944107:0crwdnd2944107:0crwdnd2944107:06crwdnd2944107:0crwdne2944107:0

crwdns2944111:0February 19, 2020crwdne2944111:0

10 - 15 crwdns2931279:0crwdne2931279:0
crwdns2937801:0crwdne2937801:0

crwdns2915892:0crwdne2915892:0

crwdns2942287:0crwdne2942287:0

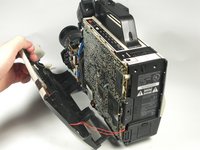
This guide will instruct you to take the left cover off of the camcorder.

crwdns2942213:0crwdne2942213:0

crwdns2943215:0crwdne2943215:0

  • Phillips #0 Screwdriver
    Phillips #0 Screwdriver
  • Phillips #1 Screwdriver
    Phillips #1 Screwdriver
  • Spudger
    Spudger

crwdns2944105:0crwdne2944105:0

  1. Disassembling RCA CC310 Left Cover, Disassembling RCA CC310 Left Cover: crwdns2935265:01crwdnd2935265:01crwdnd2935265:02crwdne2935265:0 Disassembling RCA CC310 Left Cover, Disassembling RCA CC310 Left Cover: crwdns2935265:01crwdnd2935265:02crwdnd2935265:02crwdne2935265:0
    • Remove the six 7.9mm Phillips #0 screws on the back and bottom.

    • Remove the one 3.8mm Phillips #0 screw on the bottom.

    • Remove the two 7.5mm Phillips #0 screws on the back and bottom.

  2. Disassembling RCA CC310 Left Cover: crwdns2935265:02crwdnd2935265:01crwdnd2935265:02crwdne2935265:0 Disassembling RCA CC310 Left Cover: crwdns2935265:02crwdnd2935265:02crwdnd2935265:02crwdne2935265:0
    • Remove 5.8mm Phillips #1 screw from the side button panel.

    • Slide the viewfinder all the way to the right and remove the 7.9mm Phillips #0 screw.

  3. Disassembling RCA CC310 Left Cover: crwdns2935265:03crwdnd2935265:01crwdnd2935265:02crwdne2935265:0 Disassembling RCA CC310 Left Cover: crwdns2935265:03crwdnd2935265:02crwdnd2935265:02crwdne2935265:0
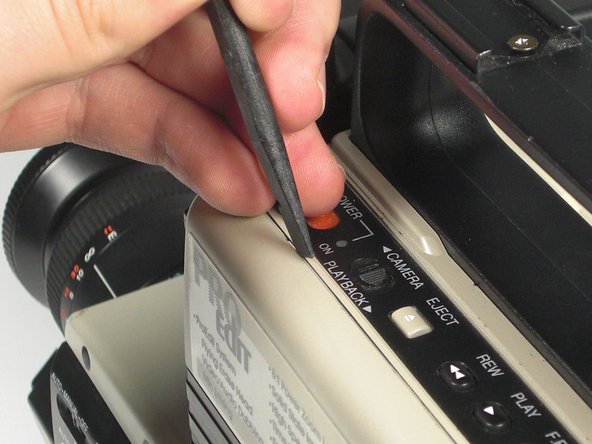
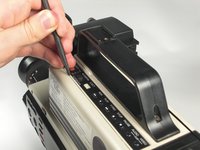
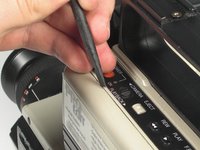
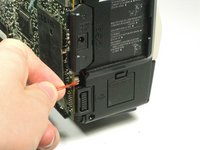
    • Pry along the seam on the top side near the buttons with a spudger.

  4. Disassembling RCA CC310 Left Cover: crwdns2935265:04crwdnd2935265:01crwdnd2935265:02crwdne2935265:0 Disassembling RCA CC310 Left Cover: crwdns2935265:04crwdnd2935265:02crwdnd2935265:02crwdne2935265:0
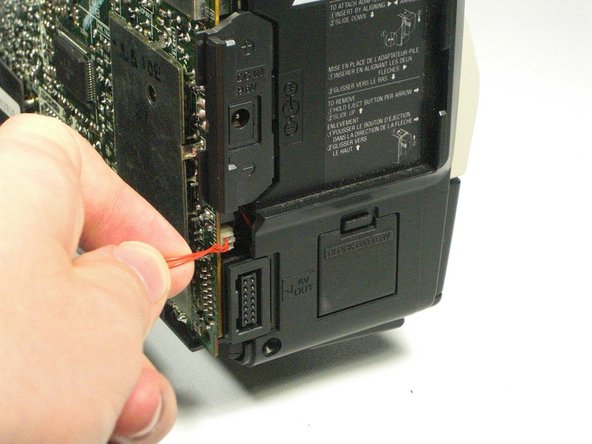
    • Pull the left panel away from the rest of the camcorder.

    • Unplug the red speaker cable located at the rear of the device.

    • Be careful to not pull too hard. The speaker cable is still connected to the panel and it can rip.

crwdns2915888:0crwdne2915888:0

To reassemble your device, follow these instructions in reverse order.

Ashley Katchadourian

crwdns2935283:001/20/11crwdne2935283:0

133 crwdns2915208:0crwdne2915208:0

crwdns2935295:0crwdne2935295:0

crwdns2915084:0crwdne2915084:0

Cal Poly, Team 5-20, Amido Winter 2011 crwdns2935289:0Cal Poly, Team 5-20, Amido Winter 2011crwdne2935289:0

CPSU-AMIDO-W11S5G20

crwdns2931471:04crwdne2931471:0

crwdns2935297:07crwdne2935297:0

crwdns2947412:00crwdne2947412:0

crwdns2917038:0crwdne2917038:0

crwdns2936625:0crwdne2936625:0:

crwdns2936751:024crwdne2936751:0 0

crwdns2936753:07crwdne2936753:0 3

crwdns2936753:030crwdne2936753:0 7

crwdns2942667:0crwdne2942667:0 1,026