crwdns2933423:0crwdne2933423:0
crwdns2947577:0crwdnd2947577:0crwdne2947577:0

Disassembling Nokia 2366i Side Buttons

crwdns2942213:0crwdne2942213:0

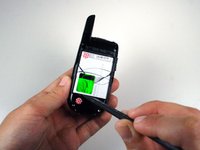
    1. Disassembling Nokia 2366i Side Buttons, Battery: crwdns2935265:01crwdnd2935265:01crwdnd2935265:02crwdne2935265:0 Disassembling Nokia 2366i Side Buttons, Battery: crwdns2935265:01crwdnd2935265:02crwdnd2935265:02crwdne2935265:0
      • Turn off the phone.

      • Position the phone so that the back side is in view.

      crwdns2952109:0crwdne2952109:0

      crwdns2917038:0crwdne2917038:0

    2. Disassembling Nokia 2366i Side Buttons: crwdns2935265:02crwdnd2935265:01crwdnd2935265:01crwdne2935265:0
      • Apply pressure on the cover while simultaneously sliding the cover downward.

      • Remove the back battery cover.

      crwdns2952109:0crwdne2952109:0

      crwdns2917038:0crwdne2917038:0

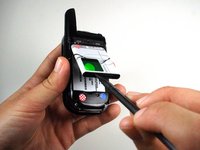
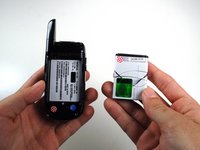
    3. Disassembling Nokia 2366i Side Buttons: crwdns2935265:03crwdnd2935265:01crwdnd2935265:03crwdne2935265:0 Disassembling Nokia 2366i Side Buttons: crwdns2935265:03crwdnd2935265:02crwdnd2935265:03crwdne2935265:0 Disassembling Nokia 2366i Side Buttons: crwdns2935265:03crwdnd2935265:03crwdnd2935265:03crwdne2935265:0
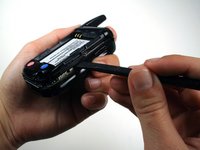
      • Insert the spudger between the base of the phone and the phone battery.

      • Position the phone so that the battery won't fall out of the phone.

      • Carefully lift the battery out of the phone.

      • The battery lifts out of the phone easily.

      crwdns2952109:0crwdne2952109:0

      crwdns2917038:0crwdne2917038:0

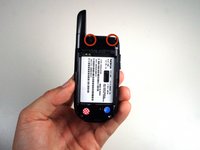
    1. Disassembling Nokia 2366i Side Buttons, Rear Case: crwdns2935265:04crwdnd2935265:01crwdnd2935265:02crwdne2935265:0 Disassembling Nokia 2366i Side Buttons, Rear Case: crwdns2935265:04crwdnd2935265:02crwdnd2935265:02crwdne2935265:0
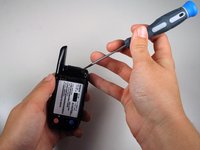
      • Use a Phillips #00 screwdriver or your fingers to remove the rubber tabs at top back of the phone.

      crwdns2952109:0crwdne2952109:0

      crwdns2917038:0crwdne2917038:0

    2. Disassembling Nokia 2366i Side Buttons: crwdns2935265:05crwdnd2935265:01crwdnd2935265:02crwdne2935265:0 Disassembling Nokia 2366i Side Buttons: crwdns2935265:05crwdnd2935265:02crwdnd2935265:02crwdne2935265:0
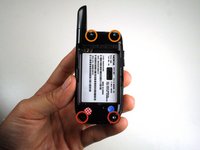
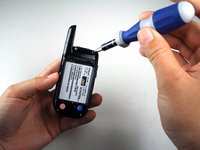
      • Remove four 5mm screws from the back of the phone using a T6 Torx screwdriver:

      • 2 screws at the bottom

      • 2 screws at the top

      crwdns2952109:0crwdne2952109:0

      crwdns2917038:0crwdne2917038:0

    3. Disassembling Nokia 2366i Side Buttons: crwdns2935265:06crwdnd2935265:01crwdnd2935265:02crwdne2935265:0 Disassembling Nokia 2366i Side Buttons: crwdns2935265:06crwdnd2935265:02crwdnd2935265:02crwdne2935265:0
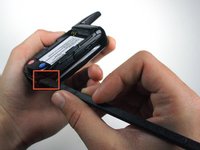
      • Rotate the phone clockwise so the edge is facing you.

      • Insert the spudger in tabs between the outer casing and the inside frame.

      • Slide the spudger upwards.

      • This will remove the rear case of the phone.

      crwdns2952109:0crwdne2952109:0

      crwdns2917038:0crwdne2917038:0

    4. Disassembling Nokia 2366i Side Buttons: crwdns2935265:07crwdnd2935265:01crwdnd2935265:01crwdne2935265:0
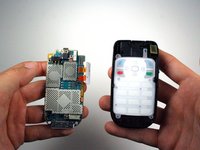
      • The phone should now be in two different sections.

      • 1) The rear case of the phone.

      • 2) The motherboard and the rest of the phone.

      crwdns2952109:0crwdne2952109:0

      crwdns2917038:0crwdne2917038:0

    1. Disassembling Nokia 2366i Side Buttons, Motherboard: crwdns2935265:08crwdnd2935265:01crwdnd2935265:02crwdne2935265:0 Disassembling Nokia 2366i Side Buttons, Motherboard: crwdns2935265:08crwdnd2935265:02crwdnd2935265:02crwdne2935265:0
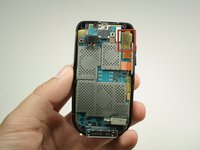
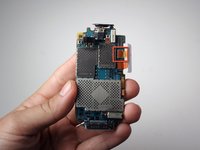
      • Use the spudger to lift off the yellow clip near the top right corner of the motherboard.

      crwdns2952109:0crwdne2952109:0

      crwdns2917038:0crwdne2917038:0

    2. Disassembling Nokia 2366i Side Buttons: crwdns2935265:09crwdnd2935265:01crwdnd2935265:02crwdne2935265:0 Disassembling Nokia 2366i Side Buttons: crwdns2935265:09crwdnd2935265:02crwdnd2935265:02crwdne2935265:0
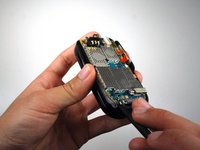
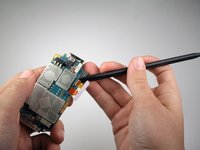
      • Rotate the phone counterclockwise so that the edge is facing you.

      • Use the spudger to lift the motherboard out of the base of the phone.

      • Remove the motherboard from the base of the phone.

      crwdns2952109:0crwdne2952109:0

      crwdns2917038:0crwdne2917038:0

    1. Disassembling Nokia 2366i Side Buttons, Side Buttons: crwdns2935265:010crwdnd2935265:01crwdnd2935265:02crwdne2935265:0 Disassembling Nokia 2366i Side Buttons, Side Buttons: crwdns2935265:010crwdnd2935265:02crwdnd2935265:02crwdne2935265:0
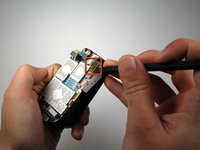
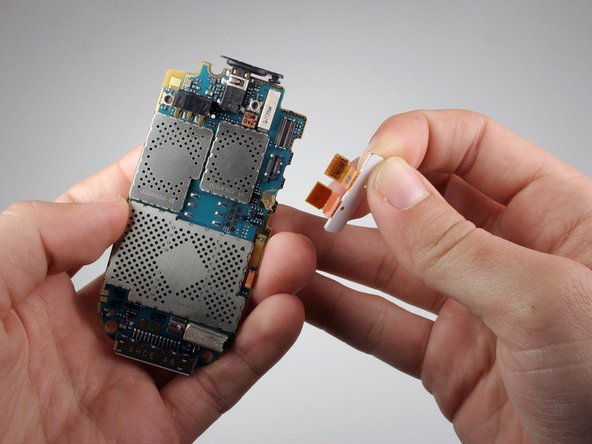
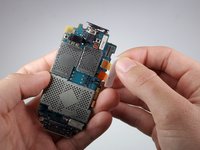
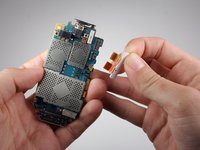
      • Use the spudger to pull off the top orange chip attached to the white tab.

      crwdns2952109:0crwdne2952109:0

      crwdns2917038:0crwdne2917038:0

    2. Disassembling Nokia 2366i Side Buttons: crwdns2935265:011crwdnd2935265:01crwdnd2935265:02crwdne2935265:0 Disassembling Nokia 2366i Side Buttons: crwdns2935265:011crwdnd2935265:02crwdnd2935265:02crwdne2935265:0
      • Lightly pull up on the white tab to remove the orange tab from the logic board.

      • Don't worry about the glue on the bottom orange tab. It's only there to keep the side button in place.

      crwdns2952109:0crwdne2952109:0

      crwdns2917038:0crwdne2917038:0

crwdns2915888:0crwdne2915888:0

To reassemble your device, follow these instructions in reverse order.

crwdns2935221:0crwdne2935221:0

Jonathan Newman

crwdns2935283:001/21/11crwdne2935283:0

516 crwdns2915208:0crwdne2915208:0

crwdns2935297:04crwdne2935297:0

crwdns2935287:0crwdne2935287:0

Cal Poly, Team 1-14, Amido Winter 2011 crwdns2935289:0Cal Poly, Team 1-14, Amido Winter 2011crwdne2935289:0

CPSU-AMIDO-W11S1G14

crwdns2931471:05crwdne2931471:0

crwdns2935297:096crwdne2935297:0

crwdns2947412:00crwdne2947412:0

crwdns2917038:0crwdne2917038:0

crwdns2936625:0crwdne2936625:0:

crwdns2936751:024crwdne2936751:0 1

crwdns2936753:07crwdne2936753:0 7

crwdns2936753:030crwdne2936753:0 27

crwdns2942667:0crwdne2942667:0 1,150