crwdns2915892:0crwdne2915892:0
This is a guide to removing the silver metal front plate. It is recommended to have some kind of placemat or square tray to work on to catch the screws if they slip away.
crwdns2942213:0crwdne2942213:0
-
-
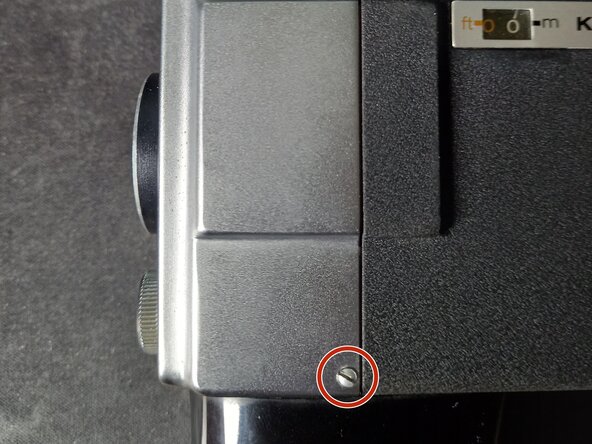
Remove the screw on the left side if the camera is facing your way.
-
-
-
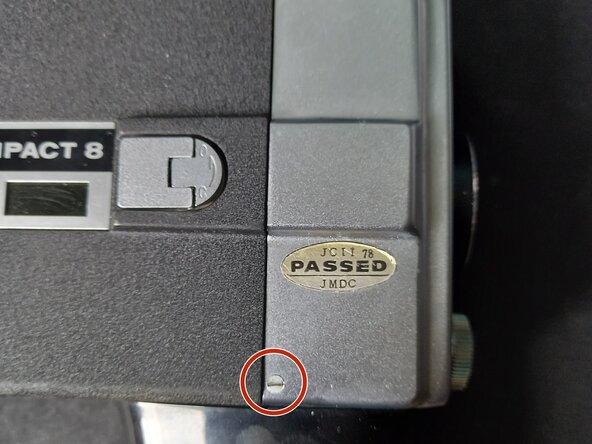
Remove the screw on the right side if the camera is facing you.
-
-
-
-
Now remove the final screw at the top of the camera. You can now remove the top cover carefully.
-
You can pry the front cover up and down to loosen it. Be careful not to pry horizontally and only vertically. This is because of the open aperture blades that are on the sides.
-
-
-
The machinery is now open and can be dissasembled further or the front cover might be cleaned freely without worry that cleaning liquid would seep into the camera.
-
Make sure to remember what the "roll and lock" switch was on before dissassembly or to not touch it at all.
-
-
-
You might need to push the brass lever that holds the wires in place (right under the small board on the leftside) up to fit the front cover back on.
-
If its stuck in place in the wrong position, loosen the screw attached to it a little bit to pry it back in it's original position.
-

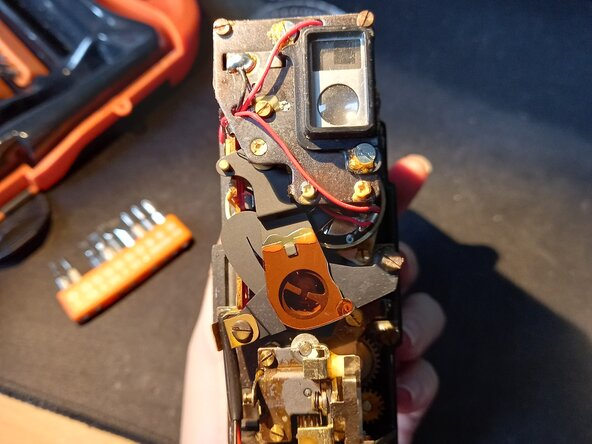

To reassemble your device, follow these instructions in reverse order. You might need to push the brass lever that holds the wires in place (right under the small board on the leftside) up to fit the front cover back on. Mine had shifted downwards after taking the cover off and the topcover did not fit back because of it. If its stuck in place in the wrong position, loosen the screw attached to it a little bit to pry it back in it's original position.
