crwdns2933423:0crwdne2933423:0

Disassembling Insignia NS-B2110 Bottom Panel

crwdns2942213:0crwdne2942213:0

  1. Disassembling Insignia NS-B2110 Bottom Panel, Battery: crwdns2935265:01crwdnd2935265:01crwdnd2935265:02crwdne2935265:0 Disassembling Insignia NS-B2110 Bottom Panel, Battery: crwdns2935265:01crwdnd2935265:02crwdnd2935265:02crwdne2935265:0
    • Flip the stereo so the CD opening is face down.

    • With two fingers, pinch the tabs and lift up to open the battery protection cover.

  2. Disassembling Insignia NS-B2110 Bottom Panel: crwdns2935265:02crwdnd2935265:01crwdnd2935265:02crwdne2935265:0 Disassembling Insignia NS-B2110 Bottom Panel: crwdns2935265:02crwdnd2935265:02crwdnd2935265:02crwdne2935265:0
    • Using a spudger or your fingers, push up against the positive end of the battery. Once it is loose, lift the battery out.

    • Repeat until all eight batteries are removed.

    • Make sure the batteries are facing the right direction. If the device does not turn on, you may have the batteries in the opposite orientation.

  3. Disassembling Insignia NS-B2110 Bottom Panel, Bottom Panel: crwdns2935265:03crwdnd2935265:01crwdnd2935265:01crwdne2935265:0
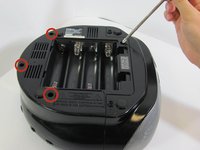
    • With a Phillips #2 screwdriver, remove two 2mm screws.

  4. Disassembling Insignia NS-B2110 Bottom Panel: crwdns2935265:04crwdnd2935265:01crwdnd2935265:02crwdne2935265:0 Disassembling Insignia NS-B2110 Bottom Panel: crwdns2935265:04crwdnd2935265:02crwdnd2935265:02crwdne2935265:0
    • Using a long Phillips #2 screwdriver, remove one 6mm screw located inside the battery compartment.

    • Use the same screwdriver to remove four more 6mm screws along the outside of the case.

  5. Disassembling Insignia NS-B2110 Bottom Panel: crwdns2935265:05crwdnd2935265:01crwdnd2935265:03crwdne2935265:0 Disassembling Insignia NS-B2110 Bottom Panel: crwdns2935265:05crwdnd2935265:02crwdnd2935265:03crwdne2935265:0 Disassembling Insignia NS-B2110 Bottom Panel: crwdns2935265:05crwdnd2935265:03crwdnd2935265:03crwdne2935265:0
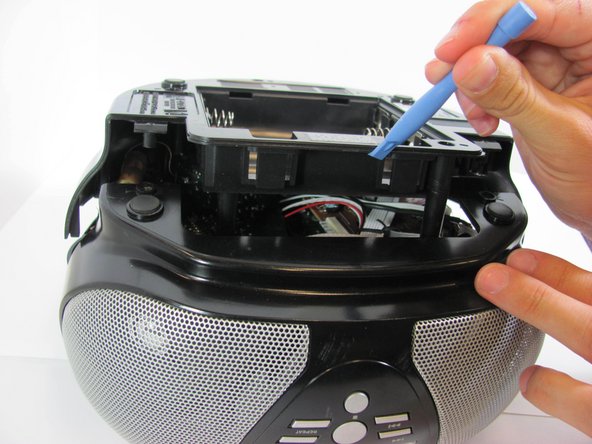
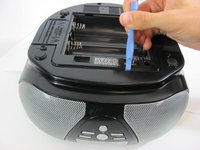
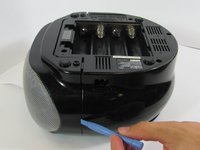
    • With a plastic opening tool, wedge the bottom shell from the main speaker face along the edge.

    • The bottom cover has two red and two yellow wires attached to it that you don't want to pull off. Handle the casing carefully.

    • Once the pieces are separated, pull them apart and place the bottom cover aside, near the stereo.

crwdns2915888:0crwdne2915888:0

To reassemble your device, follow these instructions in reverse order.

Nikki

crwdns2935283:010/14/13crwdne2935283:0

104 crwdns2915208:0crwdne2915208:0

crwdns2935295:0crwdne2935295:0

crwdns2915084:0crwdne2915084:0

Cal Poly, Team 4-31, Amido Fall 2013 crwdns2935289:0Cal Poly, Team 4-31, Amido Fall 2013crwdne2935289:0

CPSU-AMIDO-F13S4G31

crwdns2931471:04crwdne2931471:0

crwdns2935297:08crwdne2935297:0

crwdns2944067:00crwdne2944067:0

crwdns2917038:0crwdne2917038:0

crwdns2936625:0crwdne2936625:0:

crwdns2936751:024crwdne2936751:0 0

crwdns2936753:07crwdne2936753:0 0

crwdns2936753:030crwdne2936753:0 11

crwdns2942667:0crwdne2942667:0 223