crwdns2915892:0crwdne2915892:0
This guide will show you how to replace the motor in your tool .
crwdns2942213:0crwdne2942213:0
-
-
Remove the seal on the back of the device.
-
-
-
Unscrew the first screw of the pad.
-
Then unscrew the four remaining screws and pull up to remove it.
-
Finally, remove the screws located on the hull of the device.
-
-
-
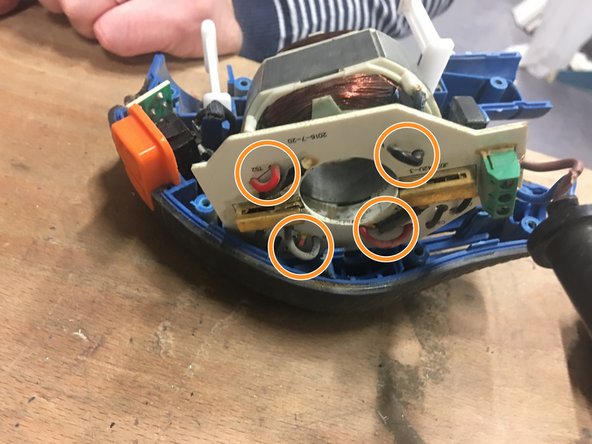
Trap the two carbons to be able to take out the rotor. With a screwdriver to lift them up, then with another screwdriver press the tab.
-
Lift the carbons and with the other tip of the screwdriver, come twist the small paw.
-
Then remove the carbon.
-
-
-
-
Remove the rotor by lifting the frame to be able to retrieve it more easily.
-
-
-
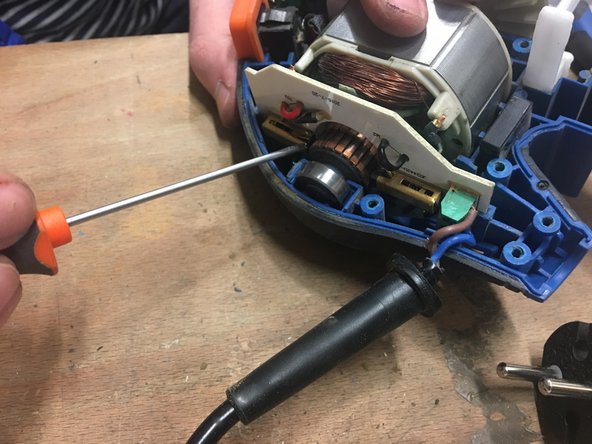
Use a soldering iron to weld the component's rotor.
-
De-solder at the location of the wires.
-
Then remove the wires one by one to remove the component.
-
-
-
Return the new component to its location.
-
Then unfold the four threads in their place.
-
-
-
Replace the rotor in its housing.
-
Unlock the carbons.
-
Replace the cable, the sheath must arrive between the two studs and the sleeve must be positioned in its housing.
-
-
-
Replace the hull of the sander by being careful to properly position the stabilisers in their housing.
-
Finally, remove the screws located on the hull of the device.
-
-
-
Replace the pad by positioning it perfectly in the tips.
-
Screw the four screws.
-
Then the last screw. Finally, put the joint back in its place.
-


To reassemble follow the steps in reverse.
To reassemble follow the steps in reverse.
crwdns2934873:0crwdne2934873:0
100%

crwdns2934883:0HelloMacOScrwdne2934883:0 crwdns2934875:0crwdne2934875:0
crwdns2934877:0crwdne2934877:0 ›
crwdns2915084:0crwdne2915084:0

Leroy Merlin crwdns2935289:0Leroy Merlincrwdne2935289:0
Community
crwdns2931471:038crwdne2931471:0
crwdns2935297:0244crwdne2935297:0