crwdns2942213:0crwdne2942213:0
-
-
Unscrew the 6 Torx T5 screws from the back of the device
-
-
-
Use a spudger to lift up the screen assembly ribbon cable flap, then remove the ribbon cable.
-
Screen Information: Model AM0310R-04 Lot # NHT18080052
Thank you! Where can we buy the screen?
I didn't get any of the details on the screen when I tore it down, I will try to get the information from the original display when I can.
Andrew S -
Have you found any info on getting a replacement Screen? Some company must make theses
Yes, this would be great to know. I can't afford to replace this a 4th for my Daughter, but I while heartedly believe in right to repair!!
I'm not sure if you can find the displays anywhere. The only number (presumably model number) I could find on the screen was AM0310R-04 and the Lot Number NHT18080052.
Andrew S -
-
-
-
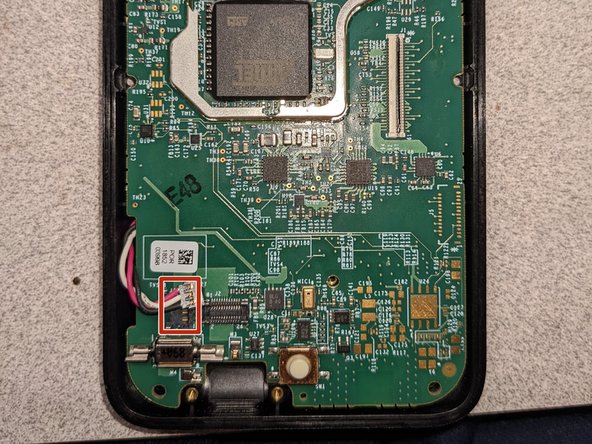
Using a spudger, unplug the Charging Port connector from the motherboard.
-
-
-
-
Remove the 2 silver Torx T5 screws holding the charging port down.
-
-
-
Remove the Charging Port Assembly from the motherboard.
-
-
-
Remove the silver Torx T5 screw holding the motherboard down.
-
-
-
Using a spudger, carefully remove the battery connector on the left side of the motherboard.
-
-
-
Using a spudger, carefully pry up the motherboard to remove it.
-


To reassemble your device, follow these instructions in reverse order.
To reassemble your device, follow these instructions in reverse order.

crwdns2947412:02crwdne2947412:0
do you know of anyone that can fix these items
anyone out there fix these items