crwdns2933423:0crwdne2933423:0
crwdns2947577:0crwdnd2947577:0crwdne2947577:0

Depth Sensor Node Bridge Mounted Replacement Procedure

crwdns2942213:0crwdne2942213:0

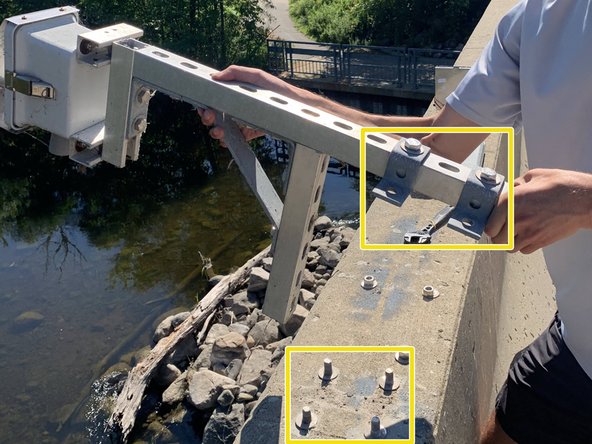
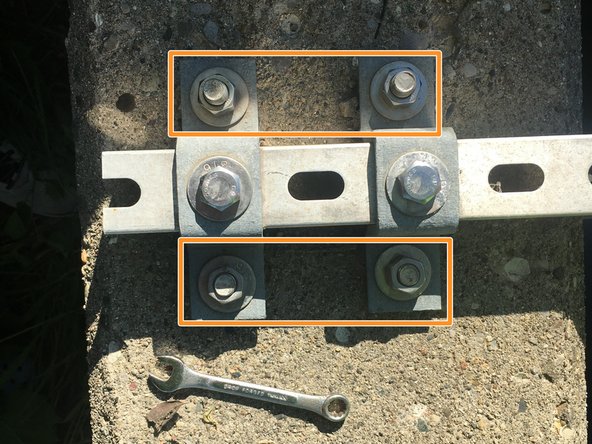
    1. Depth Sensor Node Bridge Mounted Replacement Procedure, Removing the U-brackets from the bridge mount: crwdns2935265:01crwdnd2935265:01crwdnd2935265:03crwdne2935265:0 Depth Sensor Node Bridge Mounted Replacement Procedure, Removing the U-brackets from the bridge mount: crwdns2935265:01crwdnd2935265:02crwdnd2935265:03crwdne2935265:0 Depth Sensor Node Bridge Mounted Replacement Procedure, Removing the U-brackets from the bridge mount: crwdns2935265:01crwdnd2935265:03crwdnd2935265:03crwdne2935265:0
      • Using an adjustable or socket wrench, remove the four 3/4" nuts and washers from the U-brackets attaching the long strut channel to the bridge.

      • Hold the node and long strut channel securely to ensure that they do not fall during this process.

      • Note: You do not have to remove the two 3/4" hex head screws and washers attaching the U-brackets to the long strut channel.

      crwdns2952109:0crwdne2952109:0

      crwdns2917038:0crwdne2917038:0

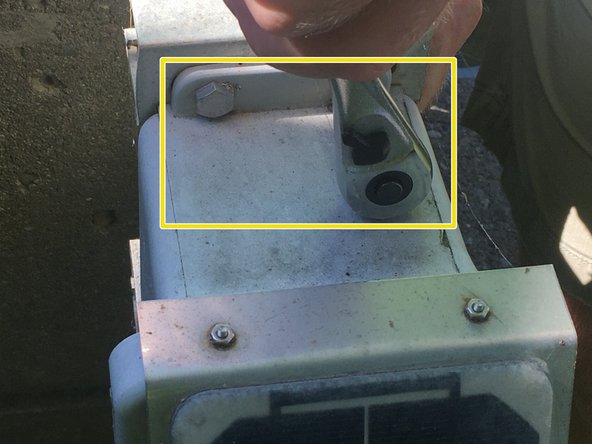
    2. Depth Sensor Node Bridge Mounted Replacement Procedure, Removing the old depth sensor node from the small strut channels: crwdns2935265:02crwdnd2935265:01crwdnd2935265:03crwdne2935265:0 Depth Sensor Node Bridge Mounted Replacement Procedure, Removing the old depth sensor node from the small strut channels: crwdns2935265:02crwdnd2935265:02crwdnd2935265:03crwdne2935265:0 Depth Sensor Node Bridge Mounted Replacement Procedure, Removing the old depth sensor node from the small strut channels: crwdns2935265:02crwdnd2935265:03crwdnd2935265:03crwdne2935265:0
      • These are the two small strut channels attaching the node to the long strut channel.

      • Before removing any parts, rotate the long strut channel (still attached to the node) so that it is no longer over the water.

      • Using a 1/2" adjustable or socket wrench, remove the four 1/2" hex head screws attaching the old node to the small strut channels.

      • Be sure to remove the nuts and washers on the inside of the small strut channels as well. (Total: Four 1/2" hex head screws, four 1/2" nuts, and four washers)

      crwdns2952109:0crwdne2952109:0

      crwdns2917038:0crwdne2917038:0

    3. Depth Sensor Node Bridge Mounted Replacement Procedure, Locking the new depth sensor node: crwdns2935265:03crwdnd2935265:01crwdnd2935265:01crwdne2935265:0
      • Obtain a new depth sensor node and attach a padlock to the new depth sensor node.

      • Projects have set lock combinations. Please ask the lab for guidance.

      crwdns2952109:0crwdne2952109:0

      crwdns2917038:0crwdne2917038:0

    4. Depth Sensor Node Bridge Mounted Replacement Procedure, Attaching the new depth sensor node to the small strut channels: crwdns2935265:04crwdnd2935265:01crwdnd2935265:03crwdne2935265:0 Depth Sensor Node Bridge Mounted Replacement Procedure, Attaching the new depth sensor node to the small strut channels: crwdns2935265:04crwdnd2935265:02crwdnd2935265:03crwdne2935265:0 Depth Sensor Node Bridge Mounted Replacement Procedure, Attaching the new depth sensor node to the small strut channels: crwdns2935265:04crwdnd2935265:03crwdnd2935265:03crwdne2935265:0
      • This step will use the same 1/2" hex head screws, 1/2" nuts, and washers from the removal of the old depth sensor node.

      • Using a rag (if handy), clean any dirt or debris off of all screws, nuts, washers, strut channels, etc. before attaching the new depth sensor node.

      • Using a 1/2" adjustable or socket wrench, attach the new depth sensor node to the small strut channels with four 1/2" hex head screws, 1/2" nuts, and washers. Tighten and secure.

      crwdns2952109:0crwdne2952109:0

      crwdns2917038:0crwdne2917038:0

    5. Depth Sensor Node Bridge Mounted Replacement Procedure, Attaching the U-brackets to the bridge mount: crwdns2935265:05crwdnd2935265:01crwdnd2935265:03crwdne2935265:0 Depth Sensor Node Bridge Mounted Replacement Procedure, Attaching the U-brackets to the bridge mount: crwdns2935265:05crwdnd2935265:02crwdnd2935265:03crwdne2935265:0 Depth Sensor Node Bridge Mounted Replacement Procedure, Attaching the U-brackets to the bridge mount: crwdns2935265:05crwdnd2935265:03crwdnd2935265:03crwdne2935265:0
      • This is what the bridge mount looks like before reattaching the long strut channel with the new depth sensor node.

      • Line up and place the U-brackets, still attached to the long strut channel, onto the bridge mount.

      • Once again, hold the node securely to ensure it does not fall while the U-brackets are being attached to the bridge mount.

      • This step will use the same 3/4" nuts and washers from the first step.

      • Using a 3/4" adjustable or socket wrench, secure the long strut channel and U-brackets to the bridge with the 3/4" nuts and washers. Tighten and secure.

      crwdns2952109:0crwdne2952109:0

      crwdns2917038:0crwdne2917038:0

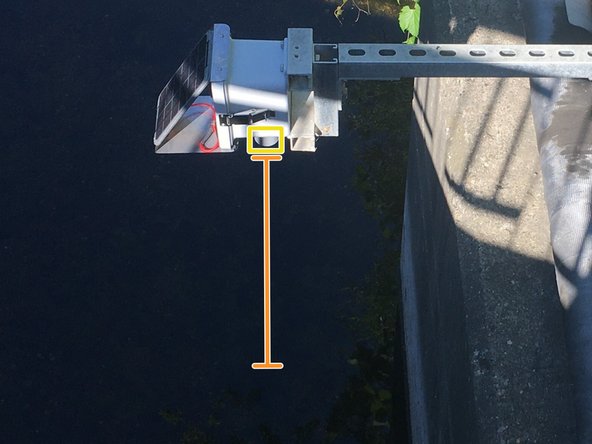
    6. Depth Sensor Node Bridge Mounted Replacement Procedure, Measure and record the distance from the bottom of the depth sensor node to the bottom of the river: crwdns2935265:06crwdnd2935265:01crwdnd2935265:02crwdne2935265:0 Depth Sensor Node Bridge Mounted Replacement Procedure, Measure and record the distance from the bottom of the depth sensor node to the bottom of the river: crwdns2935265:06crwdnd2935265:02crwdnd2935265:02crwdne2935265:0
      • Using a (weighted) tape measure, measure and record the distance from the bottom of the depth sensor node to the bottom of the river.

      • The bottom of the depth sensor node is defined as the bottom of the sensor cone.

      crwdns2952109:0crwdne2952109:0

      crwdns2917038:0crwdne2917038:0

crwdns2915888:0crwdne2915888:0

To reassemble your device, follow these instructions in reverse order.

crwdns2935221:0crwdne2935221:0

crwdns2935227:0crwdne2935227:0

Brooke Mason

crwdns2935283:005/29/19crwdne2935283:0

2,958 crwdns2915208:0crwdne2915208:0

crwdns2935297:017crwdne2935297:0

crwdns2935287:0crwdne2935287:0

Open-Storm crwdns2935289:0Open-Stormcrwdne2935289:0

Community

crwdns2931471:014crwdne2931471:0

crwdns2935297:049crwdne2935297:0

crwdns2947412:00crwdne2947412:0

crwdns2917038:0crwdne2917038:0

crwdns2936625:0crwdne2936625:0:

crwdns2936751:024crwdne2936751:0 1

crwdns2936753:07crwdne2936753:0 2

crwdns2936753:030crwdne2936753:0 16

crwdns2942667:0crwdne2942667:0 561