crwdns2933423:0crwdne2933423:0
crwdns2947577:0crwdnd2947577:0crwdne2947577:0

Dell XPS M1530 Fan Replacement

crwdns2942213:0crwdne2942213:0

    1. Dell XPS M1530 Fan Replacement, Battery: crwdns2935265:01crwdnd2935265:01crwdnd2935265:01crwdne2935265:0
      • Turn the computer upside down with the battery facing you.

      • Turn the computer off and disconnect the charging cable from the computer.

      • Failure to unplug the charging cable may result in electric shock.

      crwdns2952109:0crwdne2952109:0

      crwdns2917038:0crwdne2917038:0

    2. Dell XPS M1530 Fan Replacement: crwdns2935265:02crwdnd2935265:01crwdnd2935265:01crwdne2935265:0
      • Push the switch as far to the right as possible to unlock the battery.

      crwdns2952109:0crwdne2952109:0

      crwdns2917038:0crwdne2917038:0

    3. Dell XPS M1530 Fan Replacement: crwdns2935265:03crwdnd2935265:01crwdnd2935265:02crwdne2935265:0 Dell XPS M1530 Fan Replacement: crwdns2935265:03crwdnd2935265:02crwdnd2935265:02crwdne2935265:0
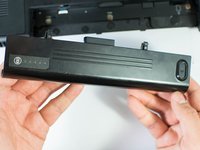
      • Remove the battery using two hands and pull it away from the computer.

      crwdns2952109:0crwdne2952109:0

      crwdns2917038:0crwdne2917038:0

    1. Dell XPS M1530 Fan Replacement, Heat Sink: crwdns2935265:04crwdnd2935265:01crwdnd2935265:01crwdne2935265:0
      • Unscrew the four Phillips #1 screws holding down the back panel. Then remove one 5.8mm Phillips #1 screw labeled "M" in the middle of the back panel.

      • Four 3.9mm Phillips #1 screws

      • One 5.8mm Phillips #1 screw

      crwdns2952109:0crwdne2952109:0

      crwdns2917038:0crwdne2917038:0

    2. Dell XPS M1530 Fan Replacement: crwdns2935265:05crwdnd2935265:01crwdnd2935265:02crwdne2935265:0 Dell XPS M1530 Fan Replacement: crwdns2935265:05crwdnd2935265:02crwdnd2935265:02crwdne2935265:0
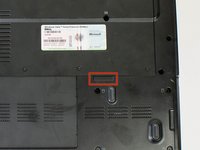
      • Using the highlighted indent, pull up and out to remove the back panel.

      • The indent should provide enough grip to remove the panel with ease.

      crwdns2952109:0crwdne2952109:0

      crwdns2917038:0crwdne2917038:0

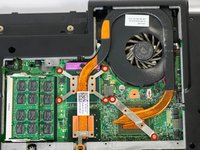
    3. Dell XPS M1530 Fan Replacement: crwdns2935265:06crwdnd2935265:01crwdnd2935265:02crwdne2935265:0 Dell XPS M1530 Fan Replacement: crwdns2935265:06crwdnd2935265:02crwdnd2935265:02crwdne2935265:0
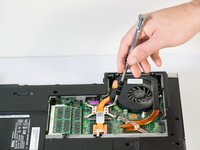
      • First, unscrew the six screws that are holding down the fan and heat sink with a Philips #1 screwdriver. Then use a Phillips #1 to remove the single screw near the bottom of the heat sink.

      • Six Silver Chrome 5.8mm Phillips #1 screws

      • One 5.8mm Phillips #1 screw

      • Remove the four screws that are holding down the CPU (the four to the top left that form a rectangle in this image) first. Unscrew them in an X pattern (eg. top left screw, bottom right screw, top right screw, bottom left screw) to minimize risk of harming CPU.

      crwdns2952109:0crwdne2952109:0

      crwdns2917038:0crwdne2917038:0

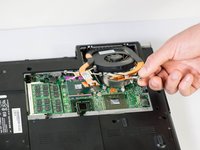
    4. Dell XPS M1530 Fan Replacement: crwdns2935265:07crwdnd2935265:01crwdnd2935265:02crwdne2935265:0 Dell XPS M1530 Fan Replacement: crwdns2935265:07crwdnd2935265:02crwdnd2935265:02crwdne2935265:0
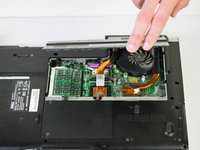
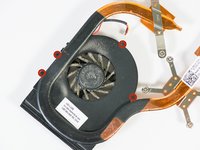
      • Carefully lift the fan and heat sink from the laptop.

      • Be careful not to pull up too hard, because the power pin is still connecting the fan to the laptop.

      crwdns2952109:0crwdne2952109:0

      crwdns2917038:0crwdne2917038:0

    5. Dell XPS M1530 Fan Replacement: crwdns2935265:08crwdnd2935265:01crwdnd2935265:01crwdne2935265:0
      • Use your fingers or a spudger to remove the power pin connecting the fan to the laptop by pulling it straight up off the motherboard.

      crwdns2952109:0crwdne2952109:0

      crwdns2917038:0crwdne2917038:0

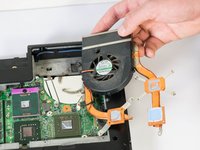
    6. Dell XPS M1530 Fan Replacement: crwdns2935265:09crwdnd2935265:01crwdnd2935265:01crwdne2935265:0
      • Remove the fan and heat sink from the laptop.

      • When installing the new heat sink, do not forget to replace the thermal paste underneath the heat sink. See iFixit's Applying Thermal Paste guide for further instructions.

      crwdns2952109:0crwdne2952109:0

      crwdns2917038:0crwdne2917038:0

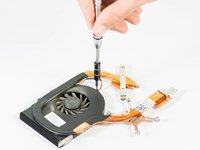
    1. Dell XPS M1530 Fan Replacement, Fan: crwdns2935265:010crwdnd2935265:01crwdnd2935265:02crwdne2935265:0 Dell XPS M1530 Fan Replacement, Fan: crwdns2935265:010crwdnd2935265:02crwdnd2935265:02crwdne2935265:0
      • Flip over the heat sink to remove the four 3.2mm Phillips #000 screws connecting the heat sink to the fan.

      • Four 3.2mm Phillips #000

      crwdns2952109:0crwdne2952109:0

      crwdns2917038:0crwdne2917038:0

    2. Dell XPS M1530 Fan Replacement: crwdns2935265:011crwdnd2935265:01crwdnd2935265:01crwdne2935265:0
      • Carefully separate the fan from the heat sink.

      • You may need to clean the fan and heat sink with an air duster, especially if enough dust have accumulated onto it.

      crwdns2952109:0crwdne2952109:0

      crwdns2917038:0crwdne2917038:0

crwdns2915888:0crwdne2915888:0

To reassemble your device, follow these instructions in reverse order.

crwdns2935221:0crwdne2935221:0

crwdns2935229:02crwdne2935229:0

Jase Sasaki

crwdns2935283:001/22/15crwdne2935283:0

721 crwdns2915208:0crwdne2915208:0

crwdns2935297:05crwdne2935297:0

crwdns2935287:0crwdne2935287:0

Cal Poly, Team 18-4, Maness Winter 2015 crwdns2935289:0Cal Poly, Team 18-4, Maness Winter 2015crwdne2935289:0

CPSU-MANESS-W15S18G4

crwdns2931471:04crwdne2931471:0

crwdns2935297:096crwdne2935297:0

crwdns2947412:00crwdne2947412:0

crwdns2917038:0crwdne2917038:0

crwdns2936625:0crwdne2936625:0:

crwdns2936751:024crwdne2936751:0 0

crwdns2936753:07crwdne2936753:0 8

crwdns2936753:030crwdne2936753:0 26

crwdns2942667:0crwdne2942667:0 2,413