crwdns2915892:0crwdne2915892:0
This guide demonstrates how to replace the motherboard in the Dell XPS 15 9575. The motherboard connects all the hardware components in the device and is a critical component. If your Dell XPS 15 is experiencing power issues and you've already checked your battery health, a motherboard replacement might be necessary. To make sure this is the right fix, check the troubleshooting section for specific symptoms such as failure to boot, overheating and power issues.
Check out the Dell XPS 9575 Troubleshooting page for more help narrowing down your issues to the motherboard.
Before you begin this repair, turn off your laptop and unplug it from the charging adapter. As an extra precaution, unplug the battery connector from the motherboard or remove the battery before you start.
crwdns2942213:0crwdne2942213:0
-
-
Use your T5 Torx driver to remove all eight 3.2 mm screws holding down the back panel.
-
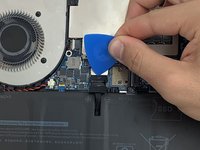
Wedge an opening pick between the back cover and the base of the board, then slightly lift the tool to pop the clips on the back cover off.
-
-
-
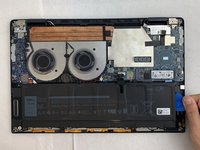
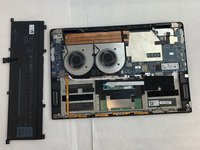
Remove the bottom cover from the device when all sides are free.
-
-
-
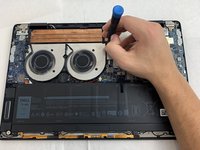
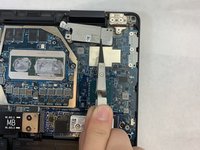
Use the Phillips #0 screwdriver to remove all four silver 3.2 mm screws fastening the interconnect cable.
-
-
-
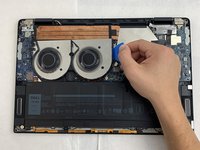
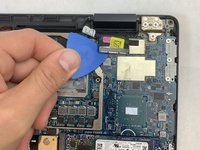
Carefully wedge the plastic opening pick between the fan and the interconnect cable.
-
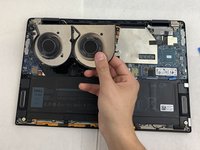
Remove the interconnect cable.
-
-
-
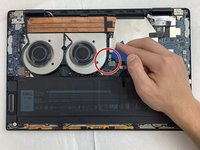
Use the nylon tweezers to remove the interconnect pins from each of the circuit boards.
-
-
-
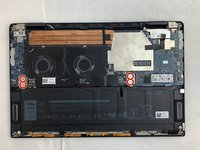
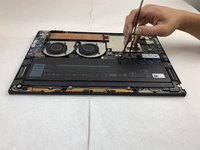
Use the Phillips #0 screwdriver to remove all eight 6.4 mm screws from the battery.
-
-
-
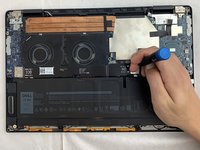
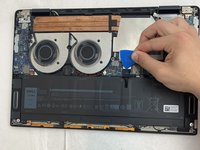
Use a plastic opening pick to pry the black battery cable away from its silver adapter.
-
-
-
-
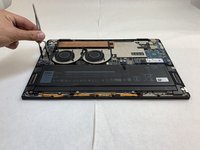
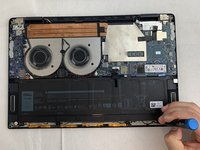
Use a plastic opening pick to separate the battery from the device.
-
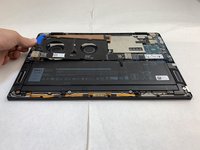
Lift the battery straight up and remove it when it is completely separated.
-
-
-
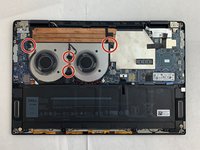
Use the Phillips 0 Screwdriver to carefully extract each of the four 3.2 mm screws.
-
-
-
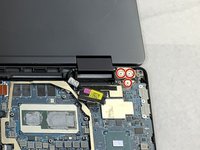
Find the wire connecting the fan into the motherboard and use the plastic opening tool to push the wire out from the motherboard's port.
-
-
-
The fan has been completely disconnected and is now safe to remove.
-
-
-
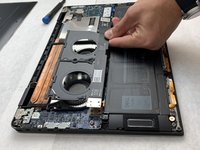
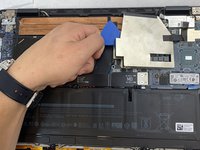
Wedge the plastic opening pick in between the aluminum cover and the motherboard.
-
Gently pull up popping off the cover and revealing the rest of the heat sink.
-
-
-
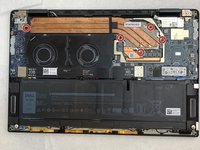
Use the Phillips #0 screwdriver to remove all five black 3.2mm screws.
-
-
-
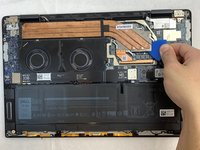
Wedge the plastic opening pick in between the edge of the heat sink and the aluminum perimeter with care not to scratch the CPU beneath.
-
Gently pry up on the heat sink until it is loose enough for you to remove. Then grab and remove the heat sink.
-
-
-
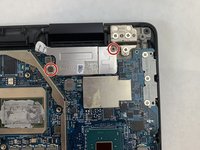
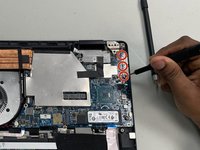
Use a Phillips #0 screwdriver to remove two screws from the lower corner of the motherboard.
-
-
-
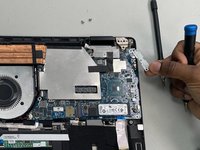
Use the Phillips #0 screwdriver to remove the two 3.2 mm black screws holding down the cover.
-
Use the tweezers to carefully remove the silver cover from the backboard.
-
Gently wedge the plastic opening pick in between the display cable and the backboard.
-
Gently pry up, disconnecting the adapter with the display cable from its bracket.
-
-
-
Open the screen until it is 180 degrees from the keyboard and then lay the laptop face down.
-
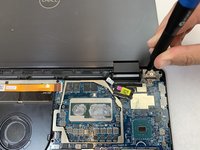
Use a Phillips #0 screwdriver to remove the three 6.3 mm screws securing the hinge on the side above the motherboard.
-
-
-
Use the Phillips #0 screwdriver to remove three screws from the bracket in the upper corner of the motherboard.
-
-
-
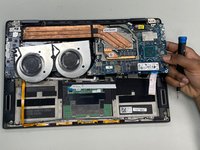
Carefully lift the motherboard from the chassis and remove it from the laptop.
-


To reassemble your device, follow these instructions in reverse order.
To reassemble your device, follow these instructions in reverse order.
crwdns2915084:0crwdne2915084:0

University of North Texas, Team 1-5, Coppersmith Spring 2024 crwdns2935289:0University of North Texas, Team 1-5, Coppersmith Spring 2024crwdne2935289:0
UNT-COPPERSMITH-S24S1G5
crwdns2931471:04crwdne2931471:0
crwdns2935297:04crwdne2935297:0