crwdns2915892:0crwdne2915892:0
Removal of the screen will be covered in this guide. To successfully remove the battery, a #0 Phillips screwdriver, a T5 Torx screwdriver, tweezers, and a plastic spudger are needed. Be careful disconnecting cables as to not break them or their connectors.
crwdns2942213:0crwdne2942213:0
-
-
Using a T5 Torx screwdriver, remove ten 3mm screws.
-
-
-
Lift the plastic tab.
-
Remove two 3mm Phillips #0 screws under the plastic tab.
-
-
-
Using a Phillips #0 screwdriver, remove the seven 3.5mm screws that secure the battery to the palm rest assembly.
-
-
-
-
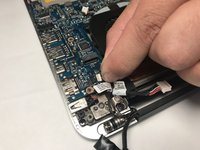
Disconnect the battery cable from the system board.
-
-
-
Pull lift tabs and remove the plastic that covers the hard drive to expose the hard drive.
-
-
-
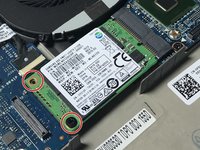
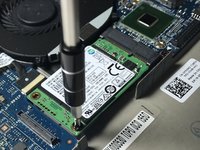
Using a Phillips #0 screwdriver, remove two 2.5mm screws that secure the SSD to the chassis.
-
-
-
Pull the SSD out parallel to the mainboard.
-
-
-
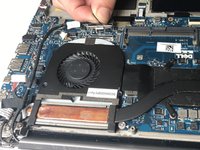
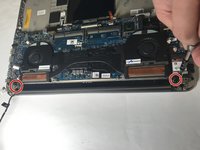
Using a Phillips #0 screwdriver, remove the four 4mm screws holding in the screen hinges.
-
-
-
Pull chassis away from screen assembly.
-


To reassemble your device, follow these instructions in reverse order.
To reassemble your device, follow these instructions in reverse order.
crwdns2935221:0crwdne2935221:0
crwdns2935227:0crwdne2935227:0
crwdns2915084:0crwdne2915084:0

Oregon Institute of Technology, Team S1-G3, Lancaster Spring 2019 crwdns2935289:0Oregon Institute of Technology, Team S1-G3, Lancaster Spring 2019crwdne2935289:0
OIT-LANCASTER-S19S1G3
crwdns2931471:03crwdne2931471:0
crwdns2935297:013crwdne2935297:0