crwdns2915892:0crwdne2915892:0
Removal of the keyboard will be covered in this guide. To successfully remove the keyboard, a #0 Phillips screwdriver, a T5 Torx screwdriver, a plastic spudger, and tweezers are needed. Be careful disconnecting cables as to not break them or their connectors.
crwdns2942213:0crwdne2942213:0
-
-
Using a T5 Torx screwdriver, remove ten 3mm screws.
-
-
-
Lift the plastic tab.
-
Remove two 3mm Phillips #0 screws under the plastic tab.
-
-
-
Using a Phillips #0 screwdriver, remove the seven 3.5mm screws that secure the battery to the palm rest assembly.
-
-
-
-
Disconnect the battery cable from the system board.
-
-
-
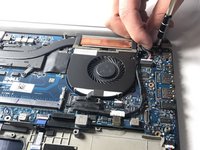
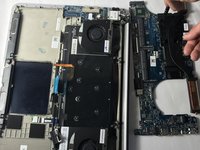
Remove the three 3.5mm Phillips #0 screws mounting the motherboard.
-
-
crwdns2935267:0crwdne2935267:0Tweezers$4.99
-
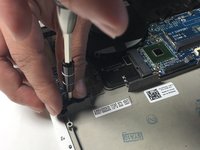
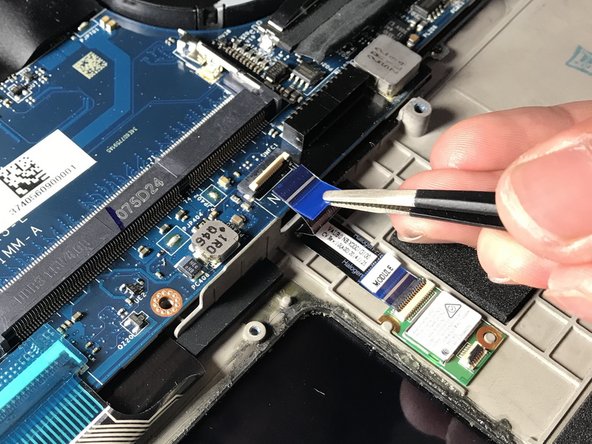
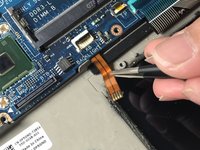
Disconnect ribbon cables above the touch pad using tweezers.
-
-
-
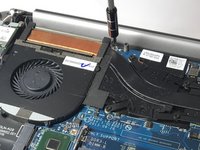
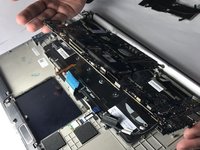
Lift and remove the motherboard from the chassis.
-
-
-
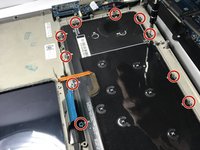
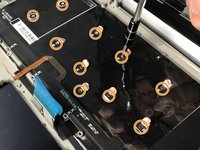
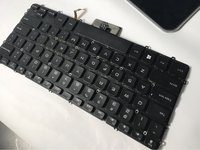
Remove the ten 3mm Phillips #0 screws on the perimeter of the keyboard assembly.
-
Remove the ten 2.5mm Phillips #0 screws underneath the plastic shielding of the keyboard.
-


To reassemble your device, follow these instructions in reverse order.
To reassemble your device, follow these instructions in reverse order.
crwdns2915084:0crwdne2915084:0

Oregon Institute of Technology, Team S1-G3, Lancaster Spring 2019 crwdns2935289:0Oregon Institute of Technology, Team S1-G3, Lancaster Spring 2019crwdne2935289:0
OIT-LANCASTER-S19S1G3
crwdns2931471:03crwdne2931471:0
crwdns2935297:013crwdne2935297:0
crwdns2947410:01crwdne2947410:0
Thank you for this guide! Is there any way to obtain replacement screws for the outer perimeter of the keyboard? I’ve recently disassembled my XPS 9530 and found one of the screws is very stripped, I managed to get it out but it really shouldn’t be put back in due to the state of the head.
I’m struggling to find replacements for the size quoted. Are they Phillips M2 3mm silver screws?