crwdns2915892:0crwdne2915892:0
Laptop hinge replacement is important because it ensures that the display system stays in place without wobbling, moving, or being too tight. A broken hinge will affect the usability of your laptop. This guide will show you how to replace the hinges using the iFixit iOpener tool.
crwdns2942213:0crwdne2942213:0
-
-
Remove eight 3 mm screws from the underside of the case using a T5 Torx screwdriver.
-
-
-
Wedge the case apart with a nylon spudger.
-
Slide spudger along each side of the laptop
-
-
-
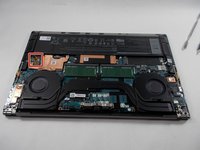
Lift the back panel of the laptop off and set it aside.
-
-
-
Using the small battery pull tab, disconnect the battery connector from the motherboard.
-
-
-
-
Remove eight 2.5 mm from around the perimeter of the battery using a Phillips #0 screwdriver.
-
-
-
Remove the old battery from the laptop.
-
-
-
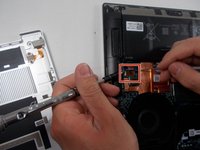
Remove the four screws (eight total) from each display hinge using a Phillips #00 screwdriver.
-
-
-
Remove five screws that connect the display using a Phillips #00 screwdriver.
-
-
-
Carefully remove the display from the Dell XPS 15 9510.
-
-
-
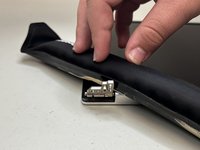
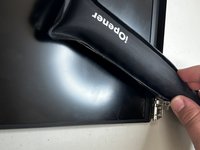
Heat the iOpener in the microwave for 30 seconds.
-
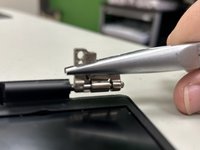
Place the iOpener on top of the laptop where the hinge is connected. Leave it there until the glue holding it in place melts.
-
-
-
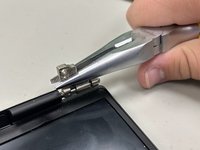
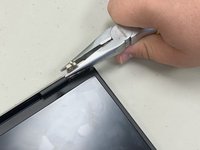
Pull out the hinges using a pair of needle nose pliers.
-


To reassemble your device, follow these instructions in reverse order.

crwdns2935287:0crwdne2935287:0

University of North Texas, Team 3-5, Coppersmith Fall 2024 crwdns2935289:0University of North Texas, Team 3-5, Coppersmith Fall 2024crwdne2935289:0
UNT-COPPERSMITH-F24S3G5
crwdns2931471:04crwdne2931471:0
crwdns2935297:05crwdne2935297:0