crwdns2915892:0crwdne2915892:0
This guide explains how to replace the motherboard in the Dell XPS 13 9350. The motherboard connects all the hardware components in the device and is a critical component. If your Dell XPS 15 is experiencing power issues a motherboard replacement might be necessary. To make sure this is the right fix, check the troubleshooting section for specific symptoms such as failure to boot, overheating and power issues.
crwdns2942213:0crwdne2942213:0
-
-
Remove the eight 4 mm T5 Torx screws from the bottom cover.
-
-
-
Use a plastic opening tool to pry open the 'XPS' flap in the middle.
-
-
-
Remove the single Phillips screw hidden beneath the flap.
-
-
-
Use opening picks or a plastic pry tool to pry open the case clips, beginning from the back edge.
-
-
-
Pull the battery cable connector towards the battery to disconnect it from its socket.
-
If the connector is stubborn, push a little at one side, then the other, to "walk" it out of its socket.
-
If you have trouble walking the connector out of the socket, use the point of a spudger to gently push on the connector indent to slide the connector out.
-
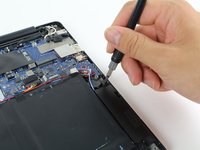
Open the display and press the power button for five seconds to drain any remaining charge from the system.
-
-
crwdns2935267:0crwdne2935267:0Tweezers$4.99
-
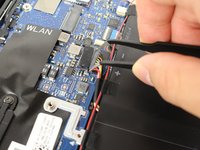
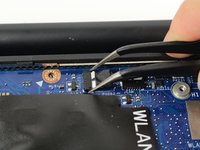
Use tweezers to remove the little white connector by pulling it out and away from its socket.
-
-
-
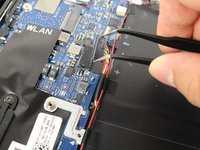
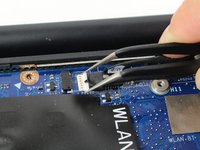
Remove the black standard flat connector by lifting the tab up with your hand.
-
-
-
-
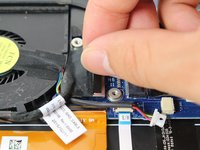
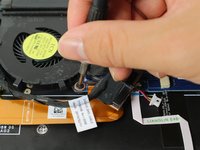
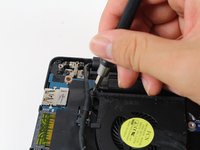
Remove the 4 mm Phillips #0 screw that connects the fan to the motherboard.
-
Remove the 4 mm Phillips #0 screw that connects the fan to the base of the computer.
-
-
-
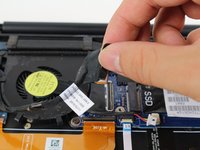
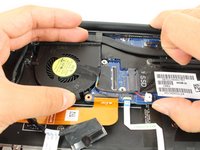
Use your right hand to lift up the larger section of the motherboard, closest to the fan.
-
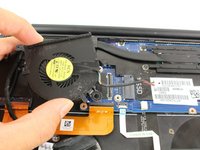
Use your left hand to pull the fan at a 30-degree angle out from underneath the motherboard.
-
-
-
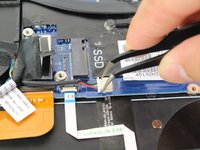
Remove the four 3 mm Phillips #0 screws located on each corner of the battery.
-
-
-
Pull the battery cable connector towards the battery to disconnect it from its socket.
-
-
-
Peel up any tape securing the speaker cables to the battery.
-
-
-
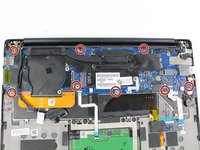
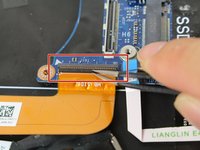
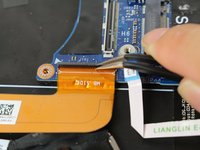
Remove the eight 4 mm Phillips #0 screws from the motherboard.
-
-
crwdns2935267:0crwdne2935267:0Tweezers$4.99
-
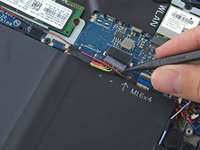
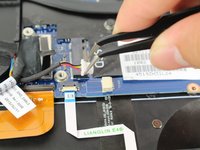
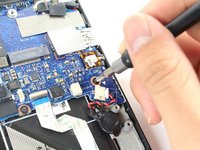
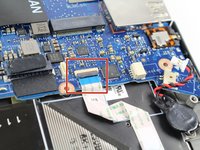
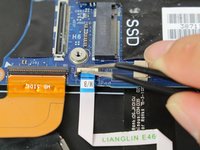
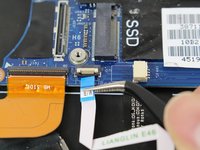
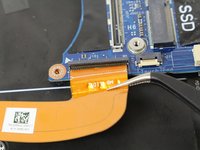
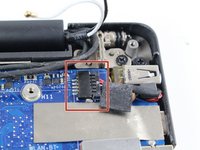
Locate the red and black cable connector at the bottom right of the motherboard.
-
Use tweezers to slowly detach the cable connector from its socket by pulling it to the right and up.
-
-
-
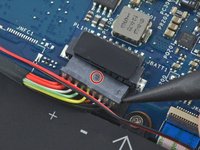
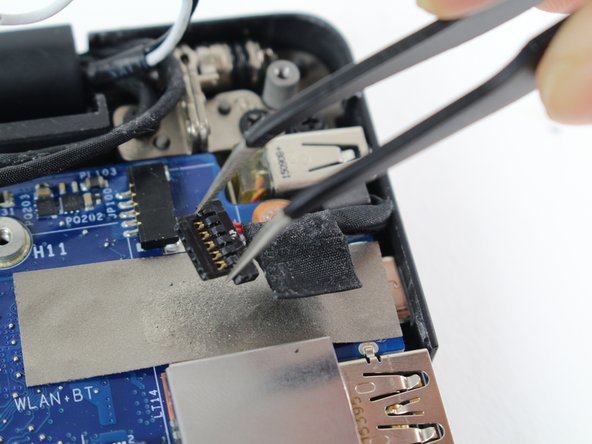
Use tweezers to flip open the Zero Insertion Force (ZIF) connector.
-
Use tweezers to detach the ribbon cable from the ZIF by pulling it towards yourself.
-
-
-
Use tweezers to flip open the white ZIF connector.
-
Use tweezers to detach the ribbon connector from the ZIF by pulling it towards yourself.
-
-
-
Use tweezers to flip open the ZIF connector.
-
Use tweezers to detach the orange ribbon connector from the ZIF by pulling it towards yourself.
-
-
-
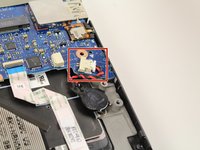
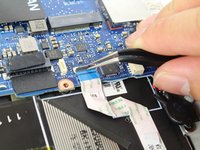
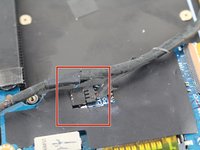
Use tweezers to detach the black cable connector out of its socket by pulling it to the right.
-
-
-
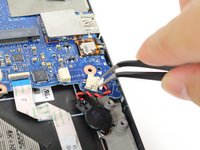
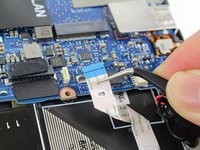
Use tweezers to gently detach the black and white cable connector out of its socket by pulling it to the right.
-
-
-
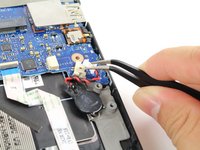
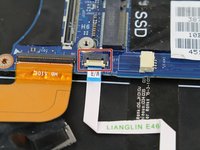
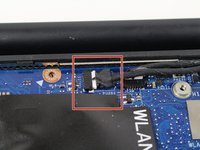
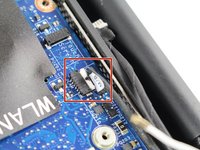
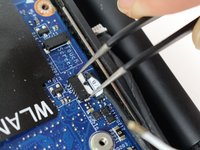
Locate the connector at the top right of the motherboard.
-
Use tweezers to detach the cable connector from its socket by pulling it to the right.
-
-
-
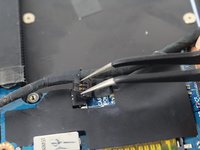
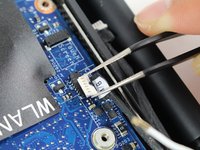
Locate the last black cable connector.
-
Use tweezers to detach the black cable connector from its socket by pulling it to the right.
-
-
-
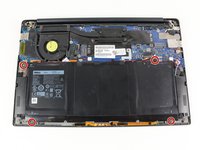
Use your hands to lift up the motherboard.
-


To reassemble your device, follow these instructions in reverse order.
crwdns2935221:0crwdne2935221:0
crwdns2935229:014crwdne2935229:0
crwdns2935287:0crwdne2935287:0

Cal Poly, Team S21-G6, Livingston Spring 2017 crwdns2935289:0Cal Poly, Team S21-G6, Livingston Spring 2017crwdne2935289:0
CPSU-LIVINGSTON-S17S21G6
crwdns2931471:05crwdne2931471:0
crwdns2935297:030crwdne2935297:0
crwdns2947412:04crwdne2947412:0
where is camera cable
Wow man that is awesome job. Where can you get a newer motheboard for the same laptop?
Démontage pour changer la prise jack qui ne fonctionne plus et en plus provoque un bug empêchant les hauts parleurs de fonctionner. Au lieu du son normal j ai un crachotement . Je vais confier la micro soudure à un spécialiste
Je pense qu il vaut mieux ne pas forcer sur la carte mère pour sortir le ventilateur et attendre après l étape du démontage des vis de la cm pour le sortir