crwdns2915892:0crwdne2915892:0
The heat sink helps disperse the heat from the laptop, it usually used in conjunction with the fan. If your laptop is overheating, you might need to replace the heatsink. The guide will demonstrate how to replace the heatsink step by step.
crwdns2942213:0crwdne2942213:0
-
-
Press and slide the two buttons outwards and away from the battery.
-
-
-
Slide the battery away and parallel from the laptop.
-
-
-
Unscrew the eight 6mm screws with a Philips #1 screw driver.
-
-
-
-
Lift back cover from the groove on the left side of the cover next to the symbol.
-
-
-
Unclip the power supply by pulling the cable directly up and out of the socket.
-
-
-
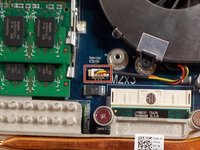
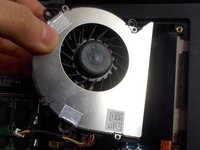
Remove the two 3mm screws located around the edge of the fan with a Philips #1 screw driver.
-
-
-
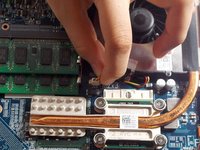
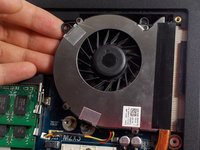
Gently lift and pull to the left until the fan is free from the heatsink.
-
-
-
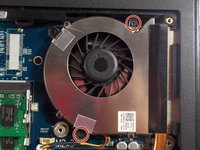
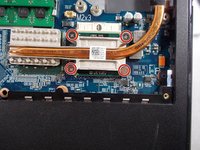
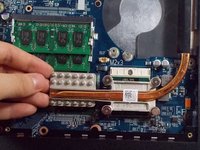
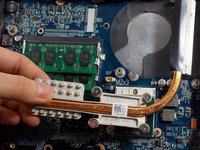
Unscrew the four 8mm screws using a Phillips #1 screwdriver until the heatsink is free.
-
-
-
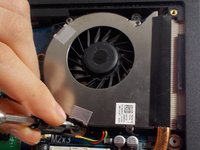
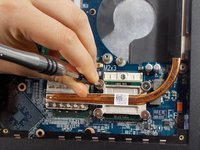
Lift up on the heatsink to remove it from the laptop.
-


To reassemble your device, follow these instructions in reverse order.
crwdns2935221:0crwdne2935221:0
crwdns2935227:0crwdne2935227:0
crwdns2935287:0crwdne2935287:0

UMass Dartmouth, Team S3-G7, Peak Spring 2018 crwdns2935289:0UMass Dartmouth, Team S3-G7, Peak Spring 2018crwdne2935289:0
UMASSD-PEAK-S18S3G7
crwdns2931471:03crwdne2931471:0
crwdns2935297:08crwdne2935297:0