crwdns2915892:0crwdne2915892:0
Use this guide to replace the battery in the Dell Streak 7. This guide will show the steps required to replace the battery in the tablet.
crwdns2942213:0crwdne2942213:0
-
-
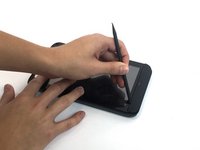
Insert the spudger under the capacitive button panel, and slide the spudger all the way around.
 crwdns2952109:0crwdne2952109:0
-
-
-
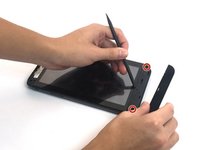
Remove the button cover by lifting the cover away from the tablet.
-
-
-
Using the Torx screwdriver, remove the 4mm screws.
-
-
-
With the Torx screwdriver, remove the two 5mm screws.
-
-
-
Using the spudger, insert it under the black side panel. Slide the spudger all the way around until the cover piece comes off.
-
With the Torx screwdriver, remove the two 4mm screws.
-
-
-
Use the spudger to go along the edges of the device and pop out the latches securing the display to the case.
-
-
-
Disconnect the ribbon cables by unlocking the connector and pulling the cable out slowly.
-
-
-
-
Using the spudger, disconnect the ribbon cable by lifting up on the connector.
-
-
-
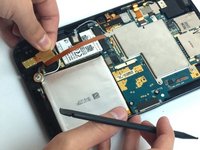
Pull the headphone jack up, away from the case.
-
-
-
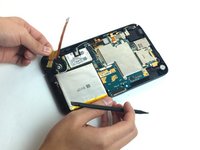
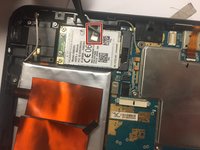
With the spudger, disconnect the antenna cable located on the module.
-
-
crwdns2935267:0crwdne2935267:0Tweezers$4.99
-
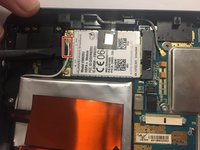
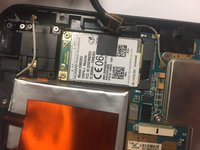
Using tweezers, remove the tape connected to the GSM module.
-
-
-
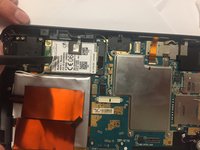
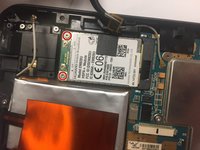
Remove the two 3mm screws securing the GSM module. Use the Torx screwdriver.
-
-
-
Disconnect the GSM module by lifting the module up, out of the case.
-
-
-
Using the spudger, disconnect the front camera by lifting up on the connector.
-
-
-
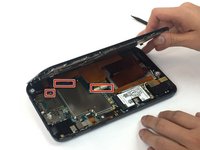
Using the Torx screwdriver, remove the six 3mm screws .
-
-
-
Lift up the metal cover.
-
-
-
Use the spudger to lift the vibration motor out of the case.
-
-
-
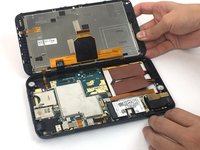
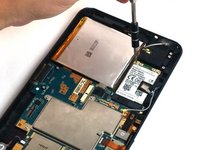
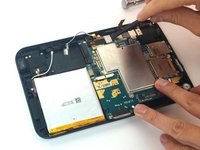
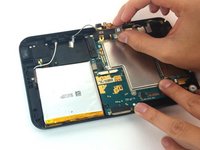
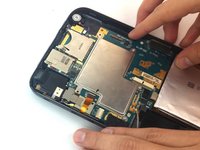
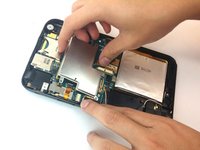
Pull out the motherboard and the battery.
-
-
-
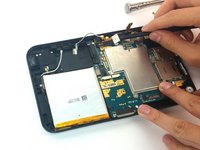
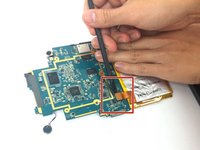
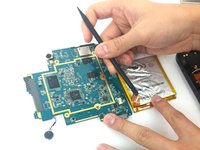
Use the spudger to lift up and detach the cable connecting the battery to the motherboard.
-


To reassemble your device, follow these instructions in reverse order.
crwdns2935221:0crwdne2935221:0
crwdns2935229:04crwdne2935229:0

crwdns2935287:0crwdne2935287:0

USF Tampa, Team 4-6, Passmore Fall 2016 crwdns2935289:0USF Tampa, Team 4-6, Passmore Fall 2016crwdne2935289:0
USFT-PASSMORE-F16S4G6
crwdns2931471:03crwdne2931471:0
crwdns2935297:012crwdne2935297:0